- 15 -
1-3-2 Installing the CPU Cooler
FollowthestepsbelowtocorrectlyinstalltheCPUcooleronthemotherboard.(Thefollowingprocedureuses
Intel
®
boxedcoolerastheexamplecooler.)
Use extreme care when removing the CPU cooler because the thermal grease/tape between the CPU
cooler and CPU may adhere to the CPU. Inadequately removing the CPU cooler may damage the CPU.
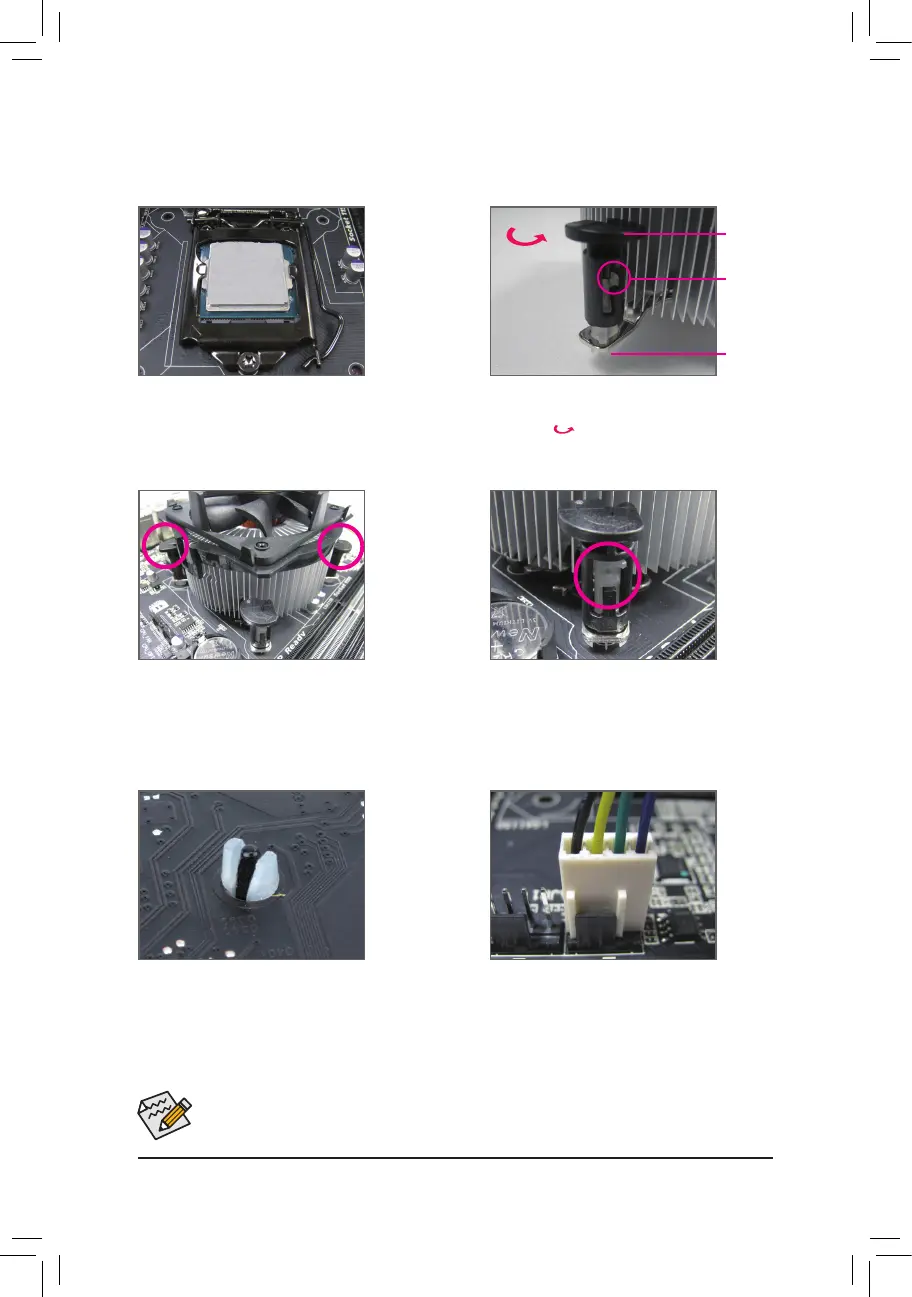
Step 5:
Aftertheinstallation,checkthebackofthemoth-
erboard. If the push pin is inserted as the picture
aboveshows,theinstallationiscomplete.
Step 6:
Finally, attach the power connectoroftheCPU
coolertotheCPUfanheader(CPU_FAN)onthe
motherboard.
Step 1:
Apply an even and thin layer of thermal grease on
the surface of the installed CPU.
Step 2:
Beforeinstallingthecooler,notethedirectionofthe
arrow sign onthemalepushpin.(Turningthe
push pin along the direction of arrow is to remove
thecooler,onthecontrary,istoinstall.)
Step 3:
PlacethecooleratoptheCPU,aligningthefour
push pins through the pin holes on the mother-
board. Push down on the push pins diagonally.
Step 4:
You should hear a "click" when pushing down each
push pin. Check that the Male and Female push
pins are joined closely.
(RefertoyourCPUcoolerinstallationmanualfor
instructionsoninstallingthecooler.)
Male
Push Pin
Female
Push Pin
The Top
of Female
Push Pin
Direction of
the Arrow Sign
on the Male
Push Pin
 Loading...