GD-Link V2 Adapter User Guide
16
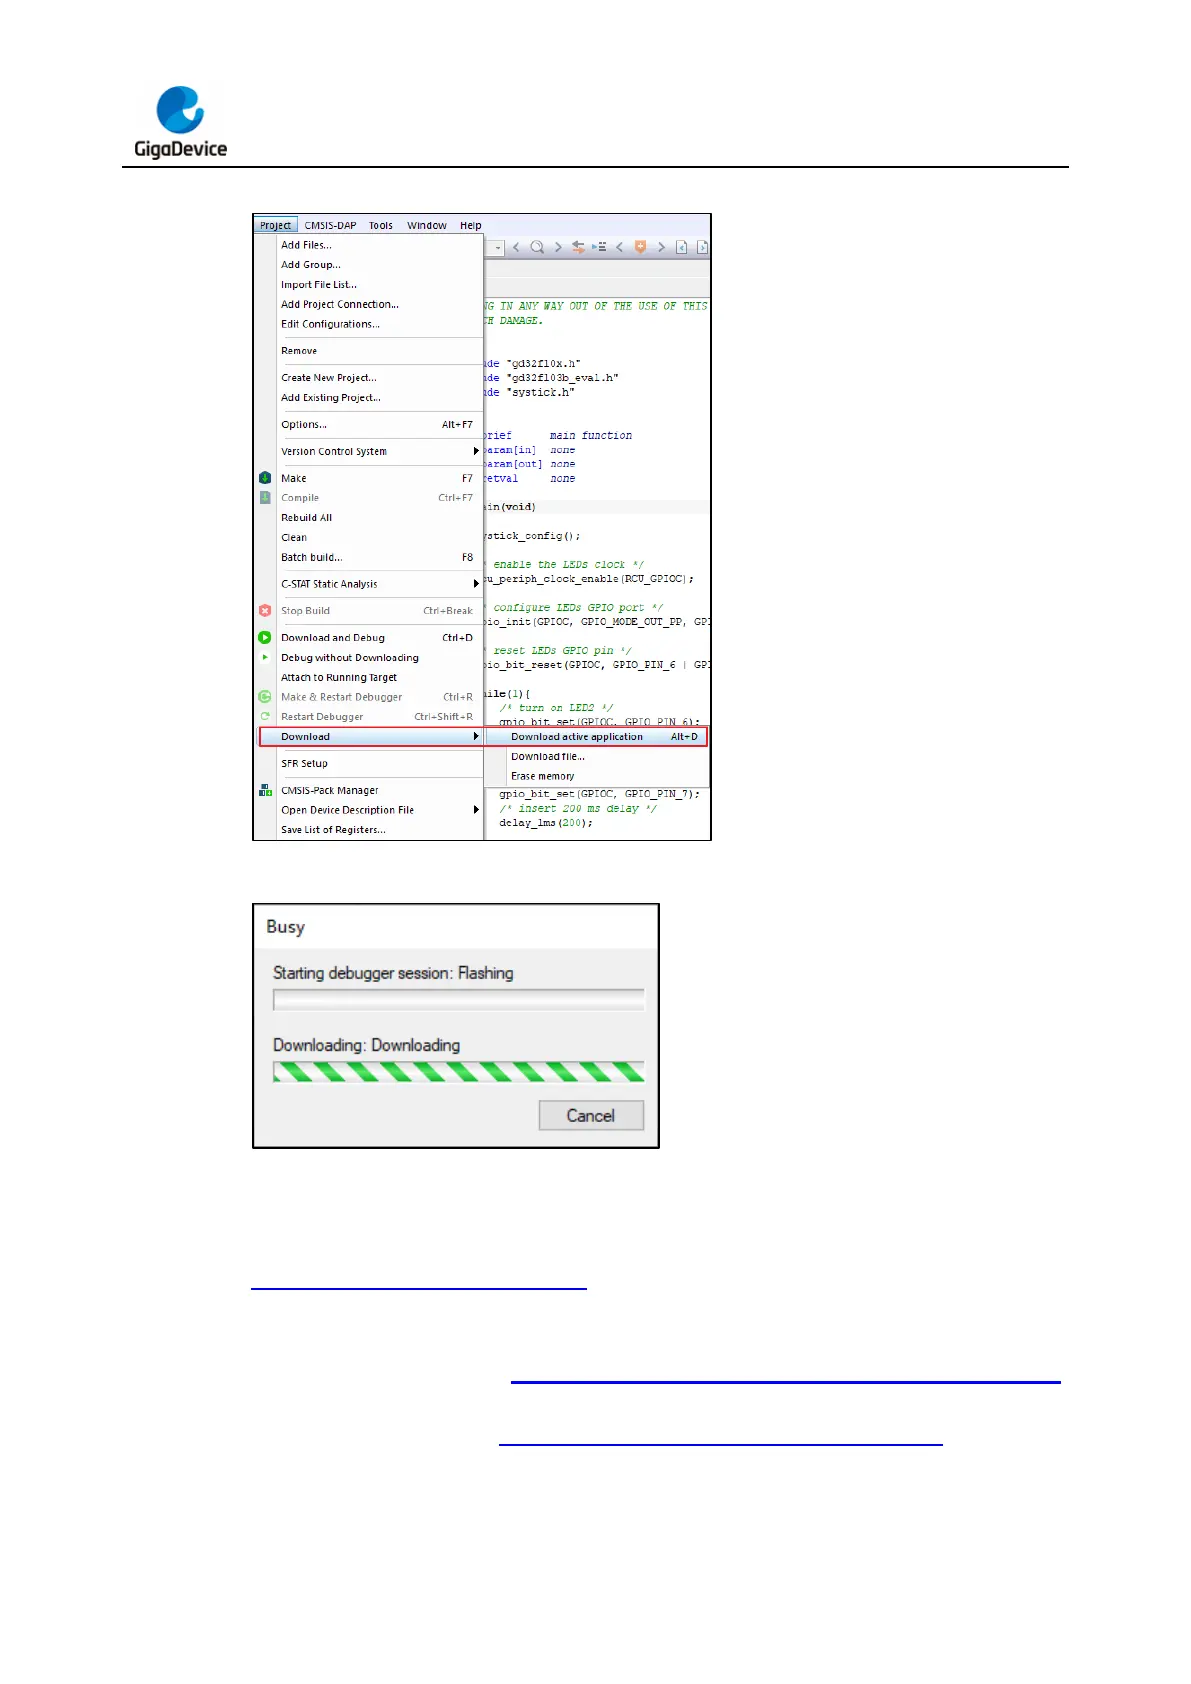
Figure 3-11. IAR download button
Figure 3-12. IAR download progress bar
Programming with Eclipse
Connect GD-Link V2 to the target chip according to the hardware connection described in the
Pin definitions and wiring methods section. Connect the USB interface of GD-Link V2 to
the PC, and wait for LED2 to enter rapid blinking mode. Open the Eclipse software and click
"RUN" menu and select the dropdown option "Debug Configurations..." to enter the
"Debugger" tab, as shown in Figure 3-13. Access the "Debug Configurations" interface.
Configure the OpenOCD path correctly and fill in the cfg file to be used in the "Config options"
section, as demonstrated in Figure 3-14. Configure the "Eclipse Debug" tab in the Eclipse
Debug Configuration interface.
After completing the configuration, click the "Apply" button to save the settings. Then, select