Pinion,
Clutch, Clamp, Field & Engine
Disassembling these parts can start from the pinion
housing,
or from the clutch if no pinion service is
needed.
If
starting from the pinion housing
,
first follow Steps 1 to
6
of
Drive Housing
, on page
19, and then continue with
the
procedure below
.
If starting from the clutch
, see page 22.
Pinion
Pinion Housing
WARNING
To
reduce the risk of
serious injury
, including fluid in
-
jection
always follow the
Pressure Relief Procedure
Warning on page 14 before checking, adjusting,
cleaning or shutting off the sprayer.
Disconnect the
spark
plug!
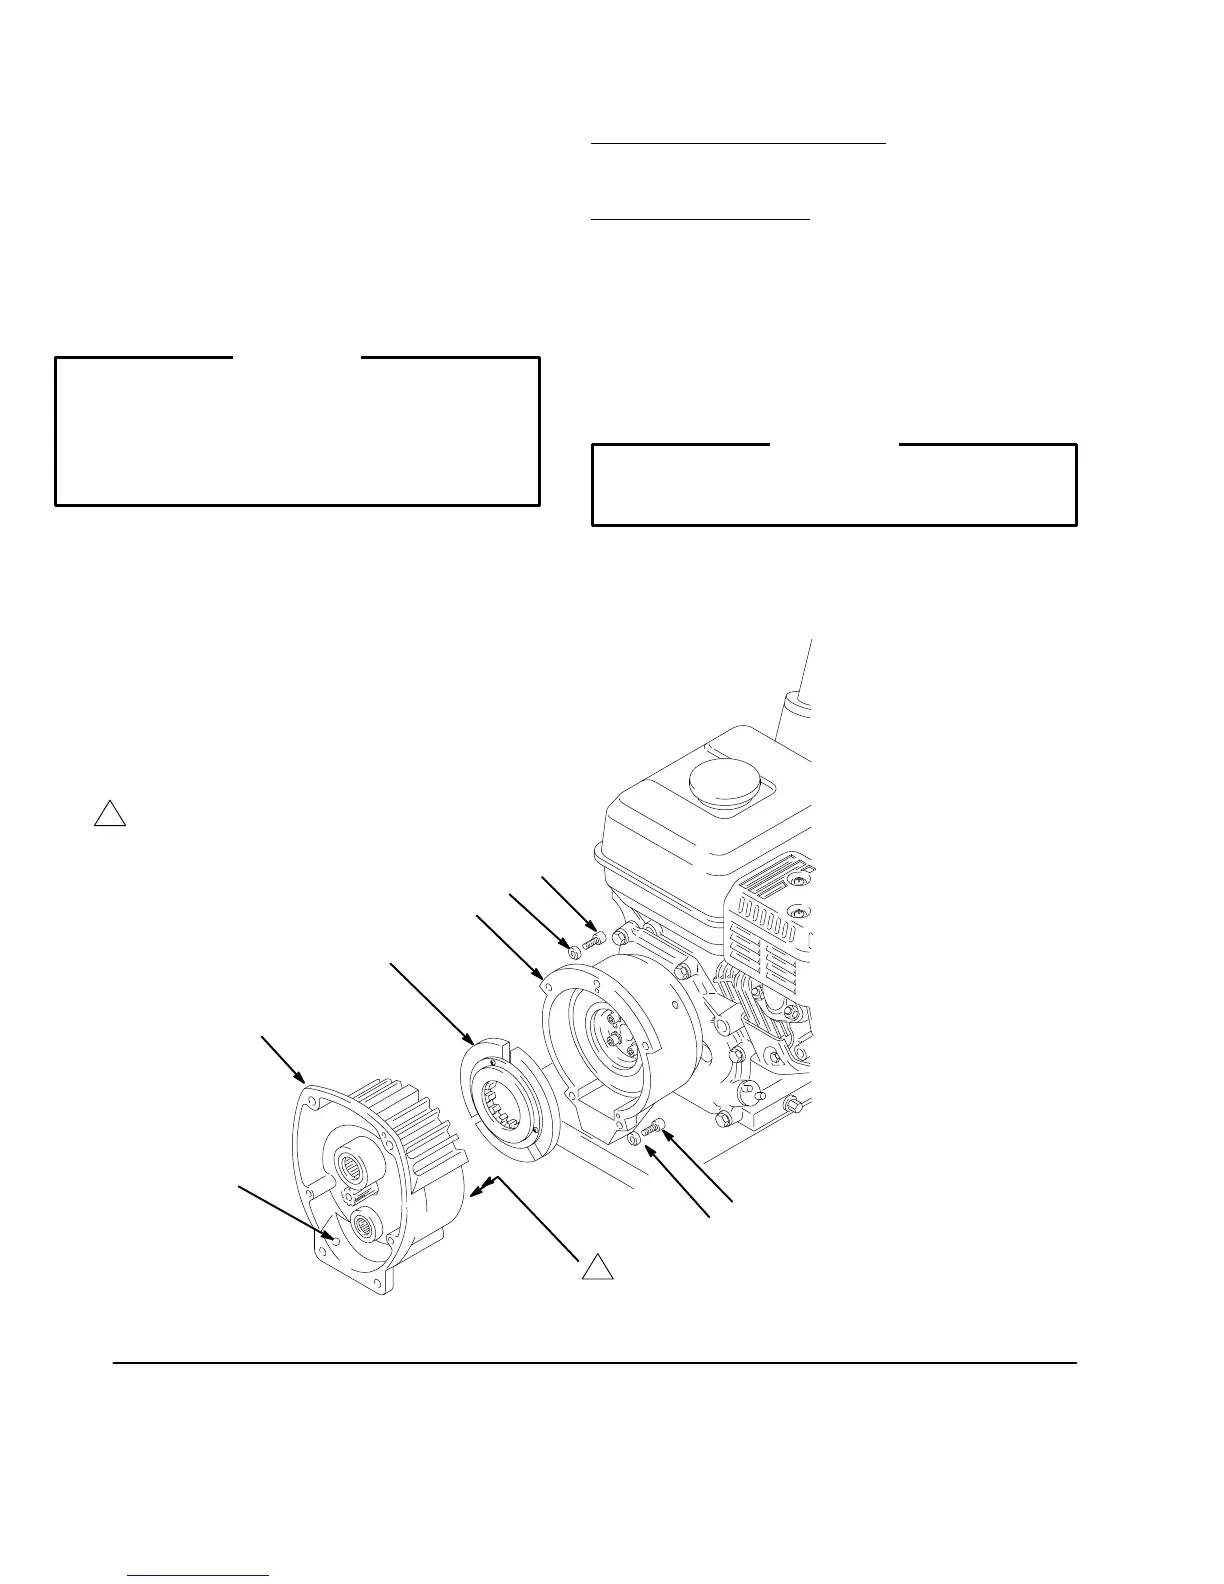
NOTE:
Refer to Fig. 8 for Steps 1 to 3.
1.
Remove the two bottom screws (10) and lockwash
-
ers (11) first, and then remove the top three screws
(10)
and lockwashers (1
1).
2. Pull
the pinion housing away from
the clutch housing.
The
armature (4a) will come with it.
3. Pull the armature (4a) off the hub (19j –
see Fig. 9)
of
the pinion housing.
CAUTION
Do not lose the thrust ball (19d). Refer to the CAU-
TION
on page 19 for more information.
NOTE: To
disassemble the
pinion, go to page 21. T
o dis
-
assemble more of the sprayer, go to page 22. To reas-
semble
the sprayer from this point, skip ahead to
Reas-
sembly,
page 27, Step 7.
Fig. 8
10
11
2
4a
19
19d
11
10
0171
See
page 21