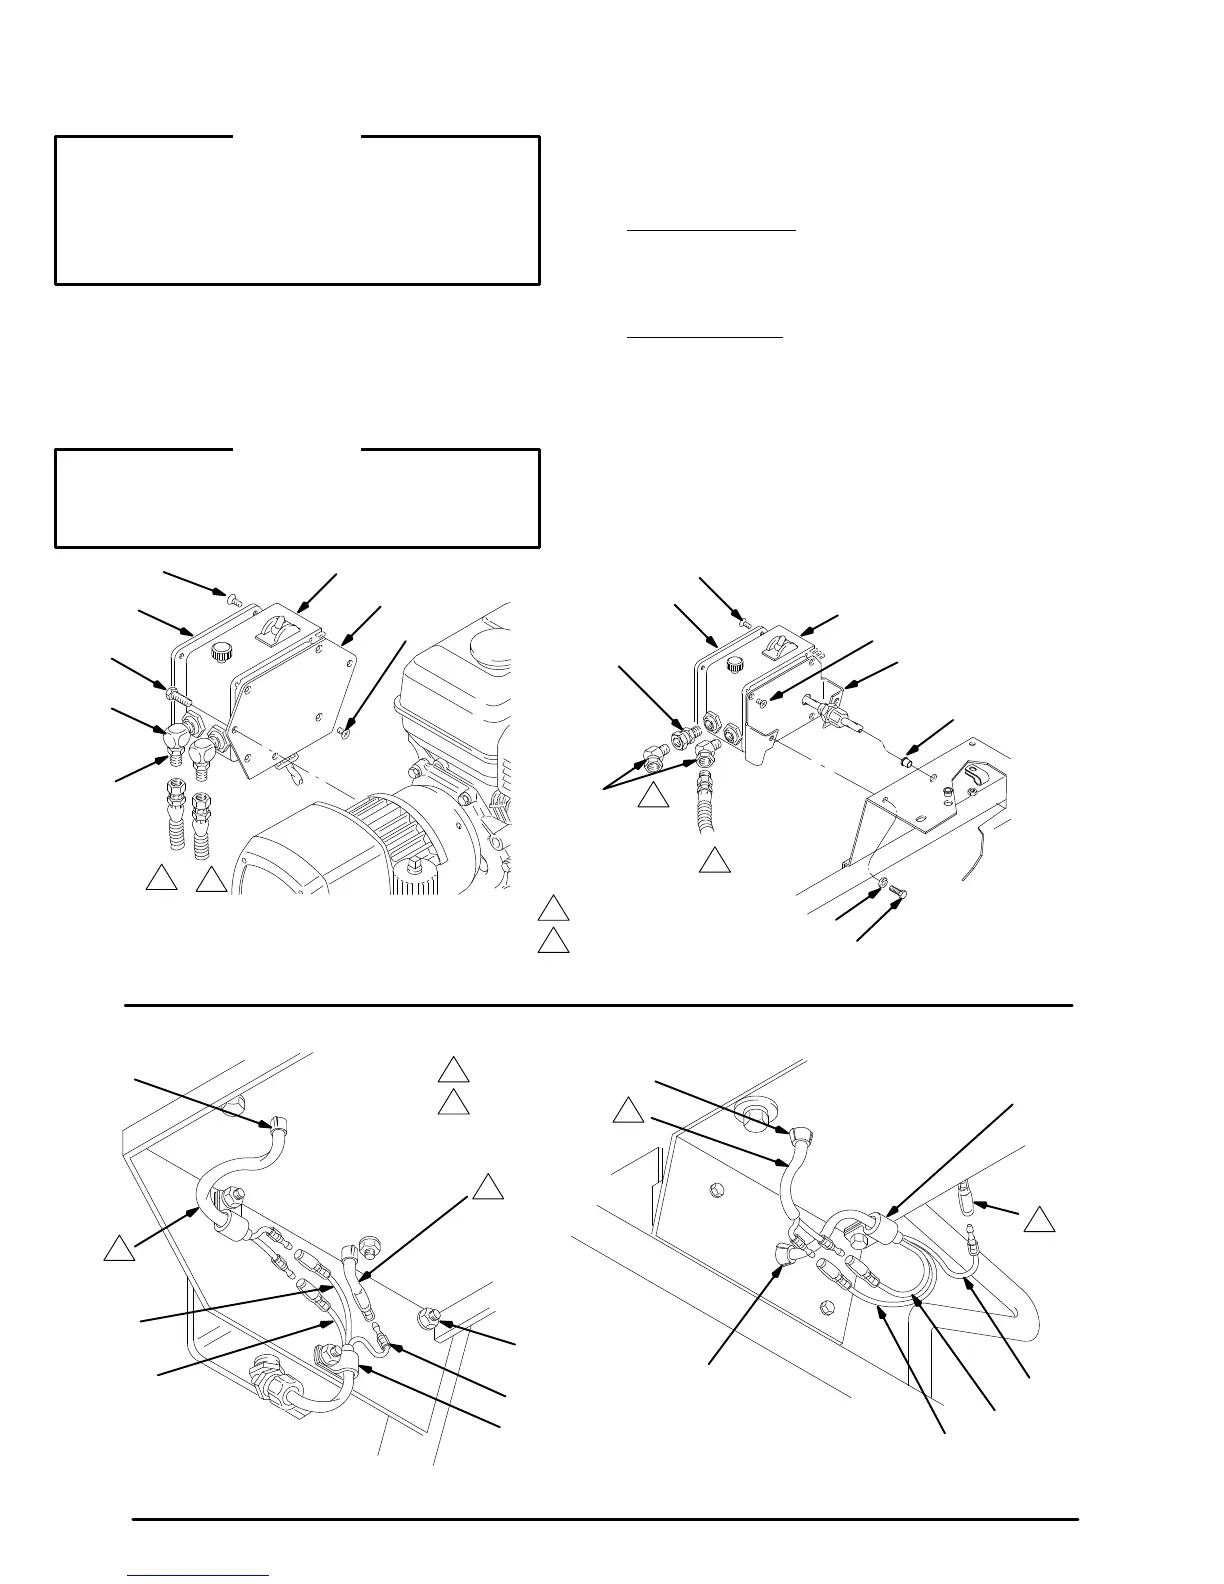
Pressure
Control Replacement
WARNING
To
reduce the risk of
serious injury
, including fluid in
-
jection
always follow the
Pressure Relief Procedure
Warning on page 14 before checking, adjusting,
cleaning or shutting off the sprayer.
Disconnect the
spark
plug!
1.
Disconnect both hoses at the pressure control (63).
while
holding the elbows (317 or 320)
firmly
. See the
CAUTION,
below
. Note the original
location of each
hose
to be sure you
reassemble them correctly at the
end
of this procedure. See Fig. 20.
CAUTION
DO NOT allow the elbow (317 or 320) to turn when
removing or connecting the hoses. Turning the el-
bows
can damage the sensitive bourdon tube.
2. Working
under the engine mounting plate of the cart,
disconnect
the red, black and white wires.
For
the upright cart
, remove the three
nuts (61) and
lockwashers (9) from the capscrews (62). See Fig.
21.
For
the lo-boy cart
, remove the three screws (62) and
washers
(9). See Fig. 21.
3. Remove the wire clamp (97). See Fig. 21. Remove
the
pressure control.
4. Remove the pressure control cover (76) and the
mounting
bracket (67 or 107). See Fig. 20.
106
63
Fig. 20
UPRIGHT
CART
LO-BOY CART
107
64
66
9
62
320
319
317
316
63
67
76
76
62
106
64
0144 0145
1
2
T
o pump
T
o filter
1
2
1
2
Fig.
21
View
from under engine mounting
plate on upright cart
V
iew from under engine mounting
plate on lo-boy cart
97
97
WHITE
BLACK
RED
61,9,62
BLACK
RED
WHITE
66
66
0146
0147
66
1
2
T
o field
T
o engine
1
1
2
2