Repair
3A9286B 33
Repair the Standard
Diaphragms
Required Tools:
• Torque wrench
• 25 mm open-end wrench
• Lubriplate
®
Synxtreme HD-2 grease (or equivalent
NLGI Grade 2 synthetic grease with calcium
sulfonate base)
• 15 mm hex wrench
See F
IG. 14–FIG. 16.
NOTE: Lubricate the motor rotor when replacing
diaphragms. See your related motor manual. See
Related Manuals, page 2.
Disassemble the Standard Diaphragms
1. Follow Prepare Equipment for Repair, page 31.
2. Follow Disassemble Check Valves, page 32.
3. Remove all clamps (6a) from the fluid covers (3).
Remove the fluid covers (3).
4. Use an applicable wrench to firmly hold one
diaphragm fastener (15) in place. At the same time,
use an applicable wrench to loosen the fastener
(15) on the opposite side.
5. Remove the fastener (15), seal (16, if applicable),
fluid plate (11), diaphragm (13), and diaphragm
backer (14, if applicable) from the shaft (1a) on the
side of the pump with the loosened fastener (15).
6. Loosen the remaining diaphragm fastener (15).
If the first loosened diaphragm fastener (15) is
on the side of the shaft (1a) with the wrench flat:
a. Use an applicable wrench to firmly hold the flat
of the shaft (1a) in place. At the same time, use
an applicable wrench to loosen the remaining
diaphragm fastener (15). See F
IG. 16.
If the first loosened diaphragm fastener (15) is
opposite the wrench flat on the shaft (1a):
a. Follow the procedure to lubricate the rotor in
your related motor manual to access the flat of
the shaft (1a). See Related Manuals, page 2.
b. After the flat of the shaft (1a) is accessible, use
an applicable wrench to firmly hold the flat of
the shaft (1a) in place. At the same time, use an
applicable wrench to loosen the remaining
diaphragm fastener (15). See F
IG. 16.
7. Remove the remaining fastener (15), seal (16, if
applicable), fluid plate (11), diaphragm (13), and
diaphragm backer (14, if applicable) from the
shaft (1a).
NOTE: Do not remove the diaphragm shaft with
plate (1b) from the motor (1).
8. Clean and inspect parts for wear or damage.
Replace parts as needed.
9. Lubricate the rotor. See your related motor manual.
See Related Manuals, page 2.
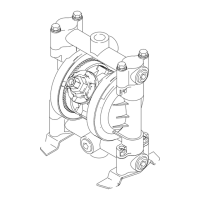
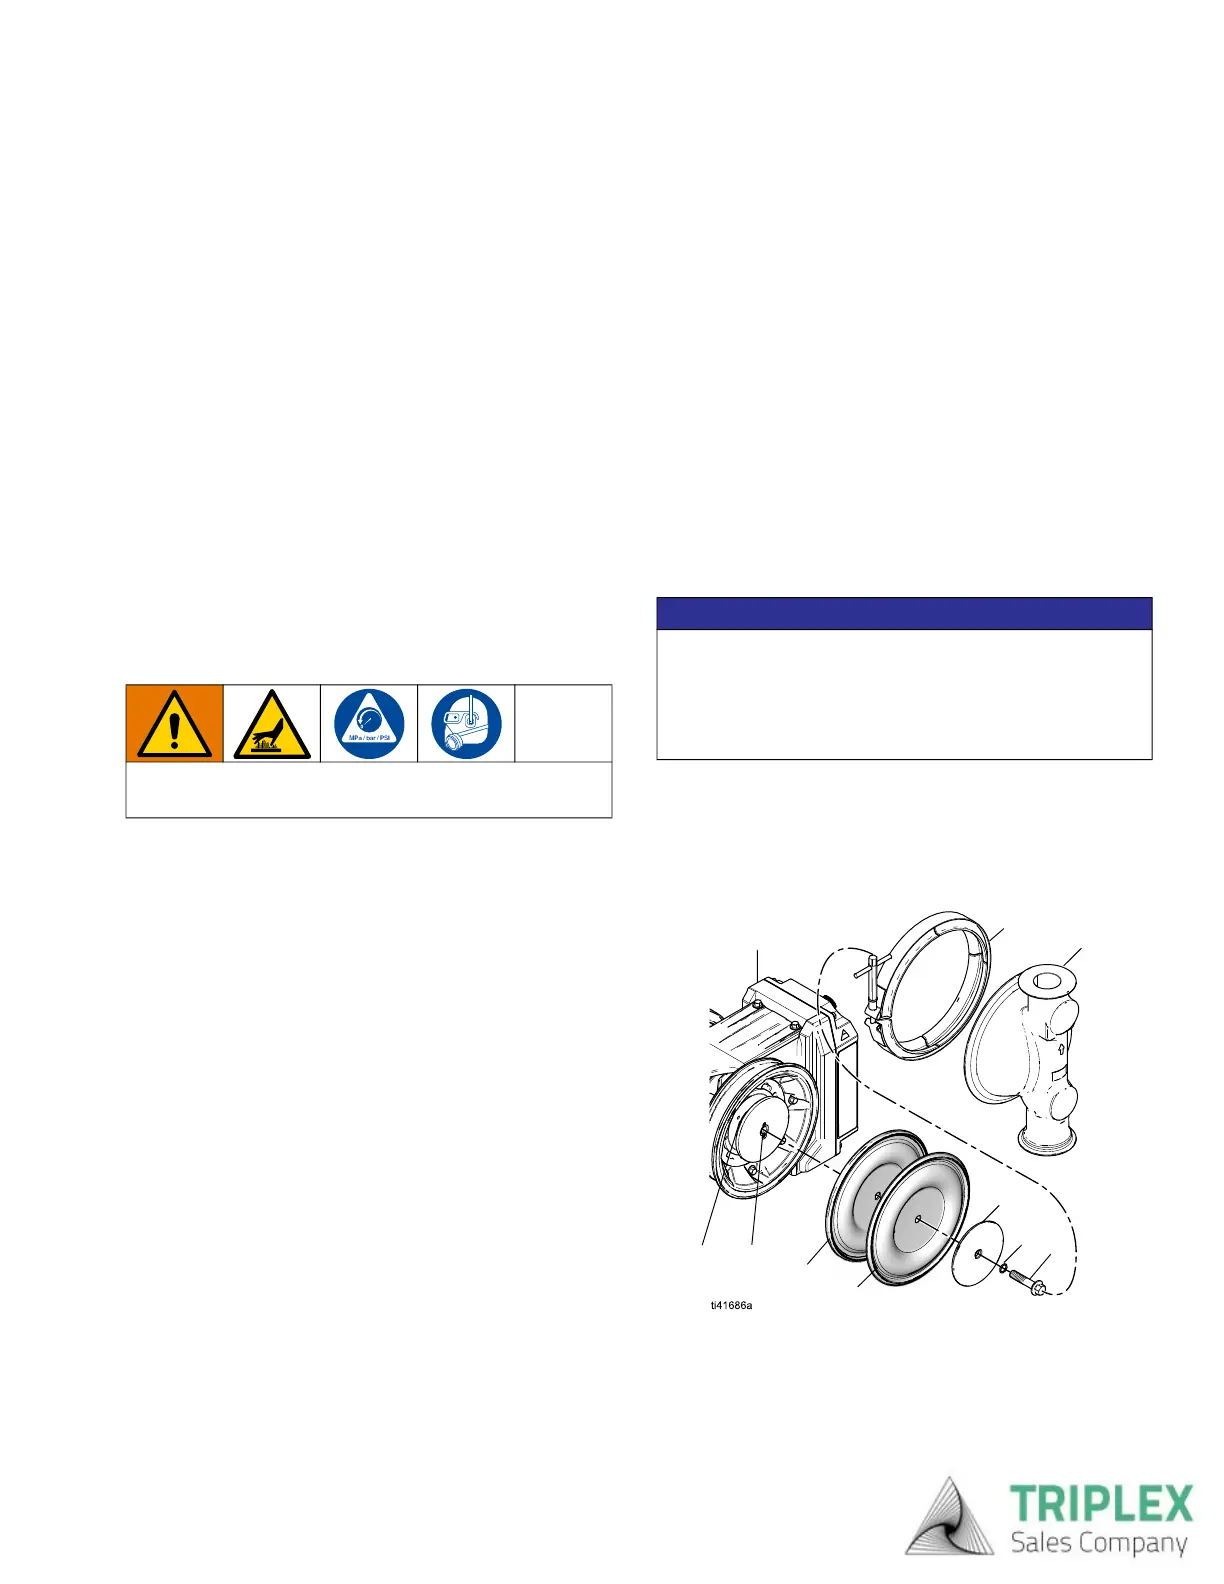
FIG. 14: Standard Diaphragms
To avoid severe burns, do not touch hot fluid or hot
equipment.
NOTICE
To avoid damage to the rotor or equipment, do not
remove the shaft with plate (1b) from the motor (1).
Removing the shaft will cause the rotor balls to
dislodge from the rotor and the rotor will not function
properly.
15
16
11
1
1a
1b
13
14
6a
3
Triplex Sales
1-847-839-8442
www.triplexsales.com