Repair
34 3A9286B
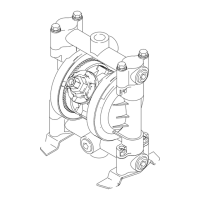
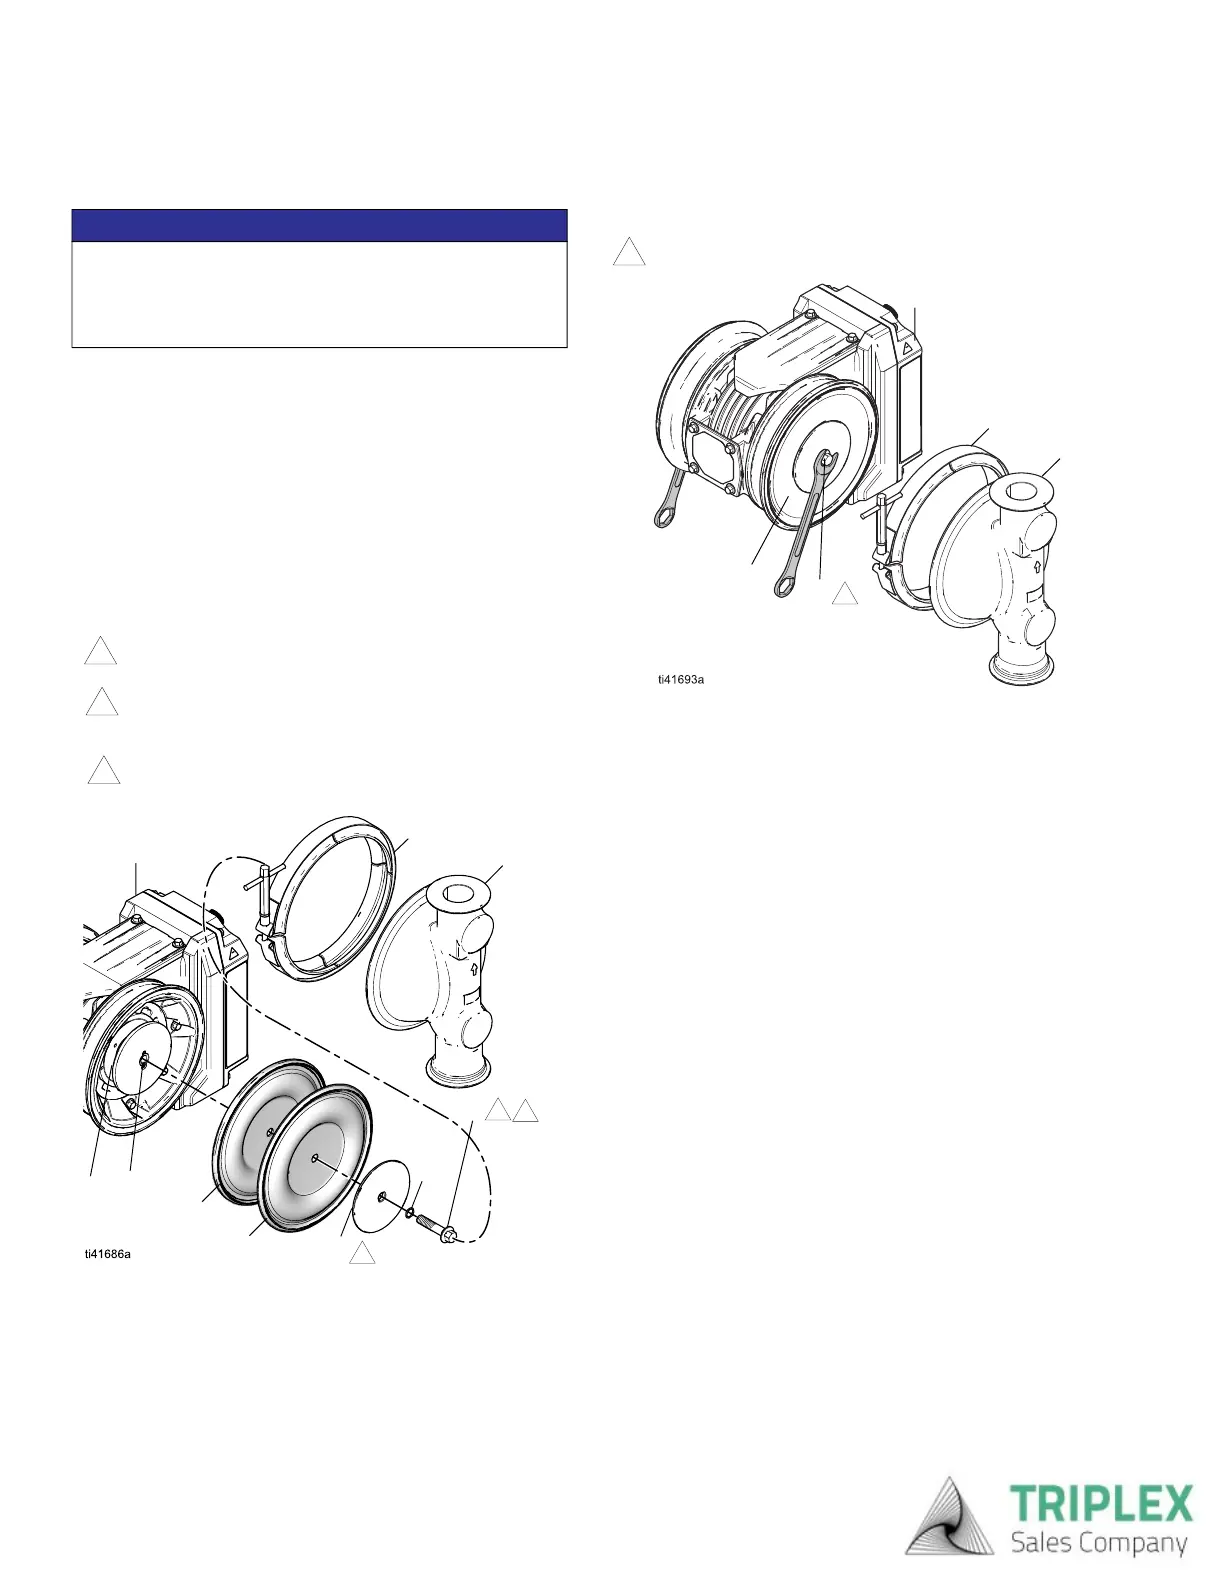
Reassemble the Standard Diaphragms
1. Assemble the diaphragm backers (14, if applicable),
diaphragms (13), fluid side plates (11), and seals
(16, if applicable) with the fasteners (15) exactly as
shown for your equipment model. See your related
parts manual. See Related Manuals, page 2.
NOTE: Face the rounded side of the fluid side plate
(11) toward the diaphragm (13).
NOTE: Apply thread locker to the fastener (15) for
all diaphragm assemblies.
FIG. 15: Reassemble Standard Diaphragms (Hygienic
Model Shown)
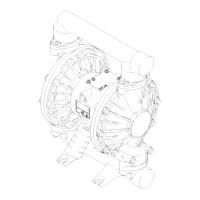
2. Install the assembled diaphragm assemblies into
the shaft with plate (1b) and hand-tighten the
fasteners (15).
3. Use an applicable wrench to firmly hold one
fastener (15) in place. At the same time, use an
applicable wrench to torque the opposite fastener
(15) to 50 ft-lb (68 N•m). See F
IG. 16.
FIG. 16: Tighten Standard Diaphragms
4. Align the fluid covers (3) to the motor (1).
5. Install clamps (6a) to hold the fluid covers (3) in
place.
NOTE: To ensure proper spacing and alignment of
the manifolds, install clamps (6a) loose enough to
allow for fluid cover movement before securing the
fluid covers in place.
6. Reassemble the check valves and manifolds as
explained in Reassemble Check Valves, page 32.
NOTICE
After reassembly, allow the thread locker to cure for
12 hours, or per instructions of the manufacturer,
prior to operating the equipment. The equipment will
be damaged if the diaphragm shaft fastener loosens.
Apply a high-strength thread locker to attach the
fastener to the diaphragm plate.
Apply a medium-strength thread locker to the shaft
side of the fastener to attach the diaphragm to the
shaft.
Rounded side faces toward the diaphragm (13).
3
16
13
14
1
1a
1
2
15
3
11
1b
6a
Torque to 50 ft-lb (68 N•m).
3
1
15
13
6a
Triplex Sales
1-847-839-8442
www.triplexsales.com