EasyManua.ls Logo

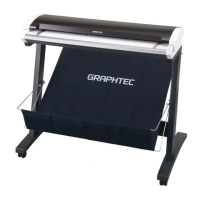
GRAPHTEC CS510 SERIES - User Manual

GRAPHTEC CS510 SERIES
122 pages
Print Icon
To Next Page IconTo Next Page
Loading...
IMAGE SCANNER
SERVICE MANUAL
CS510/IS210 SERIES
CS510/IS210-UM251-02-9370

Table of Contents

Questions and Answers

  • K
    Kimberly BrownAug 19, 2025
    Why my PC does not detect GRAPHTEC CS510?
    • E
      Erica RobertsAug 19, 2025
      If your PC isn't detecting the GRAPHTEC scanner, try the following: * Ensure the scanner is turned on. * Reattach the USB or ethernet cable, set it up, and reinstall the USB or ethernet driver. * Replace the cable. * Check the supply voltage and replace the power supply if necessary. * Replace the data controller board and reinstall the boot program.
  • S
    Steve WilliamsAug 21, 2025
    What to do if scanned data from GRAPHTEC CS510 is completely black?
    • J
      Joseph TranAug 21, 2025
      If the scanned data from your GRAPHTEC scanner is completely black, try the following: * Perform Calibration (white correction). * Check that the image sensor cables are properly connected and have no broken wires. * Check the +5 V power supply and replace it if it is faulty. Replace the data controller board. Replace the image sensors. * Adjust “Intensity (Brightness)” in Scanning Master 21+.
  • M
    Marissa GriffithAug 23, 2025
    How to fix GRAPHTEC CS510 if the document is not transported properly?
    • D
      davidyoungAug 23, 2025
      If the document is not being transported properly in your GRAPHTEC scanner, consider these steps: * Open the center cover and remove any foreign objects. * Check for anomalies around the control boards. * Check for anomalies around the motor. * Check the power supply and replace if necessary. * Replace the control boards or the main control board.
  • G
    Glenda OneillAug 26, 2025
    How to fix GRAPHTEC CS510 Scanner when lamps on the control panel remain unlit?
    • S
      shanemoonAug 26, 2025
      If the lamps on the control panel of your GRAPHTEC scanner remain unlit, try the following: * Switch on the power switch. * Connect the cable properly. * Check the power supplies and replace if necessary. * Replace the control panel or the data controller board.
  • T
    tbradyAug 28, 2025
    What to do if GRAPHTEC CS510 Scanner does not scan document in the scanning position?
    • E
      esimsAug 28, 2025
      If your GRAPHTEC scanner isn't scanning the document even when it's in the scanning position, try these steps: * Check the document detection photosensor. * Connect the cable properly. * Set the correct DIP switch setting for your model. * Use Scanning Master 21+ to specify the correct scanner model. * Replace the main control board.
  • J
    janet64Aug 30, 2025
    How to remove undesired black lines from scanned drawing on GRAPHTEC CS510 Scanner?
    • M
      moraleskyleAug 30, 2025
      To remove undesired black lines from a scanned drawing on your GRAPHTEC scanner: * Clean the scanning glass and replace if necessary. Clean the image sensors. * Perform calibration from the beginning (white correction). * Clean the document hold-down plate. * Replace the image sensors.
  • H
    hensoncarolineSep 1, 2025
    How to improve image quality on GRAPHTEC CS510 Scanner?
    • D
      Darren MunozSep 1, 2025
      To improve the image quality on your GRAPHTEC scanner: * Use purified water or alcohol to clean the scanning glass (do not use chemical solvents). * Select an appropriate resolution.
  • W
    weissmichelleSep 4, 2025
    How to eliminate undesired white lines on GRAPHTEC CS510?
    • C
      Christina WrightSep 4, 2025
      To eliminate undesired white lines on your GRAPHTEC scanner: * Clean the scanning glass and replace if necessary. * Perform calibration from the beginning (white correction).
  • D
    Donald BassSep 6, 2025
    Why GRAPHTEC CS510 Scanner does not automatically return the document after scanning?
    • M
      Melissa DeleonSep 6, 2025
      If your GRAPHTEC scanner isn't automatically returning the document after scanning: * Select “Front” for “Auto Eject.” * Check for anomalies around the paper feed section and the motor.
  • U
    ufloresSep 8, 2025
    Why does paper move beyond scanning section and drop on GRAPHTEC Scanner?
    • S
      scottelizabethSep 8, 2025
      If, when placed on the scanner, the paper is moved beyond the scanning section and drops to the back of the GRAPHTEC scanner, it could be because the paper sensor does not function properly. Try to: * Clean the paper sensor. * Check the sensor cable for contact with other cables. * Replace the paper sensor.

Summary

1. Overview of the Image Scanner

Scanner Features and Capabilities

Details the key features of the image scanning system, including resolution, width, color capability.

Scanner Standard Specifications

Provides technical specifications for CS510-11eN/CS510-11eN-PRO scanners, covering dimensions, speed, and power.

External Dimensions and View

Illustrates the external dimensions and physical layout of the scanner unit.

2. Part Names and Functions

Scanner Component Identification

Identifies and describes the main external components of the scanner from the front and rear views.

3. Preparing the Scanner for Operation

System Requirements for Scanner Operation

Lists minimum and recommended system requirements for running the scanner hardware and software.

Connecting the Scanner to Power

Details the procedure for connecting the scanner to a power source, including safety precautions.

Connecting the Scanner to a Computer

Explains how to connect the scanner to a PC via USB or Ethernet interfaces.

4. Installing Scanner Software and Drivers

Installing Scanner Driver Software

Provides step-by-step instructions for installing the scanner driver on Windows 2000, XP, and Vista.

Verifying Scanner Interface Connection

Guides users on verifying the scanner's connection to the computer via USB or Ethernet.

Installing Scanning Master 21+ Application

Details the installation process for the Scanning Master 21+ software application.

5. Daily Scanner Maintenance

Opening and Closing the Top Cover

Instructions on how to safely open and close the scanner's top cover for maintenance.

Cleaning the Document Hold-Down Unit

Procedure for cleaning the document hold-down unit to ensure optimal scanning performance.

Cleaning the Image Sensors

Steps for cleaning the transparent contact plates and image sensors for better image quality.

Cleaning the Paper Sensors

Instructions for cleaning paper sensors to ensure proper document detection.

Removing Jammed Documents

Procedure for safely removing jammed documents from the scanner.

Scanner Calibration Procedure

Details the calibration process to maintain scanning quality and resolve color discrepancies.

7. Jigs and Tools for Scanner Operation

Required Jigs for Scanner Adjustments

Lists the jigs required for various scanner adjustments and software operations.

Required Tools for Maintenance

Lists the tools required for disassembly, reassembly, and maintenance operations.

Other Necessary Items

Lists other items, such as cleaning agents and PCs, required for scanner operation.

8. Disassembling and Adjusting Mechanical Parts

Right Side Cover Removal and Installation

Procedure for detaching and reattaching the right side cover of the scanner unit.

Left Side Cover Removal and Installation

Procedure for detaching and reattaching the left side cover of the scanner unit.

Top Cover Assembly Removal and Installation

Instructions for detaching and reattaching the scanner's top cover assembly.

Front Guide Assembly Removal and Installation

Procedure for detaching and reattaching the front guide assembly.

Rear Cover Removal and Installation

Details on how to detach and reattach the rear cover of the scanner.

Motor Removal, Disassembly, and Reassembly

Instructions for detaching, disassembling, and reassembling the scanner motor.

Drive Roller Pulley Removal and Installation

Procedure for detaching and reattaching the drive roller pulleys.

Drive Rollers Removal and Installation

Step-by-step guide for detaching and reattaching the front and rear drive rollers.

Drive Belt Removal and Tension Adjustment

Instructions for detaching the drive belt and adjusting its tension.

Top Cover Sensor Removal and Installation

Procedure for detaching and reattaching the left and right top cover sensors.

Paper Detection Sensors Removal and Installation

Steps for detaching and reattaching the front and rear paper detection sensors.

Control Panel Sheet Switch Removal and Installation

Procedure for detaching and reattaching the control panel sheet switch.

Contact Glass Assembly Removal and Installation

Instructions for detaching and reattaching the contact glass assembly.

CIS Assembly Removal and Installation

Procedure for detaching and reattaching the CIS assembly.

CIS Board Removal and Installation

Instructions for detaching and reattaching the CIS board.

Pinch Roller Covers Removal and Installation

Procedure for detaching and reattaching the rear and front pinch roller covers.

Document Hold-down Rollers Removal and Installation

Instructions for detaching and reattaching the document hold-down rollers.

Pinch Roller Units Removal and Installation

Procedure for detaching and reattaching the front and rear pinch roller units.

Ethernet Board Removal and Installation

Instructions for detaching and reattaching the Ethernet board.

Data Controller Board Removal and Installation

Procedure for detaching and reattaching the data controller board.

Power Board Removal and Installation

Instructions for detaching and reattaching the power board.

Switching Power Supply Board Removal and Installation

Procedure for detaching and reattaching the switching power supply board.

9. Boards and Electrical Components

Scanner Wiring Diagrams

Provides schematic wiring diagrams for the scanner's internal electronic components and connections.

Replacing the Data Controller Board

Detailed precautions and procedure for replacing the data controller board.

Replacing the Ethernet Board and MAC Address Input

Instructions for replacing the Ethernet board and inputting the MAC address.

Downloading Scanner Firmware

Procedure for downloading firmware updates to the scanner's data controller board.

10. Adjustments Using Software

Starting and Setting Up Scanning Master 21+

Instructions for launching and setting up the Scanning Master 21+ software.

Preparing for Scanner Adjustments

Guides on noting current adjustment values before performing new adjustments.

Preparing Scanner Adjustment Charts

Information on the different adjustment charts required for scanner calibration and alignment.

Scanner Calibration (White Correction)

Procedure for performing white correction calibration to ensure accurate color.

Feed Distance Adjustment

Steps for adjusting the feed distance to correct scanning errors related to paper movement.

Sensor Stitch Adjustment

Procedure for aligning sensor joints to correct image misalignment.

Scanning Start Position Adjustment

Instructions for adjusting the scanning start position to correct image offset.

Color Correction (CS510 Only)

Procedure for performing color correction on CS510 scanners using a color correction sheet.

11. Troubleshooting Scanner Issues

Troubleshooting Unlit Control Panel Lamps

Troubleshooting steps for when control panel lamps are unlit.

Troubleshooting No Scan on Document Movement

Troubleshooting for when the scanner does not scan documents that are properly positioned.

Troubleshooting Improper Document Transport

Troubleshooting steps for when the document is not fed or transported correctly.

Troubleshooting Document Return Issues

Troubleshooting for documents not being returned automatically after scanning.

Troubleshooting Black Scanned Data

Troubleshooting for when scanned data appears completely black.

Troubleshooting PC Not Detecting Scanner

Troubleshooting steps when the computer cannot detect the scanner.

Troubleshooting Paper Jams

Troubleshooting for paper jams within the scanner.

12. Scanner Options and Consumables

Optional Scanner Items

Lists optional items available for the scanner, such as software upgrades.

Scanner Consumable Parts

Lists consumable items for the scanner, including carrier sheets and calibration sheets.

13. Parts List

Outer Casing Parts

Lists the part numbers and descriptions for the outer casing components of the scanner.

Main Frame Parts

Details the part numbers and descriptions for the main frame components of the scanner.

Drive Roller Parts

Details the part numbers and descriptions for the drive roller and related components.

CIS Unit Parts

Lists the part numbers and descriptions for the CIS unit and its sensors.

Top Cover Parts

Details the part numbers and descriptions for the top cover and its associated parts.

Cable Parts

Lists the part numbers and descriptions for various internal and external cables.

GRAPHTEC CS510 SERIES Specifications

General IconGeneral
Optical Resolution600 dpi
InterfaceUSB 2.0
Power SourceAC 100-240V, 50/60 Hz
Supported OSWindows 10/8/7
Max Cutting Width520 mm (20.5 inches)

Related product manuals