Maintenance
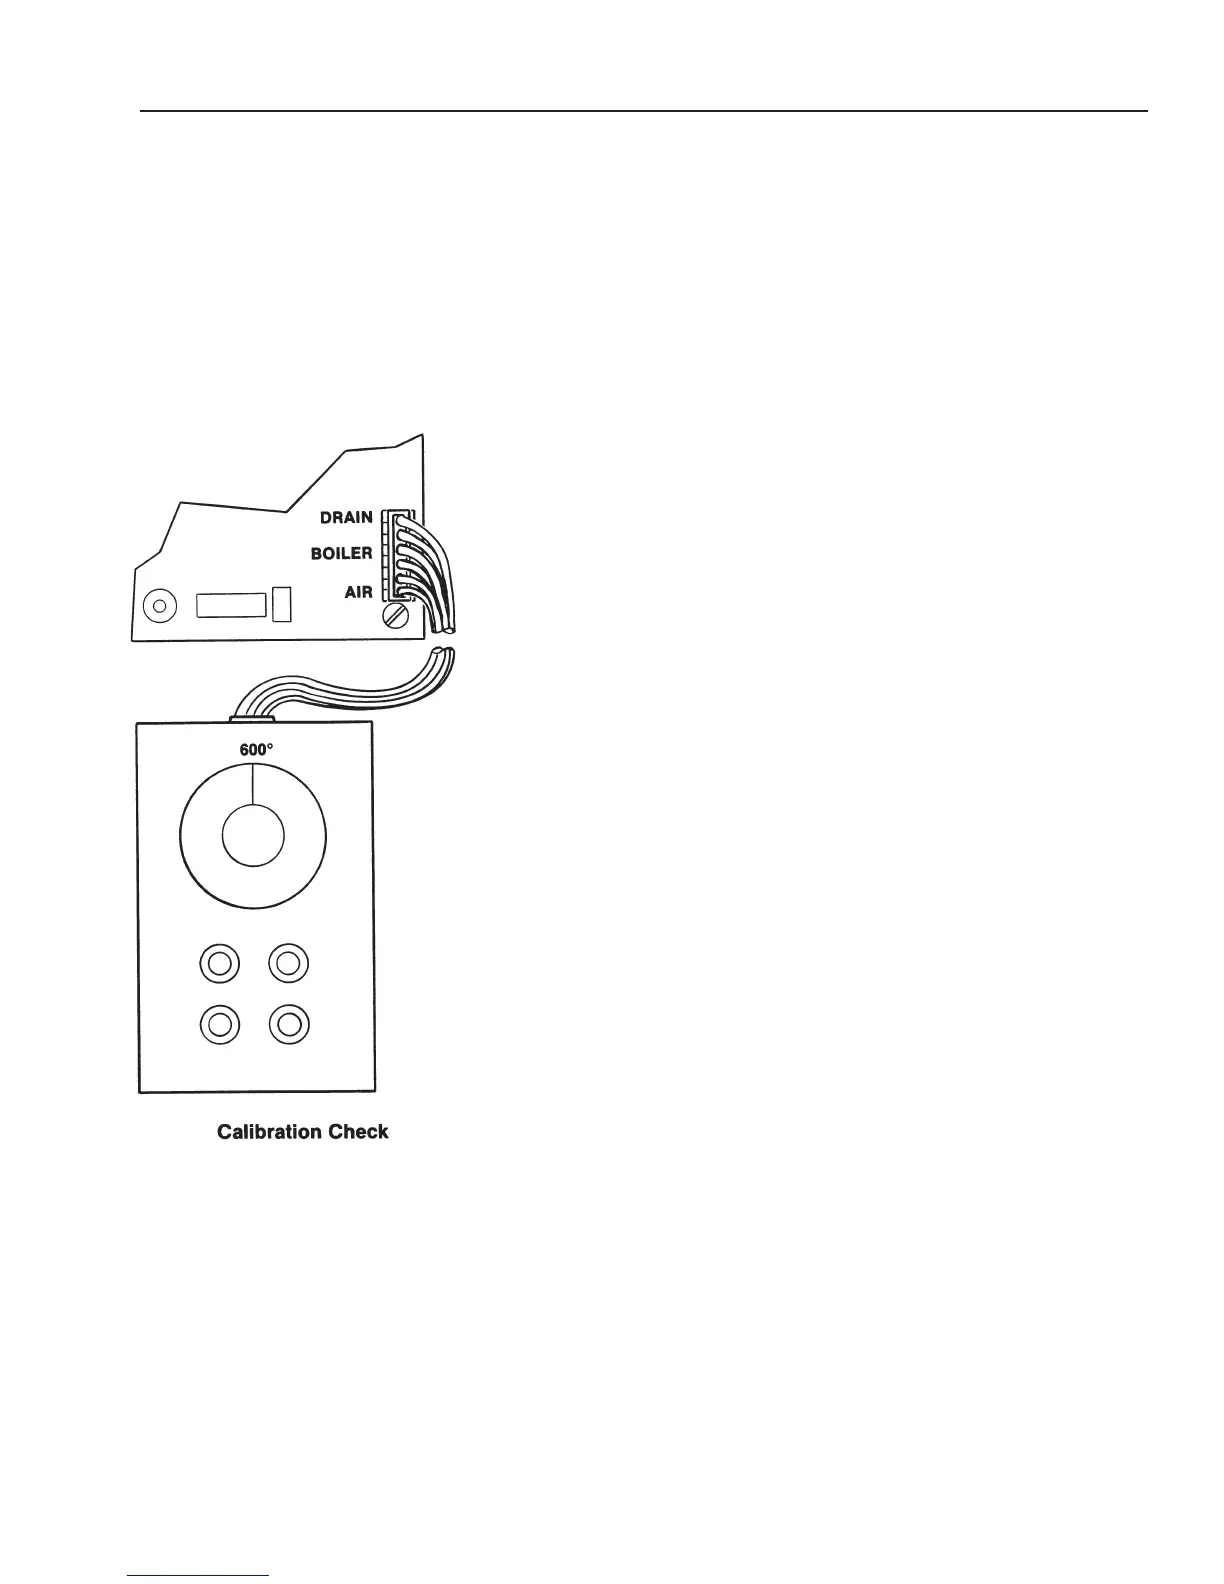
Control Panel Calibration Check
(Only Required On Old Electronics)
8-1
This procedure is not required on electronics after serial #
CC10E & CC20E C7439MS CC10G & CC20G GC7243MS
General
Service Code 7 indicates that the solid state controls are out of calibration. A
control panel calibration check is important to ensure accurate operation at
desired temperature selection.
Calibration Check
WARNING
Be sure oven power is turned off and the oven is disconnected
from the branch circuit before calibrating the control panel.
1. Turnoff oven power and disconnect oven from the branch circuit.
2. Allow the unit to cool to room temperature.
3. Remove right side cover from the oven.
4. Disconnect air, drain, and boiler probe leads from the control panel circuit
board.
5. Connect calibration box to the control panel air, drain, and boiler probe
terminal. The calibration box and the control board terminals are clearly
identified for easy connection.
6. Set calibration box dial to 600°F.
WARNING
High voltage is present at some of the electrical component
locations when oven power is ON.
7. Connect oven to the branch circuit.
8. If the unit is on, turn it off by pressing the ON touch pad.
9. Press and hold the STEAM and OVEN touch pads; then press the ON
touch pad.
t CAL will be displayed in the Time window for approximately
2-seconds, then
C 50 will appear
.
IMPORT
ANT
If the temperature displayed in the
T
ime window does not agree with the
temperature selected on the calibration box, the word
Err will be displayed in
the Time display window.
If
Err shows,
•
recheck connections,
• reset dial on T-Cal box to match Time display,
• troubleshoot T-Cal box,
•
perform power supply check.
10.
Set the calibration box dial at 50
°
F
. When the temperature displayed in the
Time window agrees with the calibration box setting, press the timer
START touch pad.
C 100 will be displayed in the Time window.
(Revised 1/02)
NOTE: May only have two wires. If
so, connect to the air
probe pins.