24
Connecting the power cord for the built-in AC power module
1. Wear an ESD wrist strap and make sure it makes good skin contact and is reliably grounded.
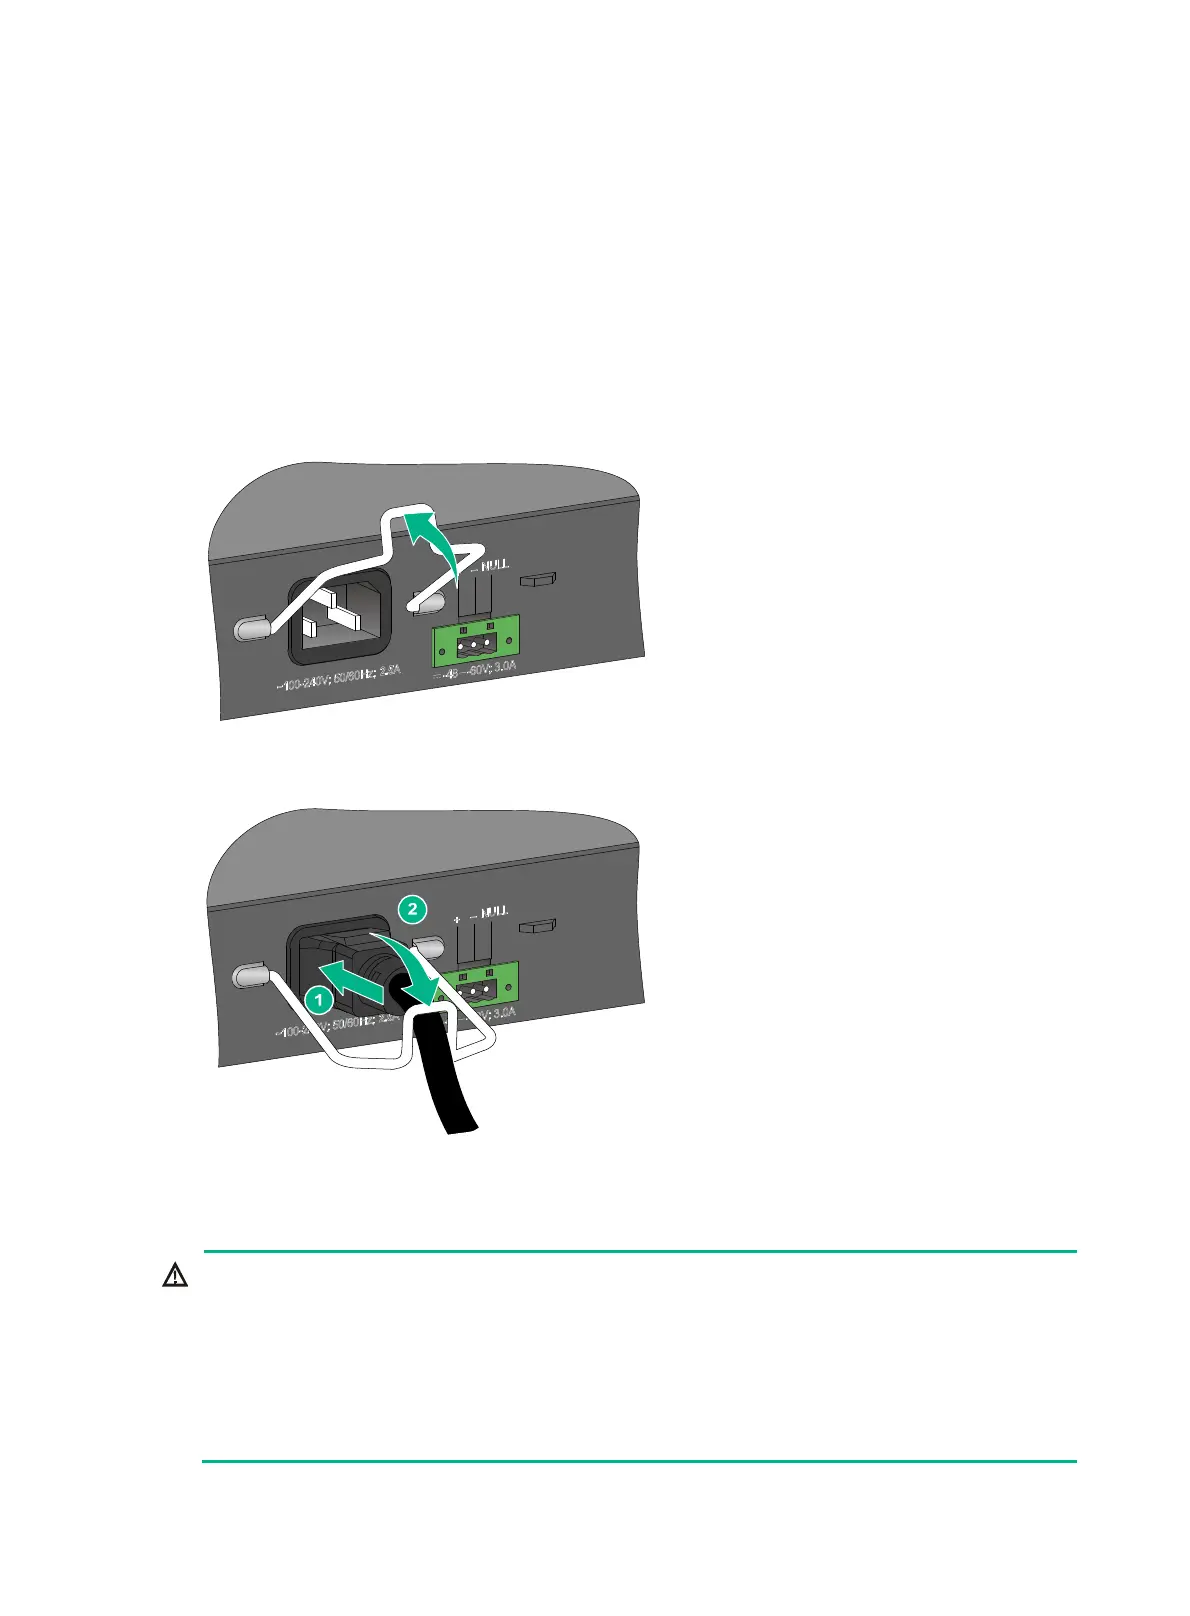
2. Attach two ends of the bail latch into the holes on the two sides of the AC power receptacle, and
pull the bail latch upwards (see Figure 30).
3. Con
nect the female connector of the AC power cord to the AC-input power receptacle on the
power module (see callout 1 in Figure 31).
4. Pull the bail latch down to secure the connector to the AC-input power receptacle (see callout 2
in Figure 31).
5. Connect the other end of the power cord to an AC power source.
Figure 30 Connecting the power cord for the built-in AC power module (1)
Figure 31 Connecting the power cord for the built-in AC power module (2)
Connecting a power cord for the built-in DC power module
WARNING!
• The DC-input power receptacle on the switch requires a DC power cord with a JD5-A connector.
• To use a –48 VDC power source for power supply, purchase an H3C recommended DC power
cord yourself.
• To use an RPS for power supply, purchase a power cord compatible with the RPS yourself.
• To connect a DC power cord to the –48 VDC power source, identify the positive (+) and negative
(-) marks on the two wires of the power cord to avoid connection mistakes.

 Loading...


