Total Chlorine
50081_Chlorine_Total_Back.fm Page 99
Total Chlorine
• To avoid loss of chlorine, be careful not to agitate the sample when measuring or pouring.
• Sample glassware must be cleaned and pretreated to satisfy any chlorine demand before the sample is introduced.
See Section 7.2 Container Pretreatment on page 63 for additional information.
• Always use organic-free reagent water for sample dilution (Cat. No. 26415-49).
• When sampling tap water, let the faucet run for at least 4–5 minutes prior to collecting the sample.
• Prepare a test sample by diluting Chlorine Standard Solution (Cat. No. 14268-10) with deionized (DI) water.
• Rinse the electrode, temperature probe, and anti-diffusion tip with deionized water before every titration.
• Download the “Certificate of Analysis” (COA) to obtain the exact concentration of any unopened bottle of Hach titrant or standard
solution. See Obtaining the Certificate of Analysis for Hach Reagents on page 41.
• Hach buffer reagents for chlorine titrations are highly recommended for this analysis.
• Never substitute buffers designed for calibrating pH meters. They contain dyes that interfere with amperometric titration.
• Never use buffers contaminated with mold or bacteria.
• Adjust the contrast of the display by accessing the Methods menu and pressing 7 to lighten, and 0
to darken.
• A distinction is drawn between running a new test and a new sample on the AutoCAT 9000. Each test is a replicate run of the
current or previous sample analysis. The AutoCAT 9000 automatically tracks the results of a series of tests and automatically
calculates the mean and standard deviation for all the results. Each test is given a different number, all of which are listed under
the same Sample ID. When a new sample starts, a new ID is assigned.
• The AutoCAT 9000 can accommodate any sample size. Standard Methods recommends a default volume of 200 mL. The
volume can be adjusted to expand the test range.
• The AutoCAT 9000 calculates the chlorine concentration based on the sample volume. Make sure that the sample volume is
correct.
• The analysis data may be analyzed as many times as needed from the Zoom Range Determination window, in manual (MEPD)
and/or automatic (AEPD) modes. The results are not stored until accepted by the user.
•The STOP key can be pressed at any time to interrupt instrument operation. The user will be given the option to resume, restart,
or quit.
• Press the
CHECK MARK key any time during data acquisition to halt data collection.
• Press DEL during any timer period (except the Start Timer) to immediately exit the timer and proceed to the next step in the
procedure.
• The Predose feature allows the adjustment of titrant addition prior to starting the titration. Make sure that predose does not
overshoot the end point by completely titrating the sample.
• Flush the burette each day before the first sample test or calibration is performed. See Daily Start-up on page 26.
• Flush the burette when changing titrants. See Changing Titrants on page 25.
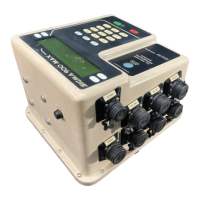
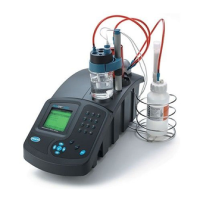
Amperometric Back Titration
Titration Workstation
0.0051–5.000 mg/L as Cl
2
*
Scope and Application: For water and wastewater; USEPA accepted for reporting**
* Higher ranges can be determined through sample dilution. See Section 5.2.3.3 Dilution on page 46.
**Procedure equivalent to USEPA method 330.2 and Standard Methods 4500-Cl C. for wastewater
Sample Tips and Techniques
Reagent Tips and Techniques
Instrument Tips and Techniques
 Loading...