20
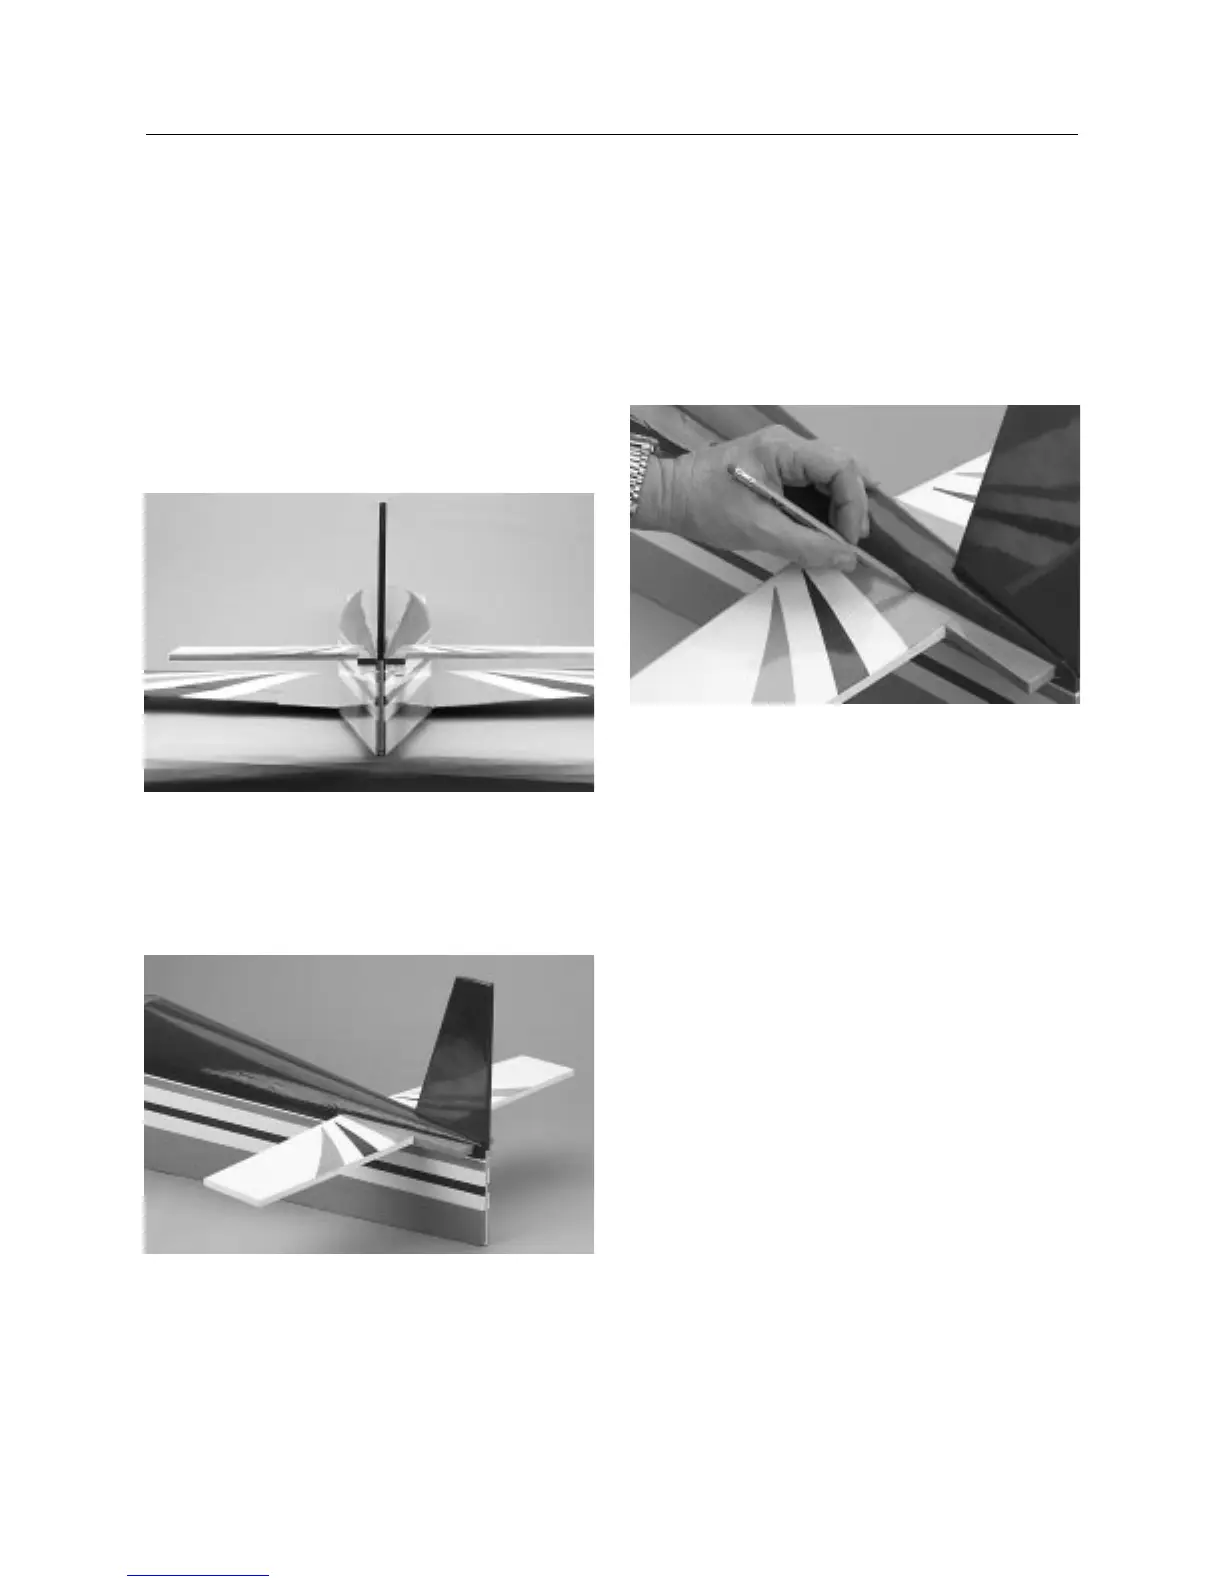
Step 5. Trial fit the vertical fin in position. Make sure the fin is
inserted completely. Some slight trimming to the bottom of the
fin may be required. Carefully check the fin to be sure it’s aligned
90 degrees to the horizontal stabilizer. A 90-degree triangle is
helpful in this step.
Hint: When installing the vertical fin, use the rudder to
check for proper fin height. It may be necessary to cut
off a small amount from the bottom of the fin to get the
rudder to drop down to the proper position so the trim
between the rudder and and fuselage will line up.
Step 6. Double check the horizontal stabilizer and vertical fin
alignment. It may be necessary to slightly trim the balsa wood on
the fuselage or fin with a sharp hobby knife to achieve exact
alignment.
Step 7. When you're satisfied with the alignment, carefully mark
the position with a pencil at the junction where the horizontal
stabilizer meets the fuselage top and bottom and where the
vertical fin meets the fuselage. The pencil should make a light
indentation in the covering.
Step 8. Remove the horizontal stabilizer and vertical fin and
carefully cut away the covering with a sharp hobby knife. Cut
approximately 1/8′′ inside the line of the horizontal stabilizer so
that when the stab is repositioned in place, no bare wood shows.
On the vertical fin, cut the covering away from the bottom of the
fin and 1/8′′ from the reference line marked with the pencil.
Again, make sure no bare wood shows when the fin is
repositioned.
CONTINUED
Section 6: Installing the Tail