8
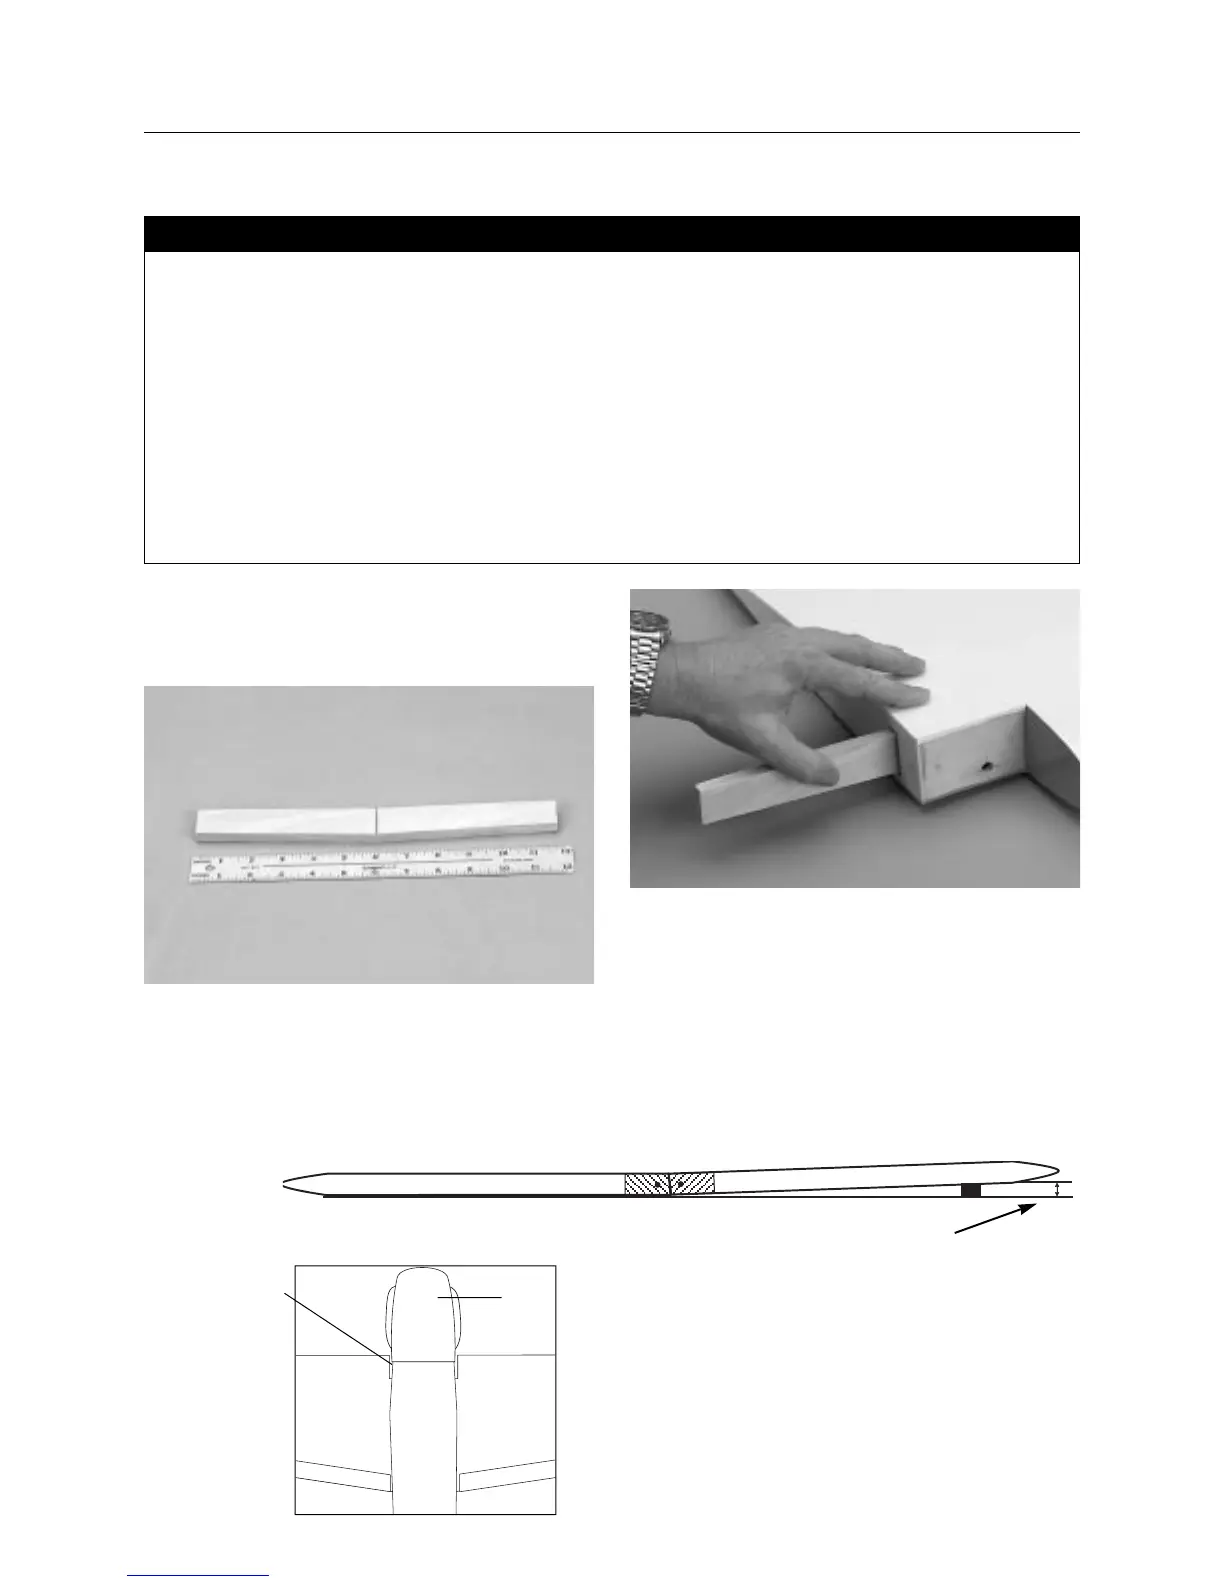
Step 1. Locate the dihedral brace (also called the wing joiner).
Using the ruler, determine the center of the brace and mark it
with a pencil.
Step 2. Trial fit the dihedral brace into one of the wing panels. It
should insert smoothly up to the center line marked in Step 1.
Now slide the other wing panel onto the dihedral brace until the
wing panels meet. If the fit is overly tight, it may be necessary to
sand the dihedral brace.
Step 3. Check for the correct dihedral angle. Place the wing on
a large, flat surface with one wing panel resting on the flat
surface. The opposite wing tip should be at 3′′ in height from the
surface (see illustration below). If necessary, sand the dihedral
brace until this is achieved. There should be no gaps in the wing
center.
Step 4. To check for adequate clearance of the cowl between the
wing’s leading edge and the fuselage, trial fit the wing together
and temporarily install on the fuselage with the cowl installed. If
the clearance is not adequate, install the extra plywood center
wing rib to provide the necessary clearance (see diagram at left).
• Right/left wing panels
• Dihedral brace
• Plywood wing dowel plate
• Wooden dowels
• Wing bolt plates
• Wing trim tape (white)
• 30-minute epoxy
• 6-minute epoxy
• Epoxy brush
• Masking tape
• Hobby knife
• Rubbing alcohol
• Paper towels
• Wax paper
• Ruler
• Pencil
• Medium sandpaper
• Mixing stick
Parts Needed Tools and Adhesives Needed
Section 2: Joining the Wing Halves
3′′
Clearance
Cowl
Wing
Fuselage