23
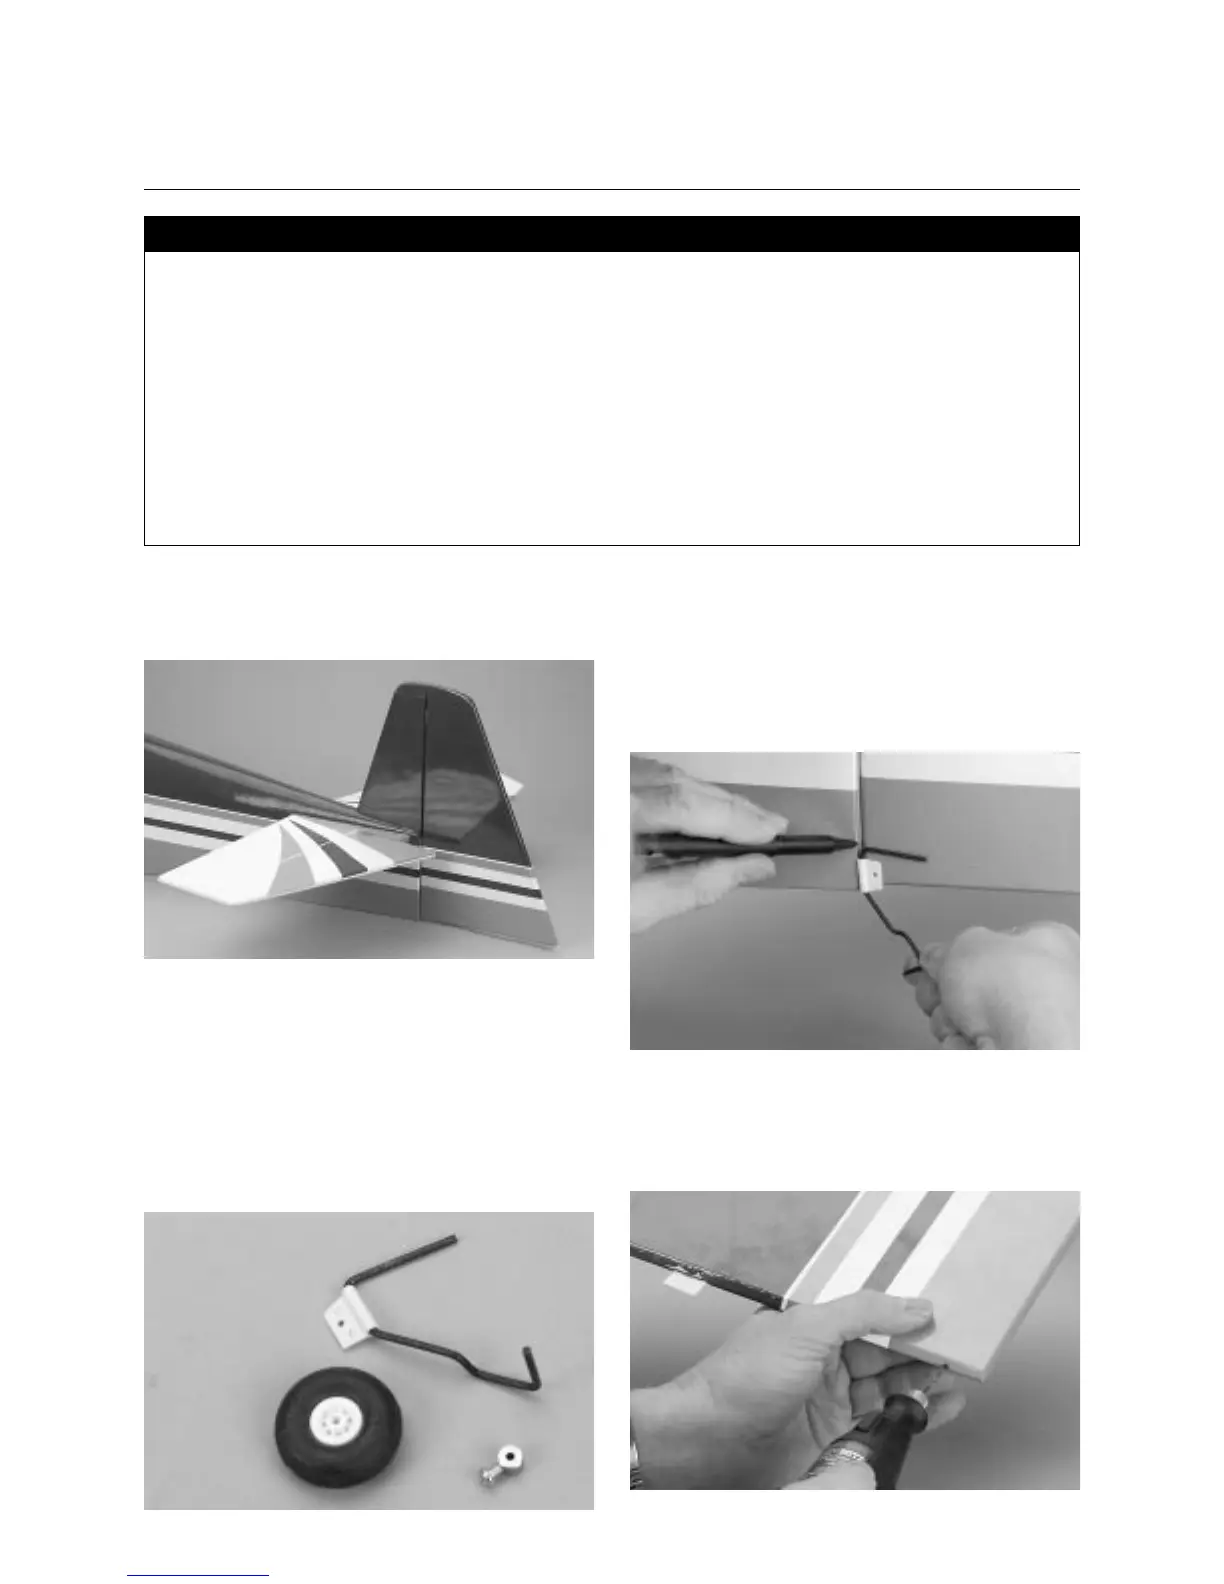
Step 1. Trial fit the rudder in position on the vertical fin with the
hinges in place. Note that three hinges attach the rudder to the
fin and two attach the rudder to the fuselage.
Step 2. Insert the tail wheel wire into the pivot bushing. With the
pivot bushing resting against the bend in the tail wheel wire, use
a needle nose pliers to make a 90 degree bend in the direction
shown below, 1/8′′ above the top of the pivot bushing.
Note: The part of the tailwheel wire which inserts into the
rudder must go into the wood block in the rudder. To
insure adequate strength, the bend of the wire must be
kept as low as possible, or the wire will miss the
hardwood.
Step 3. Hold the tail wheel assembly up to the fuselage in a
position where it's flush with the fuselage bottom. Note where
the wire rests in reference to the rudder. Using a felt tipped pen,
mark the position where the hole is to be drilled into the rudder.
Also mark the position of the slot where the pivot bushing will fit
into the back of the fuselage.
Step 4. Remove the rudder from the vertical fin. Using a 3/32′′
drill bit, drill into the exact center of the rudder as marked to
accept the tail wheel wire as shown. You can also drill a 1/16′′
pilot hole first.
• Rudder
• Fuselage
• Tail wheel assembly
• Instant thin CA glue
• CA remover/debonder
• Blue Locktite 242
• 30-minute epoxy
• Drill
• Drill bits: 1/16′′, 3/32′′
• Needle nose pliers
• Hobby knife with #11 blade
• Felt tipped pen
• Paper towels
• Rubbing alcohol
Parts Needed Tools and Adhesives Needed
Section 8: Hinging the Rudder and
Installing the Tail Wheel