29
Step 1. Locate the two wheel pants and associated hardware.
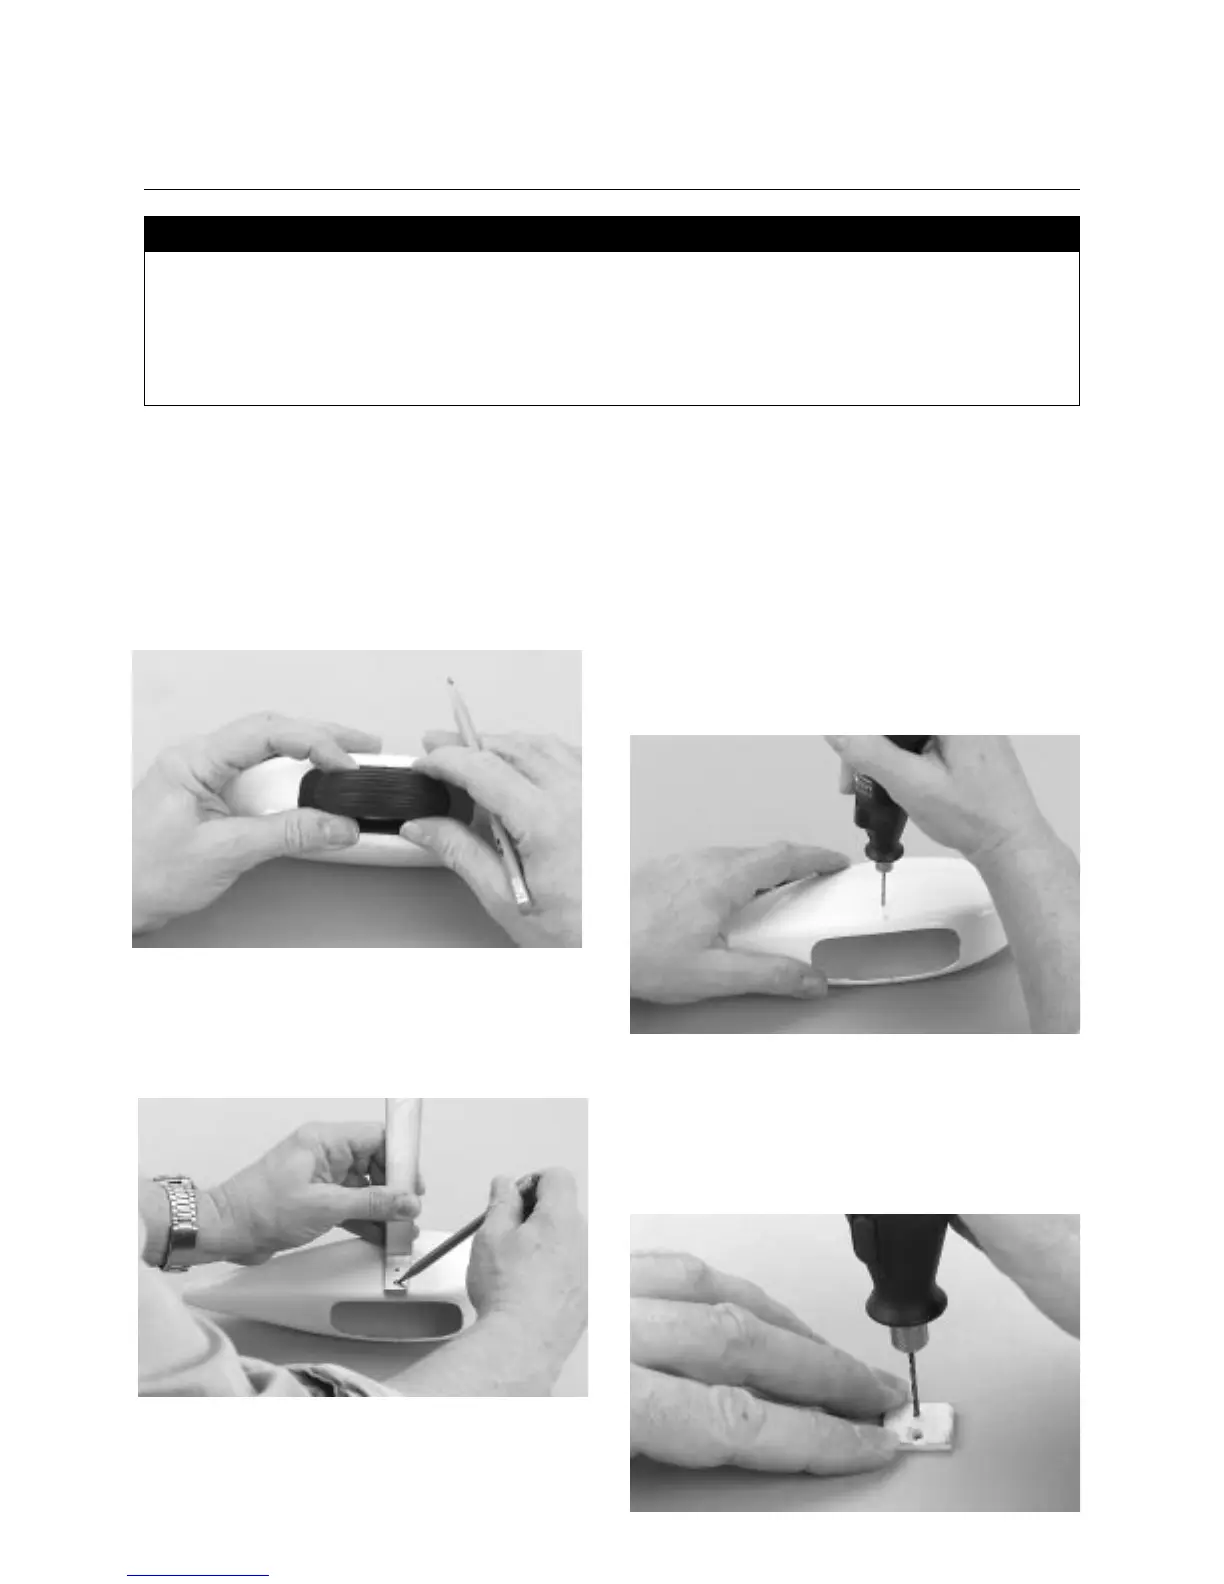
Trial fit one wheel into the opening of a wheel pant. Using a felt
tipped pen or pencil, mark the center location of the wheel in the
pant. This mark will be used as a reference for marking the
mounting holes for the landing gear on the wheel pant.
Step 2. Locate the hole for the wheel axle 5/16′′ up from the
centerline marked on one wheel pant. Mark it with a felt tipped
pen or pencil. Repeat the procedure for the other wheel pant,
noting which is the correct side.
Step 3. Place the wheel pant on the landing gear and note the
location of the main axle hole. Note that there is a smaller hole
directly above the axle. Do not mark this yet as this will be done
after the wheel is mounted. The purpose of this hole is to mount
a smaller screw to hold the wheel pant in position.
Step 4. Drill the axle hole using a 5/32′′ drill bit. Trial fit the
wheel pant to the landing gear. It's helpful to drill a 1/8′′ pilot
hole first.
Step 5. Locate the two plywood square braces. These will be
mounted inside the wheel pant as a brace for the mounting
hardware. Using the landing gear as a template, mark the
plywood braces, one for the axle hole and one for the brace hole.
Use a 5/32′′ and 1/8′′ drill bit to drill out the holes. Use caution
to make sure you do not split the wood.
• Wheel pants
• 2-3/4′′ wheels (2)
• Main landing gear
• Hardware
• Medium Phillips screwdriver
• Drill bits: 5/32′′, 1/8′′
• Drill
• 12-minute epoxy
• Felt tipped pen or pencil
Parts Needed Tools and Adhesives Needed
Section 11: Assembling and Mounting
the Wheel Pants