30
Step 6. Mix up approximately 2 ounces of 12-minute epoxy.
Epoxy both plywood pieces to the wheel pant. Allow the epoxy to
cure completely.
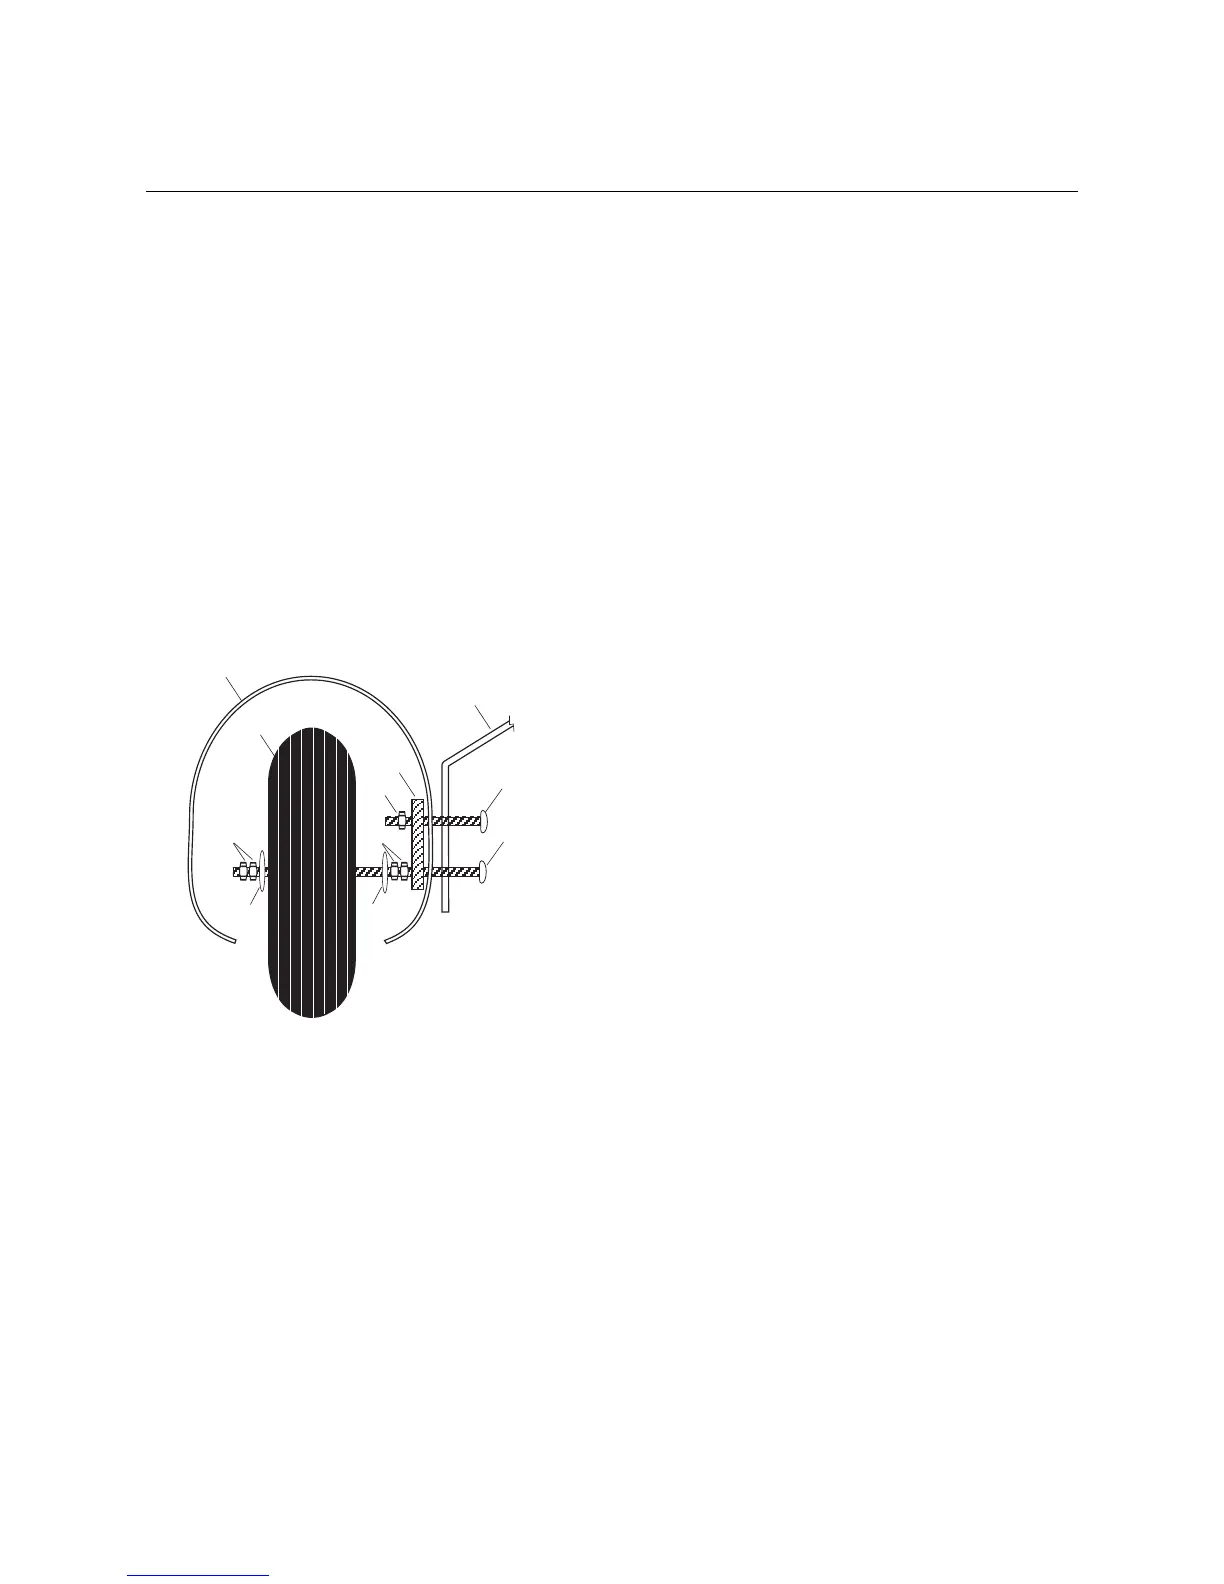
Step 7. Locate the wheel and axle hardware. Each axle will have
the axle bolt, two washers, and 4 nuts. The brace screw and nut
are also part of the mounting hardware.
Step 8. The axle bolt is inserted into the wheel pant, then two
bolts are threaded on. Slowly insert the bolt until you can thread
it through a washer and then the wheel. When the axle bolt
passes through the wheel, insert a washer and then two bolts.
The two bolts on either side of the axle provide a means of
centering the wheel, as well as retaining it on the axle inside the
wheel pant. If you need to adjust the center of the wheel more,
you can use more washers (not provided).
Step 9. Repeat the wheel mounting process for the other wheel
and wheel pant.
Step 10. After the wheels are mounted, you can now mark the
smaller wheel pant bolt hole on both wheel pants. Make sure the
wheel pants are parallel to the center line of the aircraft. Mount
using the small wheel pant bolts and nuts provided.
CONTINUED
Section 11: Assembling and Mounting
the Wheel Pants