19
Step 1. On the rear of the fuselage, slots are pre-cut in the wood
structure for the horizontal stabilizer and the vertical stabilizer.
You will need to trim away the covering with a sharp hobby knife.
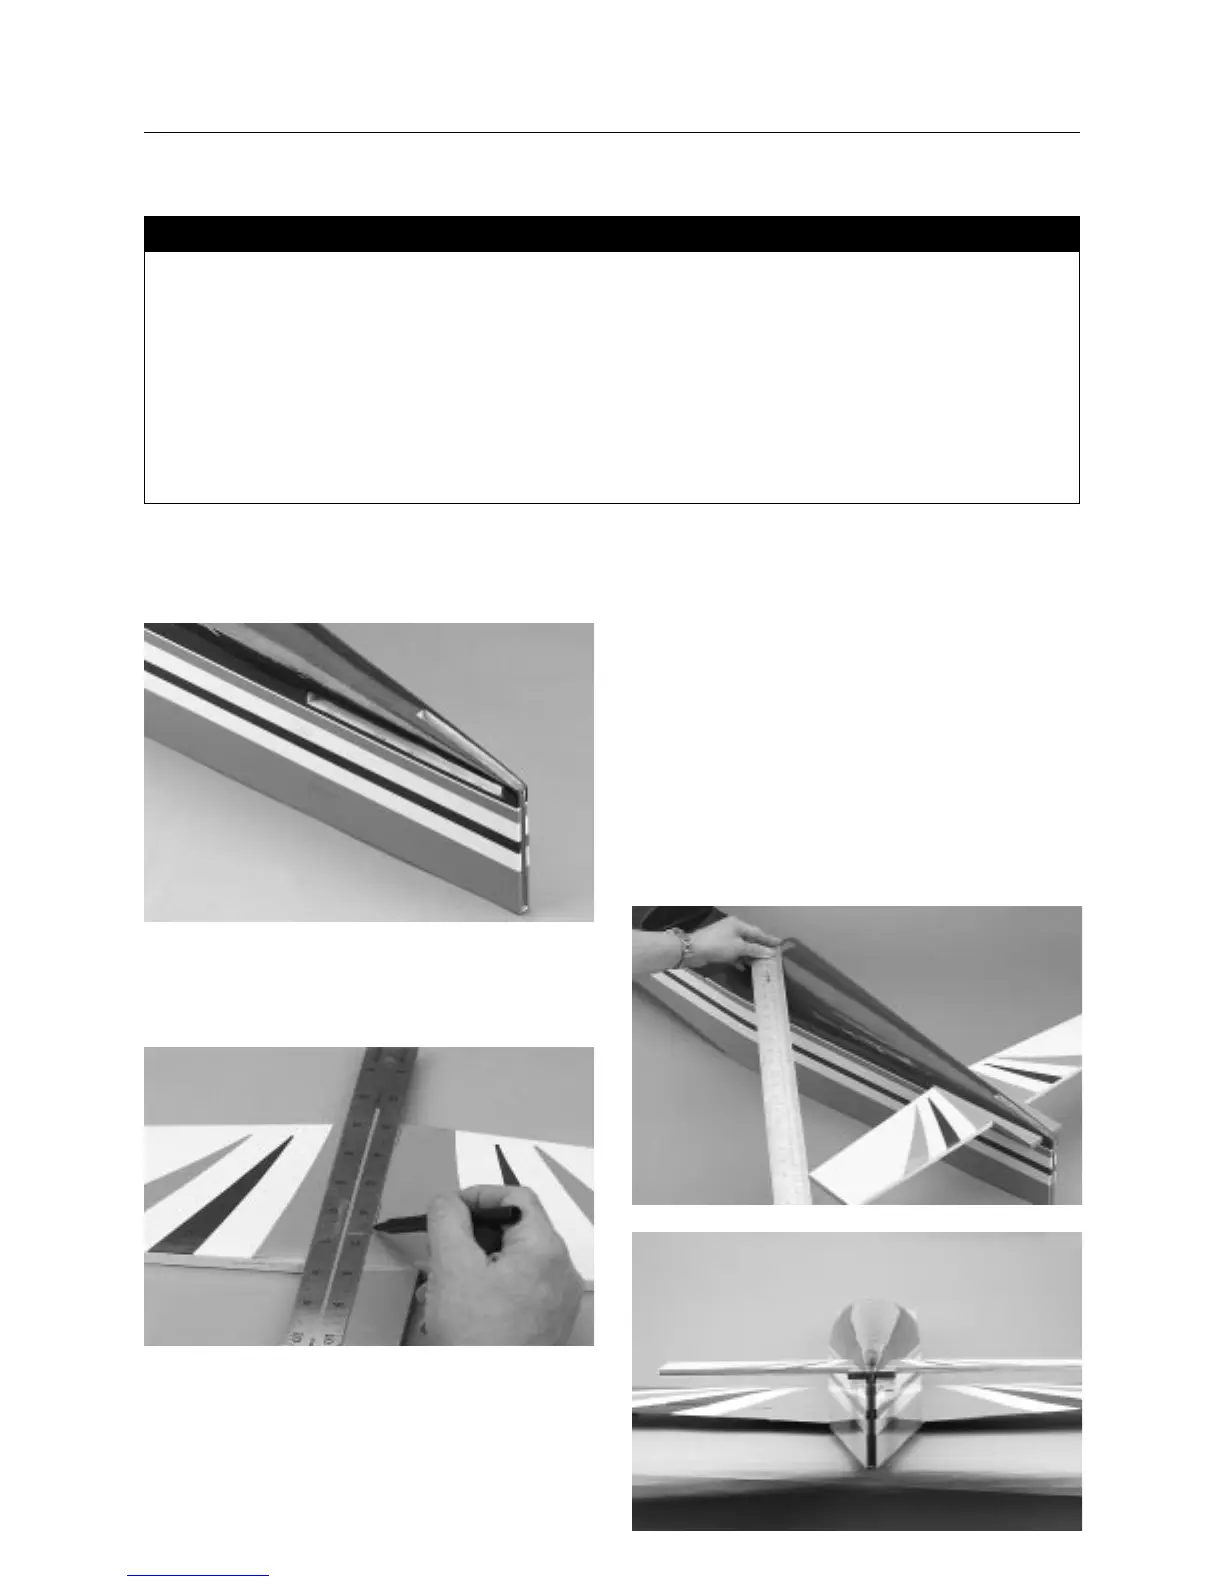
Step 2. We will begin with mounting the horizontal stabilizer
first. Remove the elevators and, using a ruler, locate the center
line of the horizontal stabilizer. This line will serve as a reference
line when installing the horizontal stabilizer on the fuselage.
Step 3. Slide the horizontal stabilizer carefully into the slot
provided in the fuselage. You may have to trim the opening to
allow the horizontal stabilizer to be inserted. By noting the center
line you marked, position the horizontal stabilizer so that it’s
centered in the fuselage.
Step 4. Locate the center line of the fuselage and put a reference
mark there. Then, using a long straight edge, measure from the
reference point on the fuselage to the tip of the horizontal
stabilizer. Adjust the stabilizer position until both right and left
measurements are the same.
Now you can install the wing and sight the horizontal stabilizer
alignment from the rear of the aircraft. Make sure the horizontal
stabilizer is level with reference to the wing.
• Fuselage
• Wing
• Horizontal stabilizer with elevators
• Vertical stabilizer with rudder
• Instant thin CA glue
• CA remover/debonder
• 30-minute epoxy
• Epoxy brush
• Hobby knife with #11 blade
• Straight edge
• Pencil
• Felt tipped pen
• Masking tape
Parts Needed Tools and Adhesives Needed
Section 6: Installing the Tail
• Rubbing alcohol
• Paper towels
• 90-degree triangle
• Ruler