24
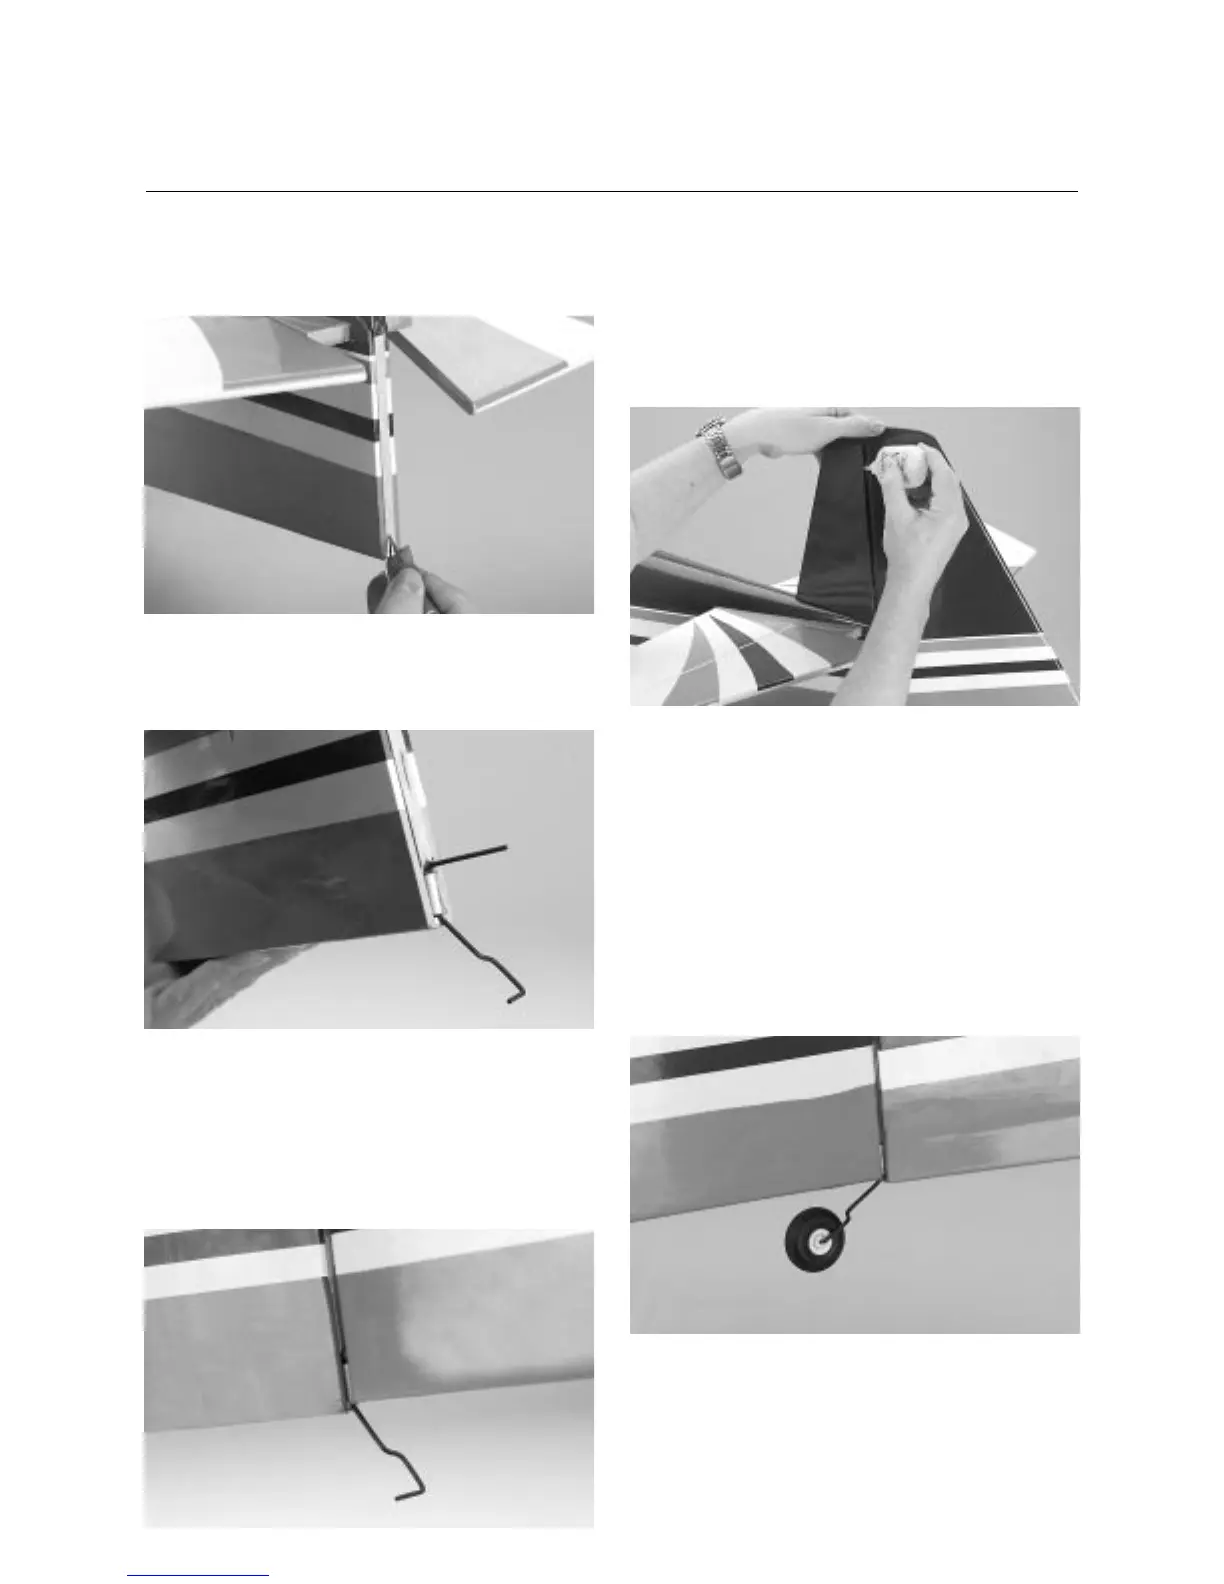
Step 5. Using a hobby knife, cut a slot or groove into the back
of the fuselage vertical stabilizer as marked to accept the tail
wheel pivot bushing.
Step 6. Trial fit the tail wheel assembly and rudder into place.
Deflect the rudder, making sure the tail wheel turns freely with
the rudder.
Step 7. When you're satisfied with the fit, disassemble the rudder
and tail wheel assembly. Mix up approximately 1/4 ounce of 30-
minute epoxy and apply it both to the pivot bushing where it goes
into the fuselage and to the hole in the rudder. With the hinges in
place, reassemble the tail wheel assembly and the rudder, wiping
away any excess epoxy with alcohol and a paper towel. Allow the
epoxy to cure completely before hinging the rudder.
Step 8. With the rudder aligned (up and down), apply thin CA
glue to the rudder hinges on both sides, using the same
technique learned in Section 1. Wipe away any excess CA with
CA remover/debonder. After the hinges are dry, check to be sure
they are securely in place by trying to pull the rudder from the
vertical stabilizer and fuselage. There should be a minimal gap
between the rudder and the vertical stabilizer.
Step 9. Work the rudder right and left. Check for free movement
and ensure that the tail wheel tracks accordingly.
Step 10. Once you're satisfied the tail wheel wire is correctly
aligned, slide the tail wheel itself onto the wire. Next, slide the
wheel collar onto the wire and tighten the screw in the wheel
collar. Use Blue Locktite 242 to secure the collar in place.
Note: The wheel must rotate freely with only a small amount
of side play. It may be necessary to drill out the tail
wheel slightly so the wheel will spin freely on the axle.
CONTINUED
Section 8: Hinging the Rudder and
Installing the Tail Wheel