38
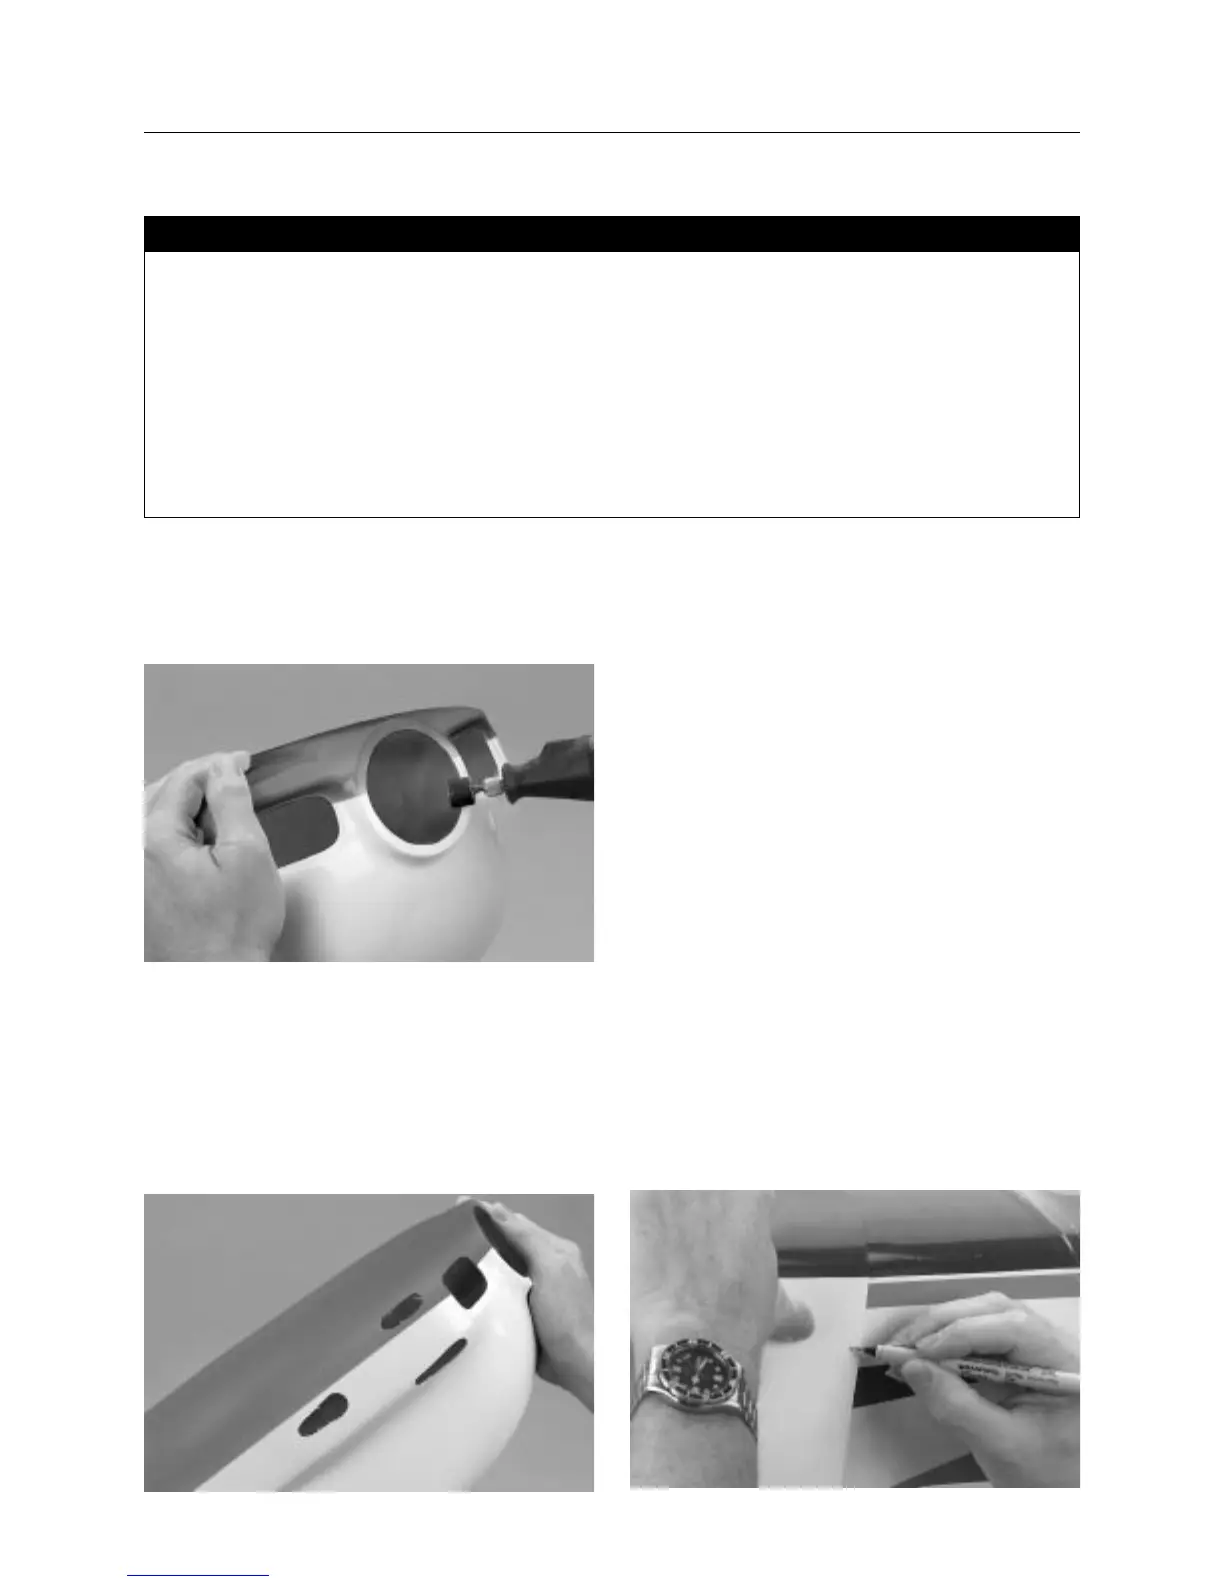
Step 1. Using a Moto-Tool, grind out the prop and cooling
openings in the front of cowl. Cut out the large “U” shape in the
bottom of the cowl so it will slide over the fuselage and landing
gear.
Step 2. Trial fit the cowl to your engine. Note those areas that
will have to be trimmed out, such as needle valve openings,
external fill openings, etc.
Step 3. Mark the locations with a felt tipped pen. For illustration
purposes we are showing the openings for the Saito 1.50
mounted in the CAP 232.
Step 4. Carefully cut out using a Moto-Tool.
Note: If you’re using another type of engine, it will be
necessary to carefully cut portions of the cowl that are
located differently from where we show with the
installation of the Saito 1.50.
Step 5. Slide the cowling onto the fuselage.
Note: It may be necessary to trial fit the cowl with and
without the engine muffler attached.
Step 6. Tape the cowl securely in position and check that it fits
correctly. There should be ample clearance (1/8′′ around the
engine and muffler). Also check that the prop hub is centered in
the opening of the cowl and that the prop hub extends at least
3/16′′ forward of the cowl. Locate the cowl hold-down screws so
there are two on either side of the cowl. Do not locate in a trim
area because the trim can be damaged as the screw is tightened
down. The blind nut location should be in the fuselage area, near
the bulkhead. Mark the four mounting holes with a felt tipped
pen.
Note: Be sure its cowl is pulled down tightly and held
securely prior to drilling a hole. a 1/16′′ drill bit is
used to drill the holes.
• Fiberglass cowling
• 4-40 button head screws (4)
• 4-40 blind nuts (4)
• Rubber grommets (4)
• Drill
• 1/16′′ drill bit
• Masking tape
• Moto-Tool with sanding drum
• Carbide cutter
• Sanding stick (medium/fine)
• Ruler
• Felt tipped pen
• Thick CA
• 1/16′′ hex wrench
Parts Needed Tools and Adhesives Needed
Section 16: Attaching the Cowling