32
CALIBRATION
Procedure
Note: If the tutorial mode is enabled, press Tutorial and follow the messages on the screen.
1. Remove the shield from the probe and rinse the probe with purified water.
2. Fill the calibration beaker 2/3 full with the first buffer solution.
3. Immerse the sensors in the buffer solution. Raise and lower the probe several times. Discard
the solution.
4. Fill the calibration beaker 2/3 full with the first buffer solution.
5. Slowly place the sensors in the selected buffer. Dislodge bubbles that may adhere to the sensors.
6. Screw the calibration beaker completely onto the probe body. Some solution may overflow.
7. Wait a few minutes for the measurement to stabilize.
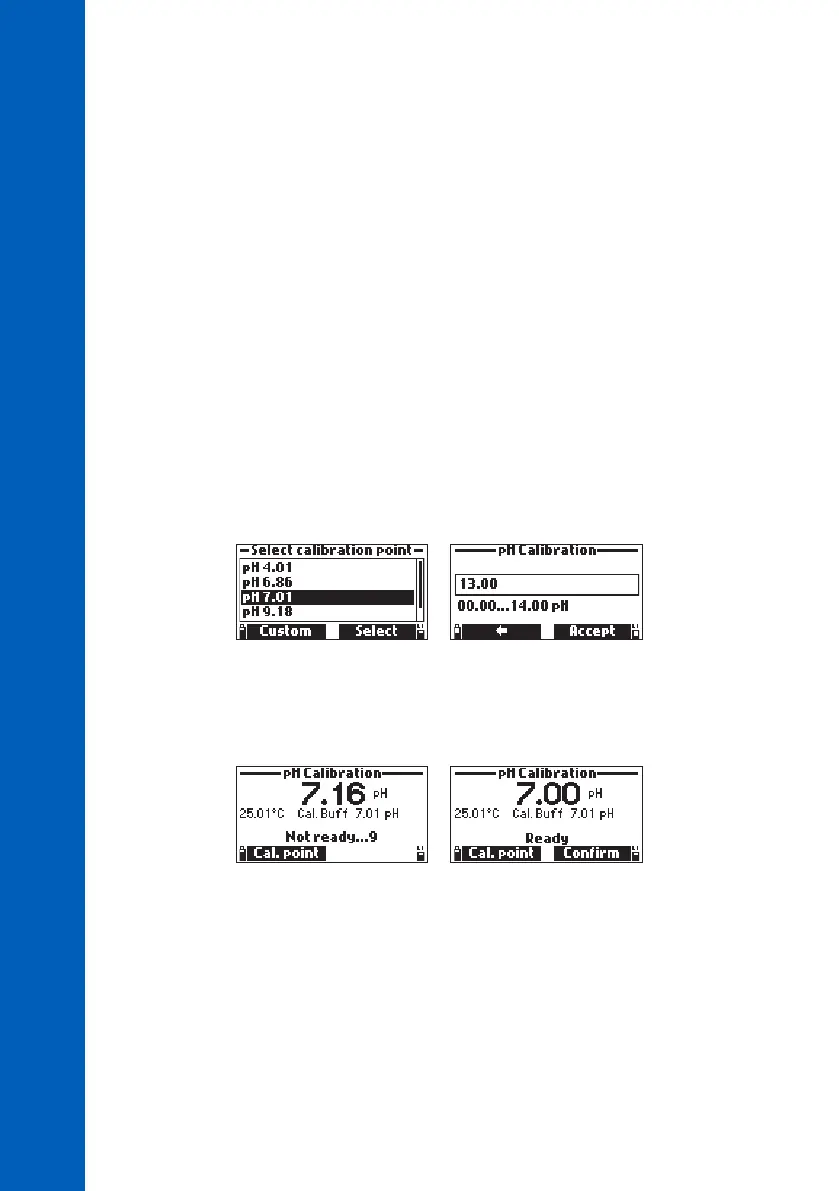
8. Use the arrow keys to select “Calibrate pH” and press Start to start the calibration. The
temperature, pH buffer value and the “Not ready” message are displayed.
9. If necessary, press Cal. point to select the correct buffer. To use a custom buffer, press Custom.
A text box window will appear. Use the keypad to enter the value of the buffer (0.00 to 14.00
pH) at the current temperature. Press Accept to confirm the buffer value.
10. Once the reading has stabilized the countdown timer will count down until the display shows
the “Ready” message.
11. Press Confirm to accept the calibration point.
12. After the calibration point is confirmed, to avoid cross-contamination, immerse the sensors in the
next calibration buffer rinse solution and stir gently.
13. Repeat the calibration procedure outlined above with the second and third buffers.
Note: To save a one or two-point calibration press the ESC key after the buffer is confirmed. The
message “Storing” followed by “Calibration completed” will be displayed.
 Loading...