17
STEP 7
Once the print head has heated up to the correct temperature, the following message appears on the display: “Push new lament
into the extruder entry until it is grabbed by extrusion mechanism.” feed the lament into the extruder until it is grabbed between the
knurled wheel and pressure bearing.
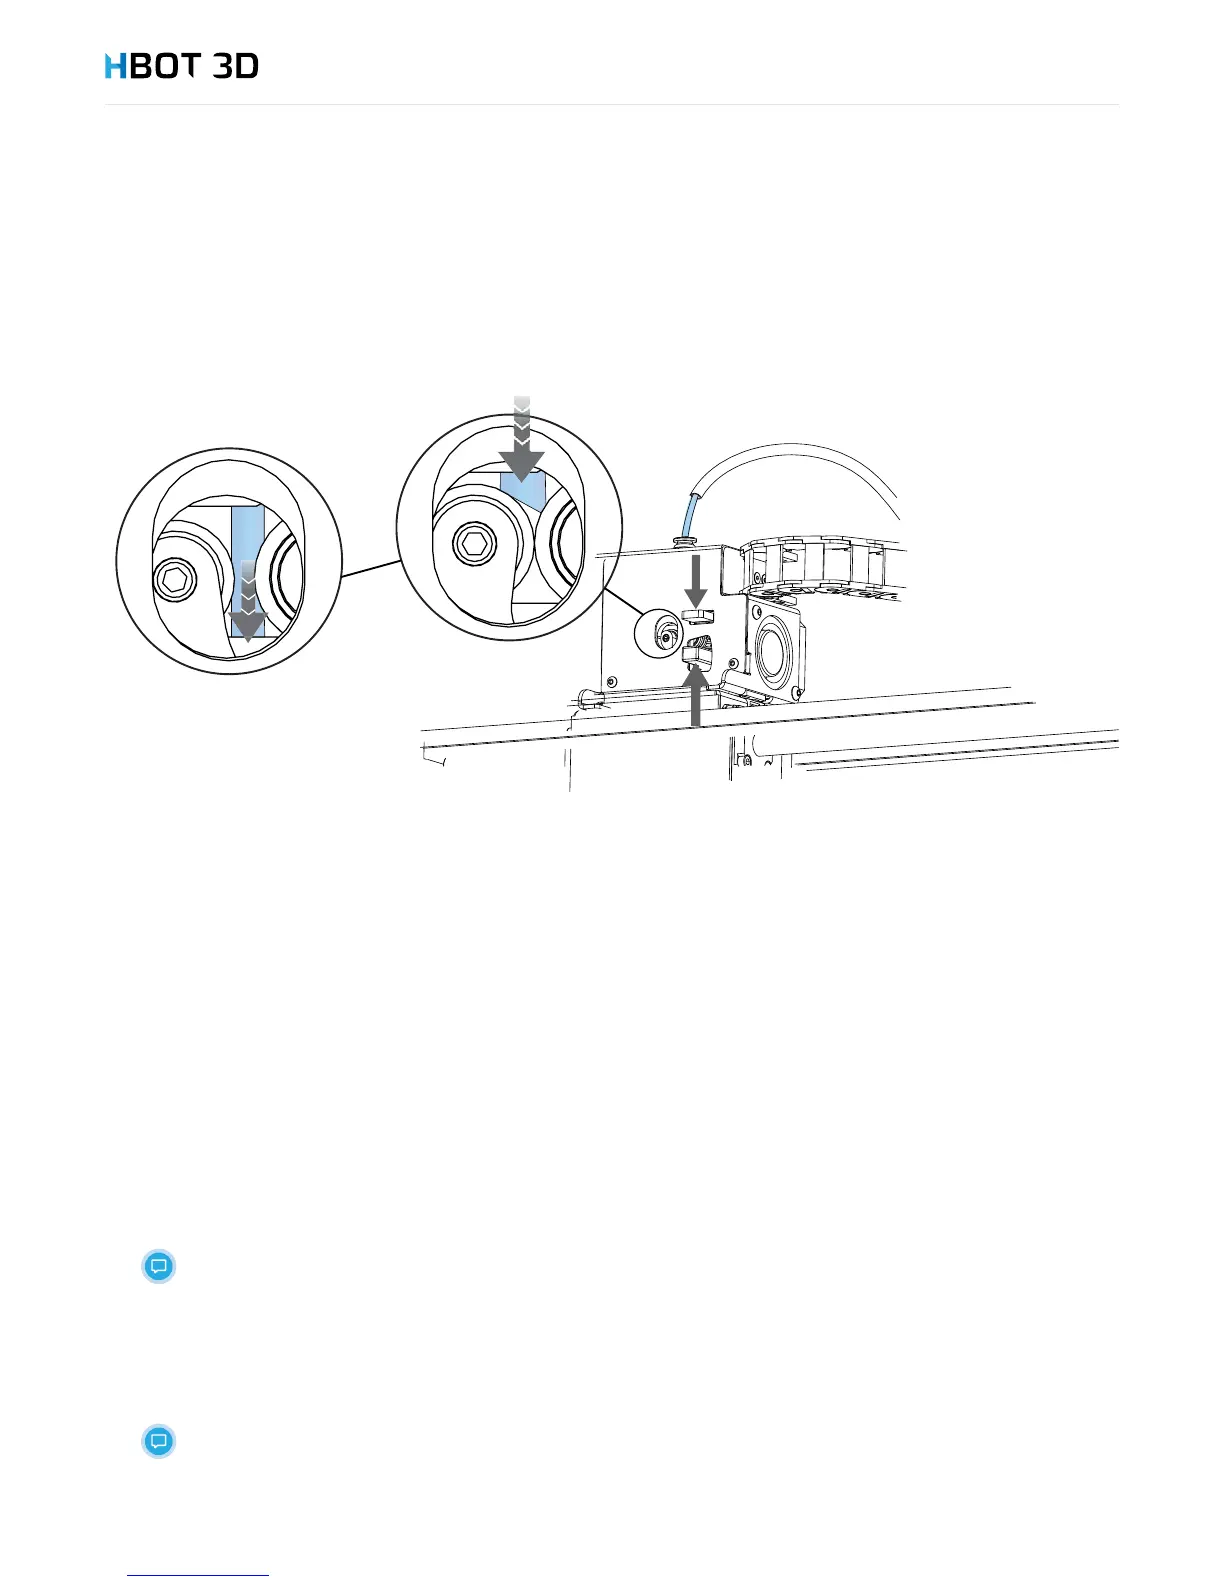
Once you feel resistance, open the pressure lever and push lament into the print head bushing.
STEP 8
Once the message “Is new lament extruded?” appears on the screen, keep selecting NO until a continuous lament thread exits the
print head. Conrm on the screen, by selecting YES.
STEP 9
By pressing the blue push-t connector collet, couple guide tube to extruder by sliding it inside.
Starting a print
STEP 1
Select the PRINT command from the control panel
STEP 2
Select the “test_print_PLA” option
STEP 3
The device starts operation from heating up the print head and the build table.
Monitor the start of the printing process.
Once the printing is nished, the message “Finished printing” appears on the screen and the printing time. Select the OK option.
Open the door and remove the build platform. Carefully remove the print using the scraper included in the kit
Be careful not to damage the print and the Kapton lm.
Clean Dimax adhesive and lament residues from the build platform.