16
STEP 3
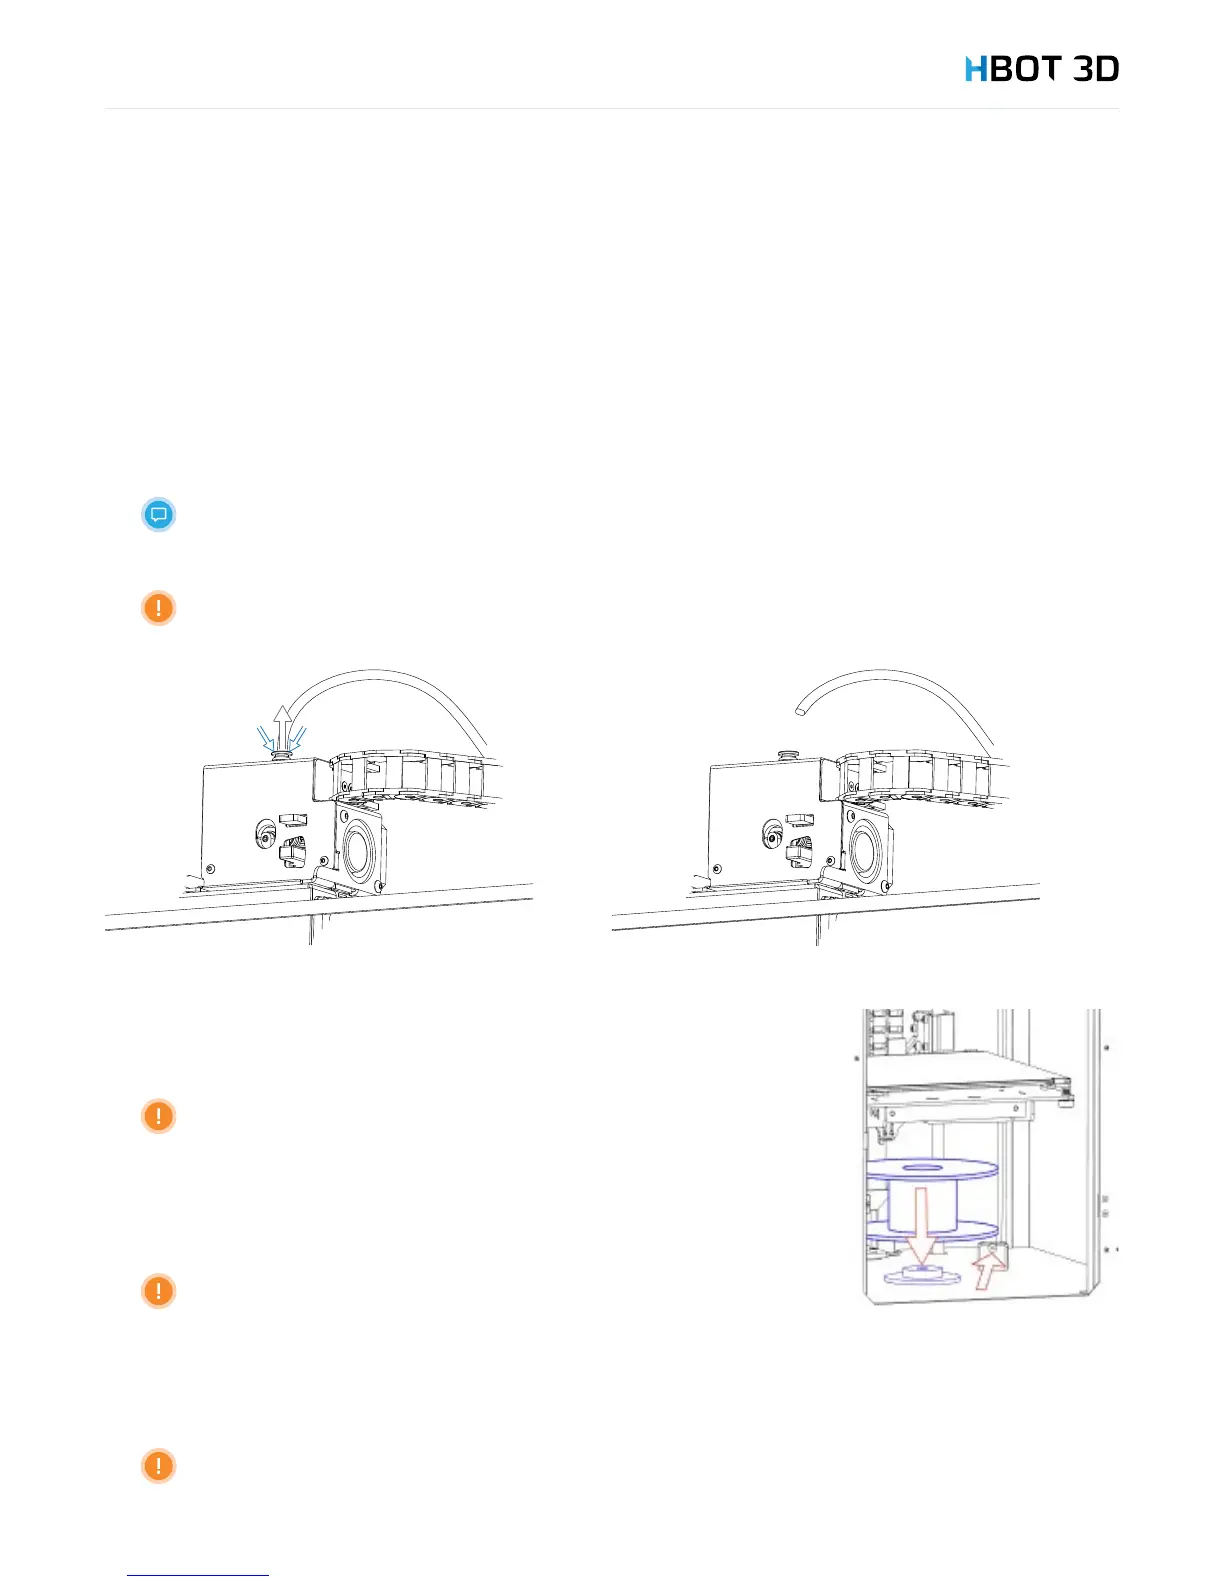
Once the carriage reaches the preset position, the message “Pull out bowden tube from extruder entry” is shown on the screen,
remove the Teon guide tube from extruder entry by pressing the push-t connector collet and conrm by selecting OK.
STEP 2
On the control panel select MATERIAL INSERT PLAOK in succession.
STEP 3
Once the carriage reaches the preset position, the message “Pull out bowden tube from extruder entry” is shown on the screen,
remove the Teon guide tube from extruder entry by pressing the push-t connector collet and conrm by selecting OK.
For easier access to the extruder, open the top door.
The Print Head starts to heat up. Do not touch!
STEP 4
Once the Build Table has reached the preset position, place the lament spool in the holder
located in the bottom of the working chamber, insert its end to the feeder.
Make sure to put the spool with the lament in the right direction, so that
the material is unwound in the counterclockwise direction and the spool can
move freely when feeding the lament.
STEP 5
Continue pushing the lament until its end appears on the other side of the feeder.
Do not allow lament coils to fall off the spool! The material may be
jammed in the feeder entry or material feed into the print head may be
interrupted!
STEP 6
Cut lament end with pliers (included) at an angle of ca. 45 degrees and gently straighten the lament core a bit.
Make sure that the lament end is not bent or torn. Otherwise the material may be jammed
in the print head!