USDE
Automation Instructions CPK • 10-2015 •106-29009
Installation
12
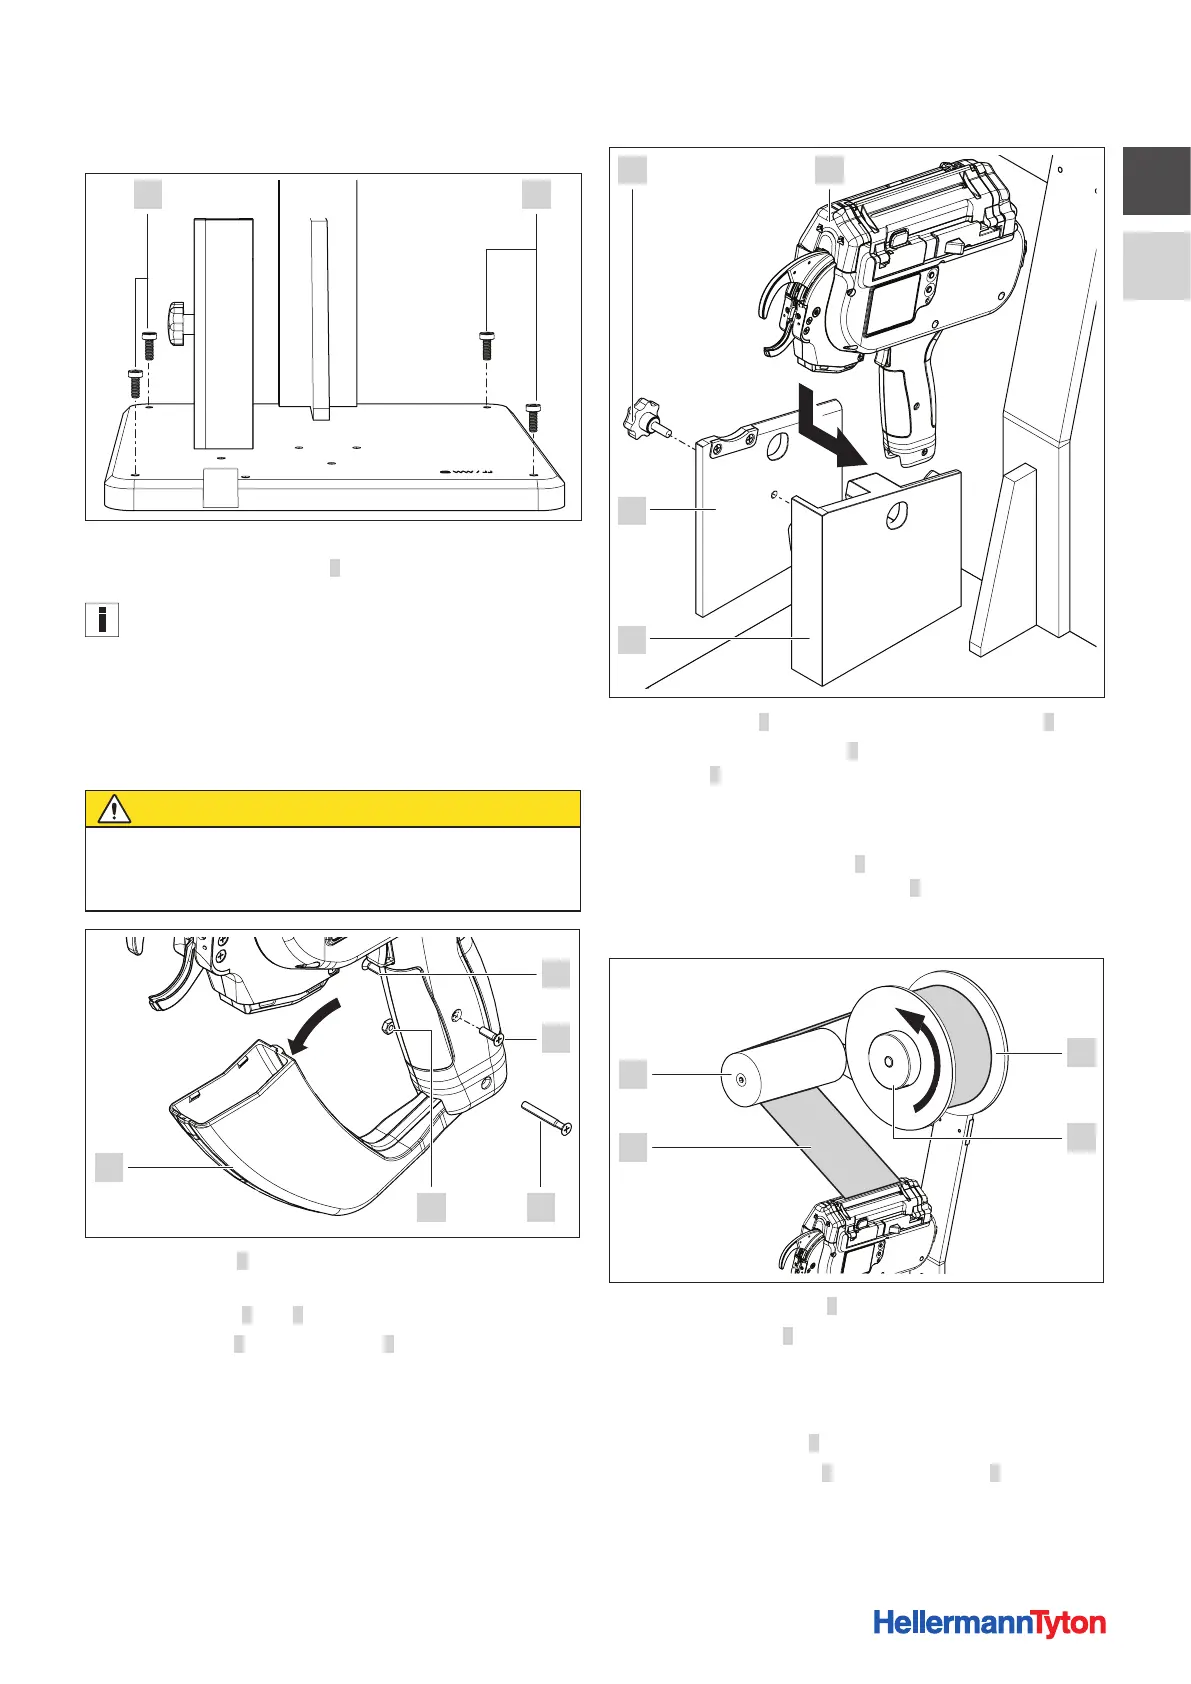
5.1.2 Securing the base plate
9 9
f Secure the base plate of the bench mount kit CPK to the
worktop with four screws 9.
The screws for securing the base plate are not included in the
scope of supply.
f When securing to a worktop, allow for the dimensions
of the bench mount kit CPK including the cable-tie reel,
à„Bench mount kit CPK“ on page25.
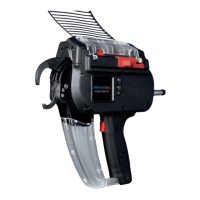
5.1.3 Inserting the tool
CAUTION
Crush hazard when jaws close.
f Always keep the power pack CPK switched OFF
while installation is in progress.
5
34
1
2
f Flip waste box 5 open in the direction indicated by the
arrow.
f Slacken screws 1 and 2 on both sides of the handle.
f Slacken screw 3 and remove nut 4.
f Ease the handle fully apart.
f Work the waste box down to remove.
f Close the two parts of the handle
f Install the screws.
9
8
6 7
f Slacken screw 6 and remove cover of tool mount 9.
f From the side, insert tool 7 with the handle into
housing8.
f Make sure that the handle of the tool is seated snugly.
; The tool is tilted back at an angle of 15°.
f Place cover of tool mount 9 in position and clamp the
tool into the housing with screw 6.
5.1.4 Inserting the cable-tie reel
1
2
4
3
f Remove clamping ring 2.
f Slip cable-tie reel 1 on to the reel mount. Be sure to
check that the reel is installed in correct position for
uncoiling.
; The reel uncoils in the counter-clockwise direction.
f Install clamping ring 2.
f Pass strip of cable ties 3 around relay roller 4 to the tool.
f Make sure that the strip of cable ties is not twisted.