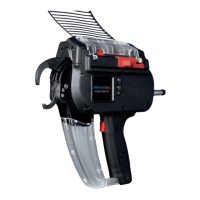
USDE
Automation Instructions CPK • 10-2015 •106-29009
Installation
17
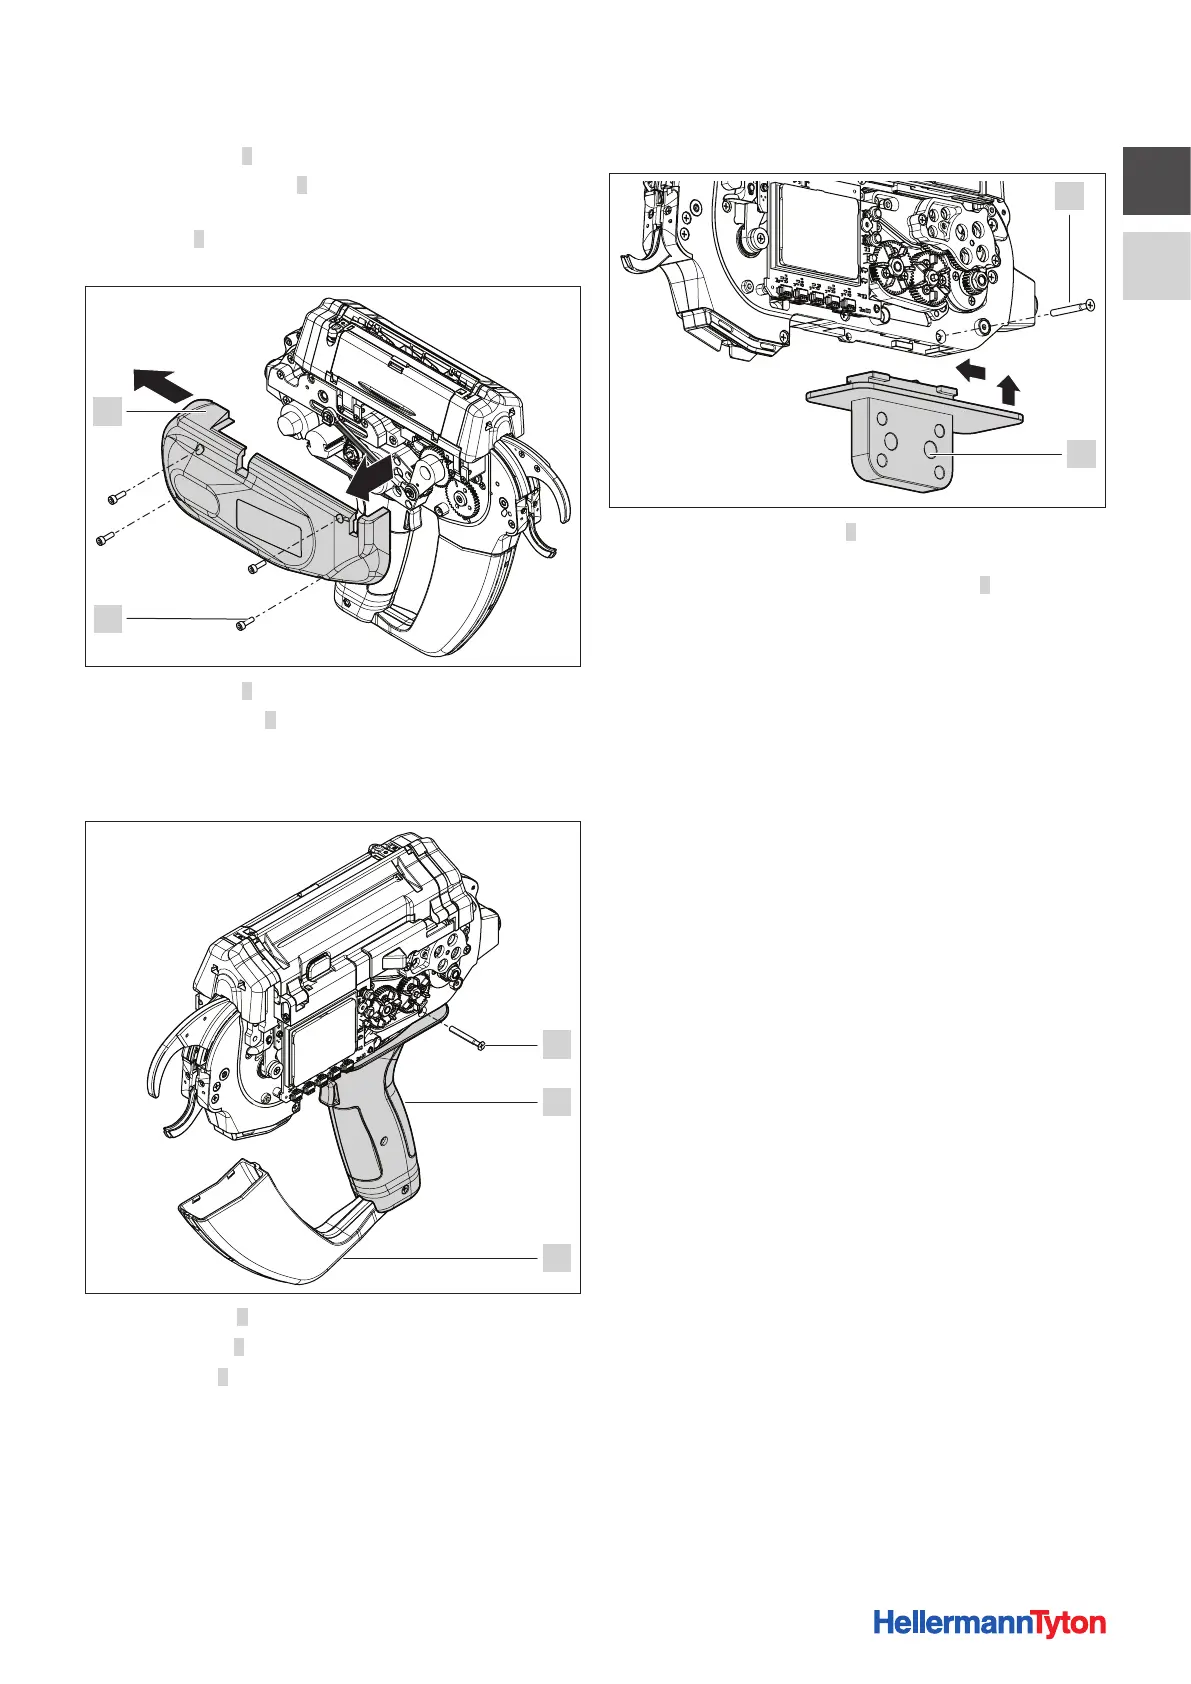
f Slacken screws 2.
f Lift left housing cover 1 slightly at the front, ease it
toward the rear and remove.
f Turn tool 3 over and carefully lay it open side down on
the soft work surface.
4
5
f Slacken screws 4.
f Lift housing cover 5 slightly at the front, ease it toward
the rear and remove.
f Turn the tool over and carefully lay it open side down on
the soft work surface.
6
7
8
f Flip waste box 8 down to open.
f Slacken screw 6.
f Ease handle 7 to the rear and work it down to remove.
5.3.2 Inserting the robot adapter CPK
6
9
f Insert robot adapter CPK 9 into the groove in the tool
and slide it forward.
f Secure the robot adapter CPK with screw 6.
f Install the housing covers of the tool on both sides and
tighten the screws to secure.
f Install the tool with the robot adapter CPK and connect
them to the power pack with control box.
f Make sure that all the wiring is free of kinks.
5.3.3 Disposing of waste material
f Ensure suitable disposal of waste material so that
even when the tool is at an extreme angle the cut
offs can drop out of the tool.