USDE
Automation Instructions CPK • 10-2015 •106-29009
Installation
16
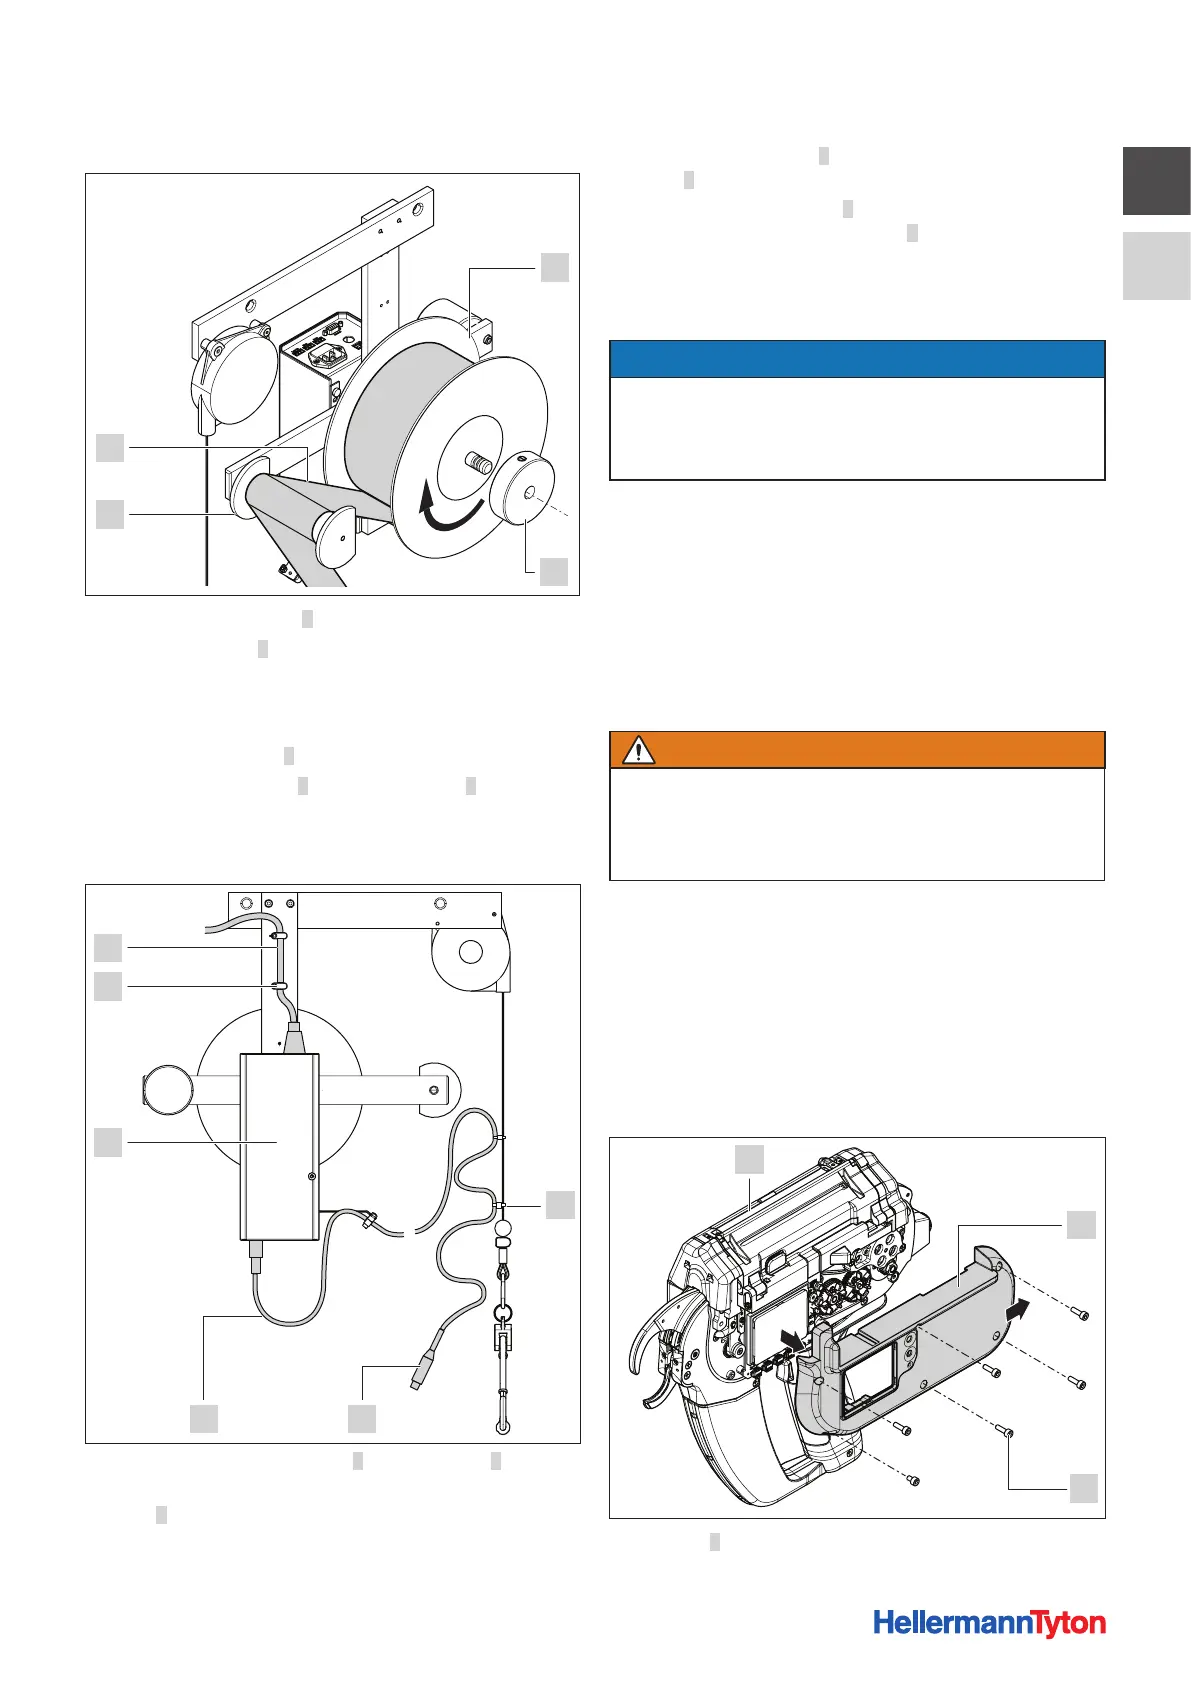
5.2.4 Inserting the cable-tie reel
1
2
4
3
f Remove clamping ring 2.
f Slip cable-tie reel 1 on to the reel mount. Be sure to
check that the reel is installed in correct position for
uncoiling.
; The reel uncoils in the counter-clockwise direction.
f Install clamping ring 2.
f Pass strip of cable ties 4 around relay roller 3 to the tool.
f Make sure that the strip of cable ties is not twisted.
5.2.5 Connecting the tool
3 2
1
6
5
4
f Connect power-supply cable 6 to power pack 4.
f Secure the power-supply cable to the upright with
clips5.
f Make sure that all the wiring is free of kinks.
f Use connecting cable 3 to connect the tool to power
pack 4 (see the Operating Instructions for the tool).
f Secure connecting cable 3 along the overhead
suspension of the tool with clips 1 .
f Make sure that there is nothing to obstruct accessibility
to the tool, the power pack with control box and the
cable-tie reel.
NOTE
The connecting cable between tool and power pack with
control box has to be loosely secured to the overhead
suspension of the tool to compensate for movements of
the overhead suspension.
5.2.6 Disposing of waste material
The waste material drops into the waste box of the tool.
f Empty the waste box at regular intervals (see the
Operating Instructions for the tool).
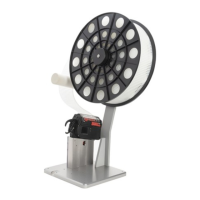
5.3 Installing the robot adapter CPK
Safety
WARNING
Electrically live parts
Electric shock hazard
f Before opening the tool, switch off the power pack
and disconnect the line plug from the power supply.
Tools needed
• Phillips screwdriver, PH0
5.3.1 Preparing the tool
The tool's handle has to be removed and the robot adapter
CPK installed in its place in order for the tool to be secured
firmly to a robot.
For sizes and weight, à„Robot adapter CPK“ on
page28.
2
3
1
f Lay tool 3 on a soft work surface.