14
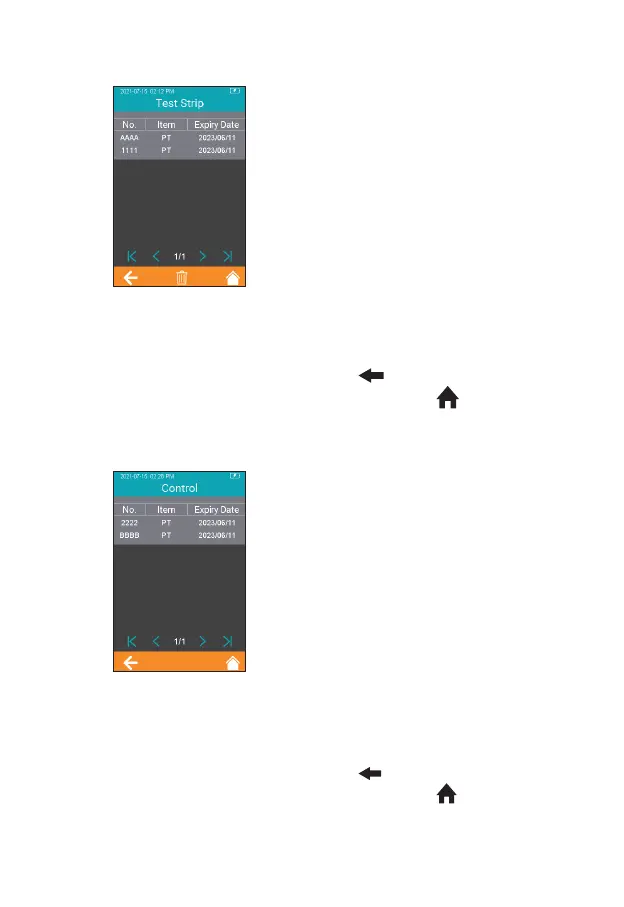
Click “Test Strip” from Codechip
menu (Figure 2-8) to enter Test Strip
menu (Figure 2-9). The Codechip
information of the installed strip is
displayed in this menu. A new strip
Codechip can also be installed by
inserting the strip Codechip into the
Codechip slot (See the right gure in
Section 2 Product Overview). Please
make sure the side with the arrow
is facing up and the Codechip is
inserted completely. If the Codechip
has not been installed, the Codechip
should be manually entered into the
analyzer and displayed in the list.
Click " " to return to the previous
screen and click " " to return to
the main menu.
Click “Control” from Codechip
menu (Figure 2-8) to enter Control
menu (Figure 2-10). The Codechip
information of the installed control
is then displayed in this menu. A
new control Codechip can also be
installed by inserting the control
Codechip into the Codechip slot
(See the right gure on Section 2
Product Overview). Please make
sure the side with the arrow is facing
up and the Codechip is inserted
completely. If the Codechip has
not been installed, the Codechip
should be manually entered into the
analyzer and displayed in the list.
Click " " to return to the previous
screen and click " " to return to
the main menu.
2-9
2-10