AB1101en_SARev.: 03 / 11.2023
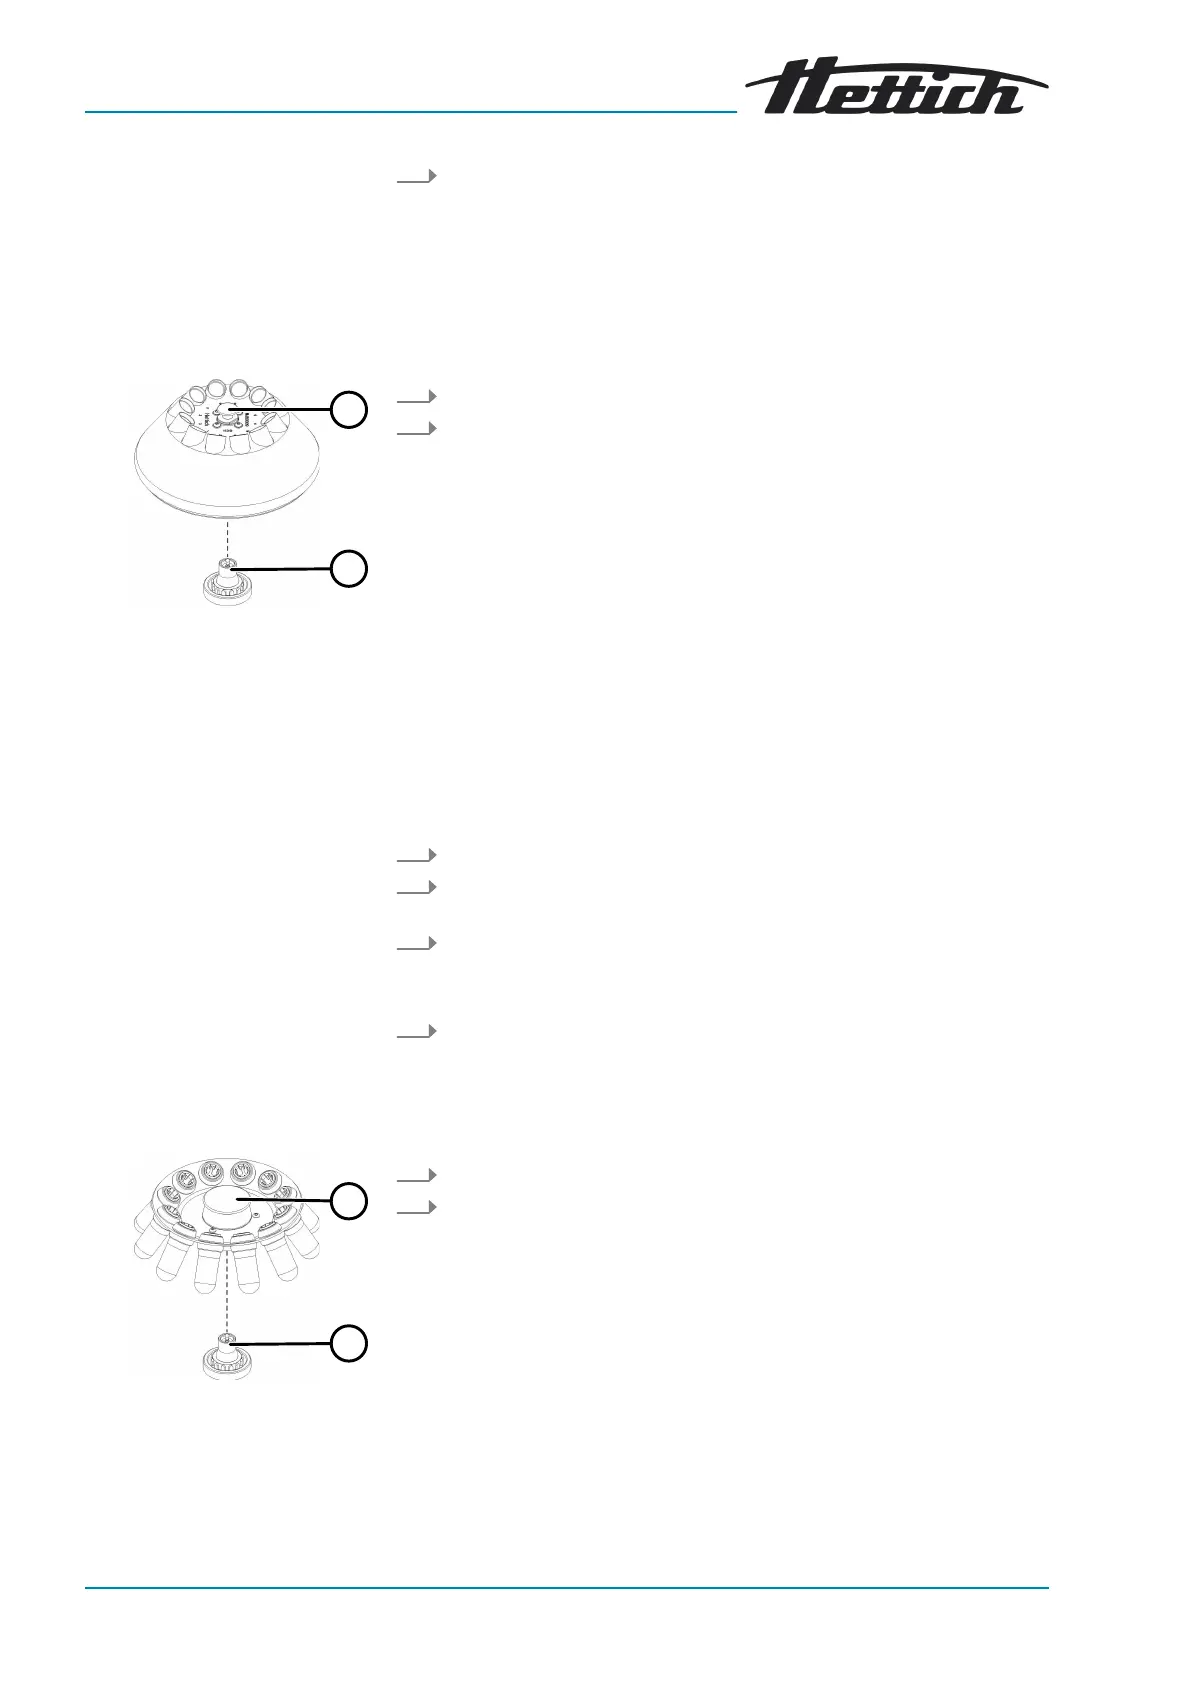
Removing a rotor with a
release knob
Fig. 18: Rotor installation and
removal
1 Release knob
2 Motor shaft
Installing a rotor with a release
knob
Removing a rotor without a
release knob
Fig. 19: Rotor installation and
removal
1 Handle
2 Motor shaft
Close the lid and press the front edge of the lid down gently.
🡆 The lid locks using a motor.
The
‘Lid locked’
indicator appears.
6.2 Removing and installing the rotor
Personnel:
■
Trained user
1. Open the lid.
2. Pull the release knob (
1
) up, hold it and lift the rotor off the motor
shaft (
2
).
Personnel:
■
Trained user
The lid is open.
1.
Clean the motor shaft (
2
) and rotor hole.
2.
Lightly grease the motor shaft (
2
), see ⮫
Chapter 8 ‘Cleaning and
care’ on page 35
.
3.
Lift the rotor by the release knob (
1
) and place it vertically on the
motor shaft (
2
).
🡆 The rotor engages automatically on the motor shaft.
4.
Check that the rotor is rmly seated by holding the rotor on the left
and right and pulling up gently.
Personnel:
■ Trained user
1. Open the lid.
2. Hold the rotor by the handle (
1
) and lift it off the motor shaft (
2
).