CHAPTER 2
Setup and Configuration
Studio Command Series User Manual 11
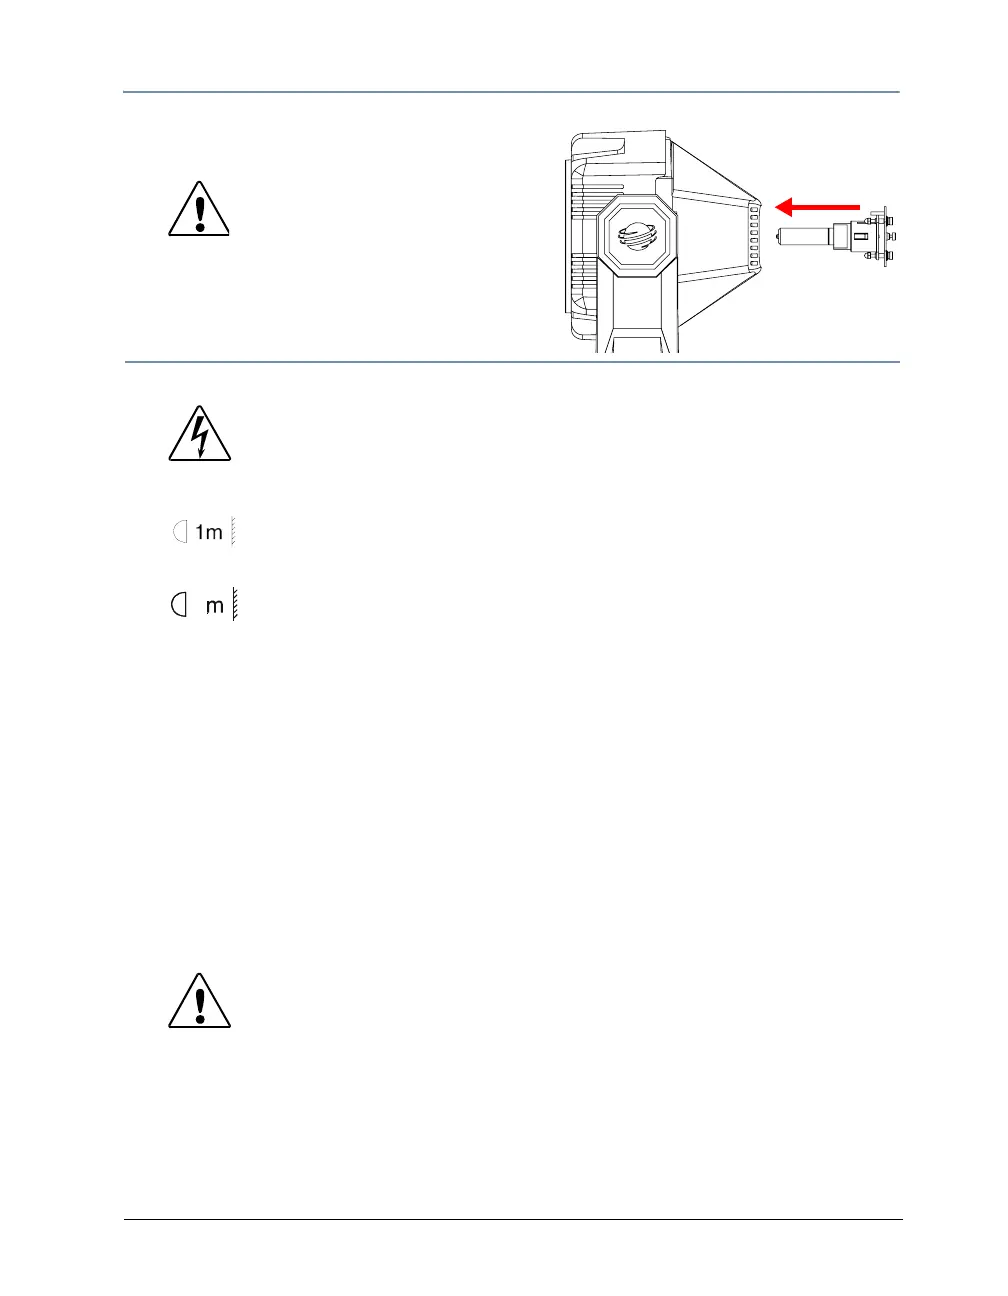
4. Insert the lamp assembly straight into the fixture
and re-tighten the lamp cover screws.
C
Caution: Make sure the lamp
socket wires are not
wrapped around the
lamp or crimped while
reinserting the lamp
assembly
Mounting the Fixture
Warnings: Equipment suitable for dry locations only. Do not expose
this equipment to rain or moisture.
Do not mount on a flammable surface.
Use a secondary safety cable when mounting this fixture.
Maintain a minimum distance of 1 m (3.28 ft.) from
combustible materials.
2
Maintain a minimum distance of 2 m (6.56 ft.) from lighted
object. This means the fixture must be positioned at least 2
meters away from the object it is illuminating.
You can mount Studio Command fixtures either upright (on the fixture’s base) or in any
orientation suspended from a support system (such as a truss). Follow the instructions below for
the mounting orientation you choose.
Mounting the Fixture Upright
To mount the fixture upright, make sure that all four rubber feet are installed on the fixture’s
base and place the fixture on a sturdy, stable surface.
If the surface is above floor height, use safety cables to secure the fixture to the surface. Install
the safety cable(s) by looping the cables around a support on the surface, through the side
holes in the fixture’s base, and around the fixture’s handles. Make sure the support and cables
can support the weight of the fixture 1200/700 Model - 24.9 kg (55 lbs) H Model - 21.7 kg (48
lb).
Mounting the Fixture on a Truss
You will need:
• truss or other support system
• safety cables (2)
•clamps (2)
Caution: Do not mount the fixture upright without the four
rubber feet installed.