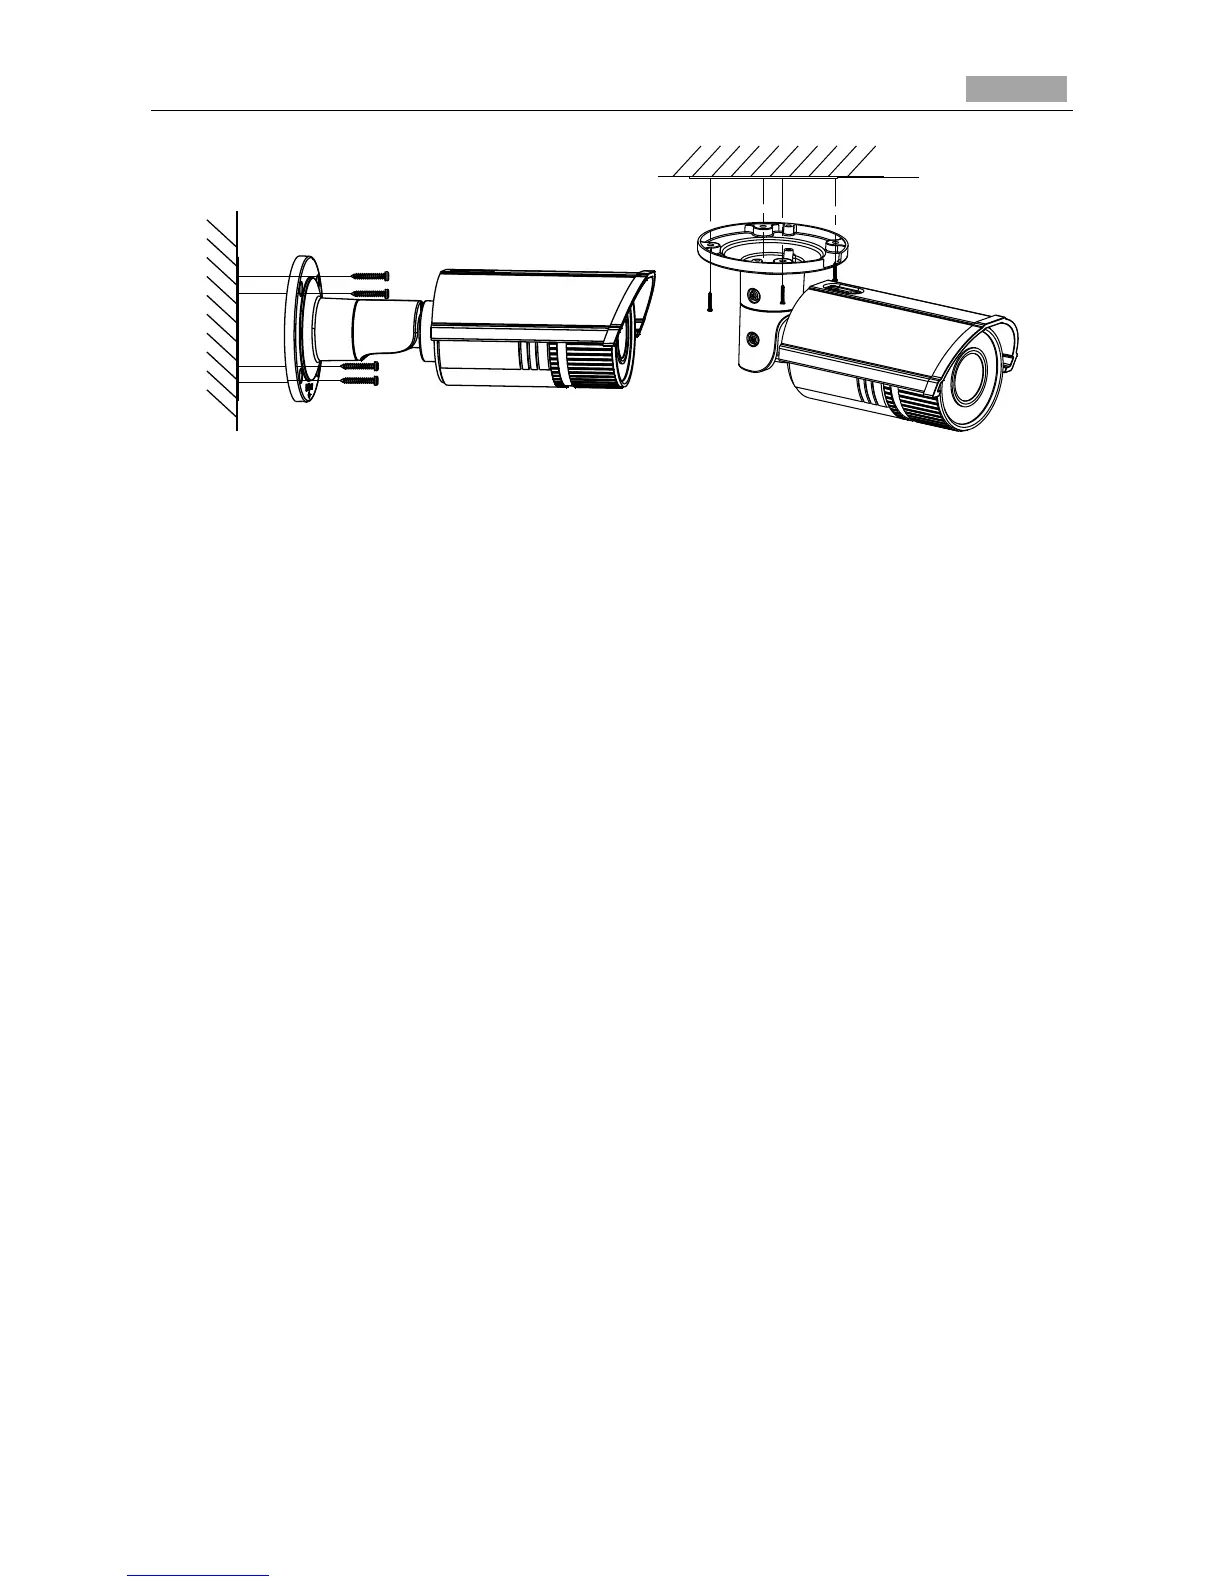
Figure 4-29 Secure the Camera
Wall Mounting with a Junction Box
Before you start:
For mounting with a junction box, you have to purchase a junction box.
Steps:
1. Attach the drill template (supplied) to the wall where the camera is to be mounted.
2. Drill holes in the wall according to the No.2 holes of the drill template. Refer to the Figure 4-28.
3. If you need to route cables through the wall (or ceiling), cut a cable hole according to the drill
template. Skip this step, if you want to route the cables on the surface of the ceiling.
4. Secure the junction box to the wall with expansion screws.
5. Route the cables of the camera.
6. Connect the video output connector to the monitor. Connect the power connector to the power
supply.
7. Adjust the image and focus. Please refer to Zoom and Focus Adjusting for more detailed
information.
8. Hook the camera to the junction box with the safety rope. Refer to the Figure 4-30.
9. Secure the camera to the junction box with screws.
 Loading...