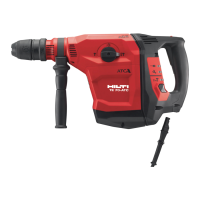
*2244433*
2244433 English 7
5 Operation
5.1 Preparations at the workplace
CAUTION
Risk of injury! Inadvertent starting of the product.
▶ Unplug the supply cord before making adjustments to the power tool or before changing accessories.
Observe the safety instructions and warnings in this documentation and on the product.
5.1.1 Connecting the detachable supply cord
CAUTION
Risk of injury! Due to leakage current as a result of dirty contacts.
▶ Connect the detachable electric connector to the electric tool only when it is clean and dry and when the
supply cord is unplugged from the power outlet.
1. Push the keyed, detachable electric plug connector into the tool as far as it will go, until it is heard to
engage.
2. Plug the supply cord into the power outlet.
5.1.2 Disconnecting the detachable supply cord
1. Unplug the supply cord from the power outlet.
2. Press the release button and pull the keyed, detachable electric plug connector out of the socket.
3. Pull the supply cord connector out of the power tool.
5.1.3 Fitting the side handle 2
CAUTION
Risk of injury! Loss of control over the combihammer.
▶ Check that the side handle is fitted correctly and tightened securely. Check that the clamping band is
engaged in the groove provided on the tool.
1. Release the side handle clamping band by turning the handle grip.
2. Slide the side handle clamping band over the chuck from the front and into the recess provided.
3. Set the side handle to the desired position.
4. Tighten the side handle clamping band by turning the handle grip.
5.1.4 Fitting the depth gauge (optional) 3
1. Release the side handle clamping band by turning the handle grip.
2. Slide the depth gauge from the front into the 2 guide holes provided.
3. Tighten the side handle clamping band by turning the handle grip.
5.1.5 Control switch lock
When chiseling, the control switch can be locked in the “on” position.
▶ Press the control switch lock.
5.1.6 Inserting the tool 4
The use of unsuitable grease can cause damage to the product. Use only genuine Hilti grease.
1. Lightly grease the connection end of the accessory tool.
▶ Use only genuine Hilti grease. Using the wrong grease can result in damage to the product.
2. Push the accessory tool into the chuck as far as it will go (until it engages).
3. After fitting the accessory tool, grip it and pull it in order to check that it is securely engaged.
▶ The product is ready for use.

 Loading...