A99UE13-1304
26
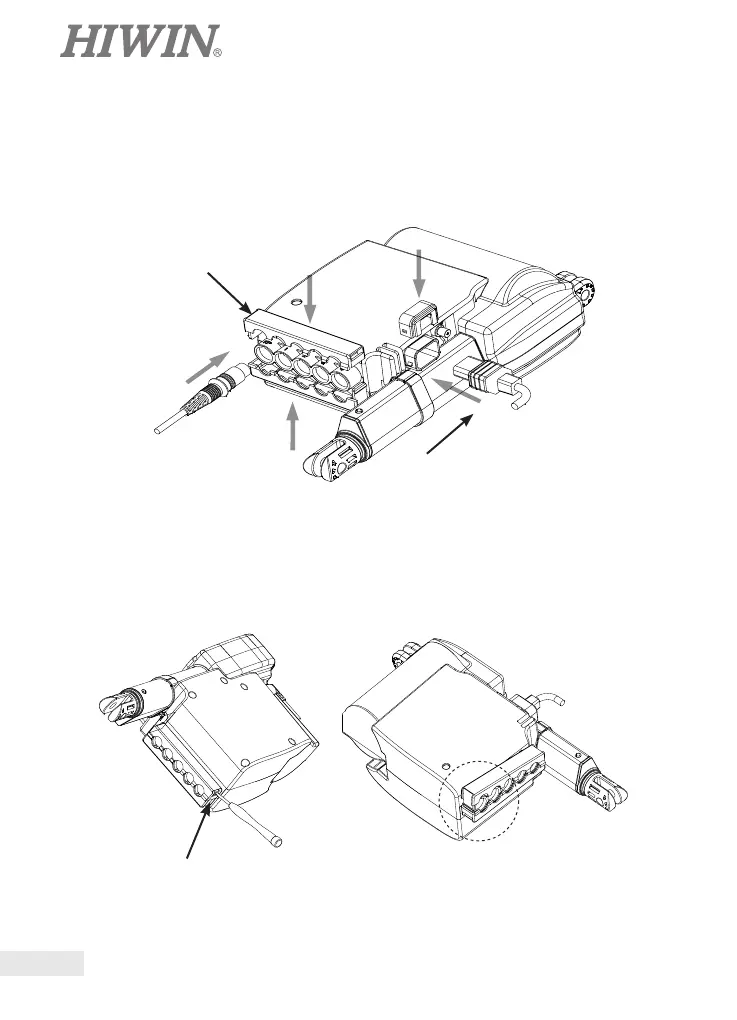
4.2 Installation of LAK4D Fixer: After inserting connectors of an actuator and a key
box,vertically insert back the xer on LAK4D controller (A) , and then fasten
the up xer and down xer on LAK4D controller (Fig. 3). Before inserting the
main power cord,rotate out the locker (B) along the arrow direction to insert
power cord (Fig. 3) and then pull it back (Fig. 3) along the arrow direction.
4.3 Release of LAK4D Fixer:
4.3.1 One side of the xer can be released (Fig. 5) by strongly pressing both sides
of the xer on LAK4D controller (Fig. 4).
A
Fig. 3
B
Fig. 4
Fig. 5
C
 Loading...