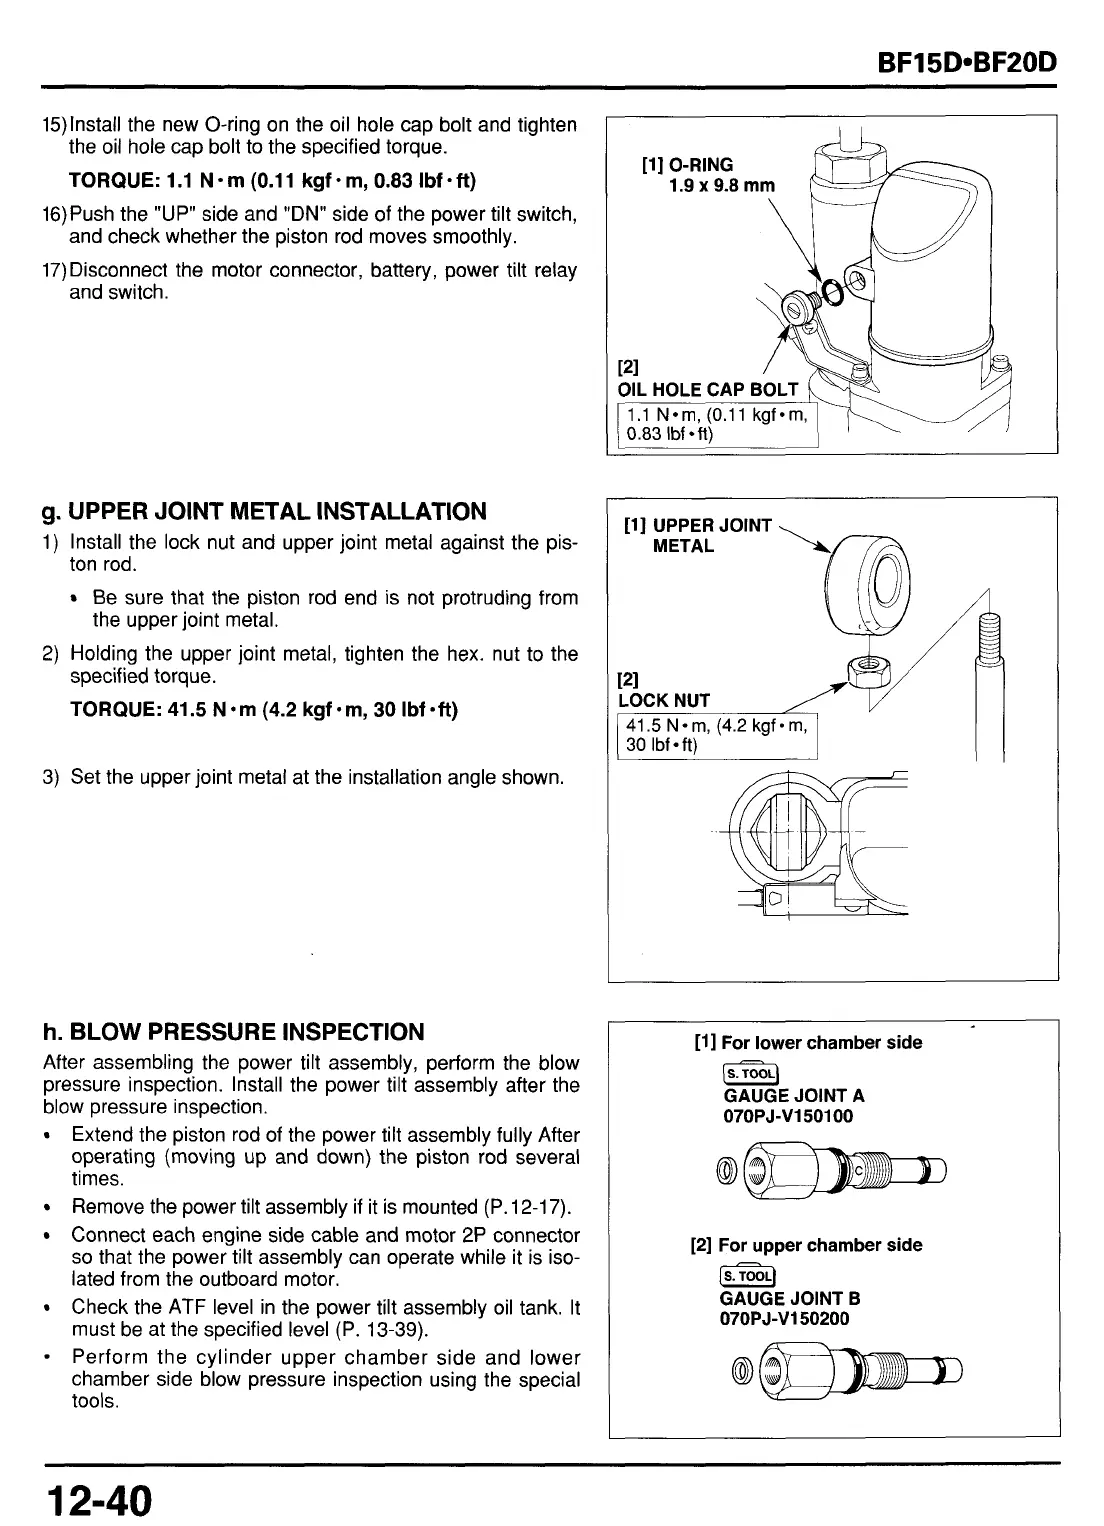
15)lnstall the new O-ring on the oil hole cap bolt and tighten
the oil hole cap bolt to the specified torque.
TORQUE:
1.1
N-m
(0.11
kgf-m,
0.83
Ibf-ft)
and check whether the piston rod moves smoothly.
and switch.
16)Push the "UP" side and
"DN"
side of the power tilt switch,
17)
Disconnect the motor connector, battery, power tilt relay
g.
UPPER JOINT METAL INSTALLATION
1)
Install the lock nut and upper joint metal against the pis-
ton rod.
Be sure that the piston rod end is not protruding from
the upper joint metal.
2)
Holding the upper joint metal, tighten the hex. nut to the
specified torque.
TORQUE:
41.5
N*m
(4.2
kgf-m,
30
Ibf-ft)
h.
BLOW
PRESSURE INSPECTION
After assembling the power tilt assembly, perform the blow
pressure inspection. Install the power tilt assembly after the
blow pressure inspection.
Extend the piston rod of the power tilt assembly fully After
operating (moving up and down) the piston rod several
times.
Remove the power tilt assembly if it is mounted (P.
12-1
7).
Connect each engine side cable and motor
2P
connector
so
that the power tilt assembly can operate while it is iso-
lated from the outboard motor.
Check the
ATF
level in the power tilt assembly oil tank. It
must be at the specified level (P.
13-39).
0
Perform the cylinder upper chamber side and lower
chamber side blow pressure inspection using the special
tools.
[l] O-RING
1.9 x9.8
mm
r21
OIL
HOLE
CAP
3)
Set the upper joint metal at the installation angle shown.
I
II
[ll
For lower chamber side
GAUGE JOINT
A
07OPJ-V150100
[2]
For upper chamber side
[TOOJ
GAUGE JOINT
B
07OPJ-V150200
12140



 To Next Page