BF15DoBF20D
BLOW PRESSURE
(Upper chamber side)
UPPER
CHAMBER
BLOW
PRESSURE
1)
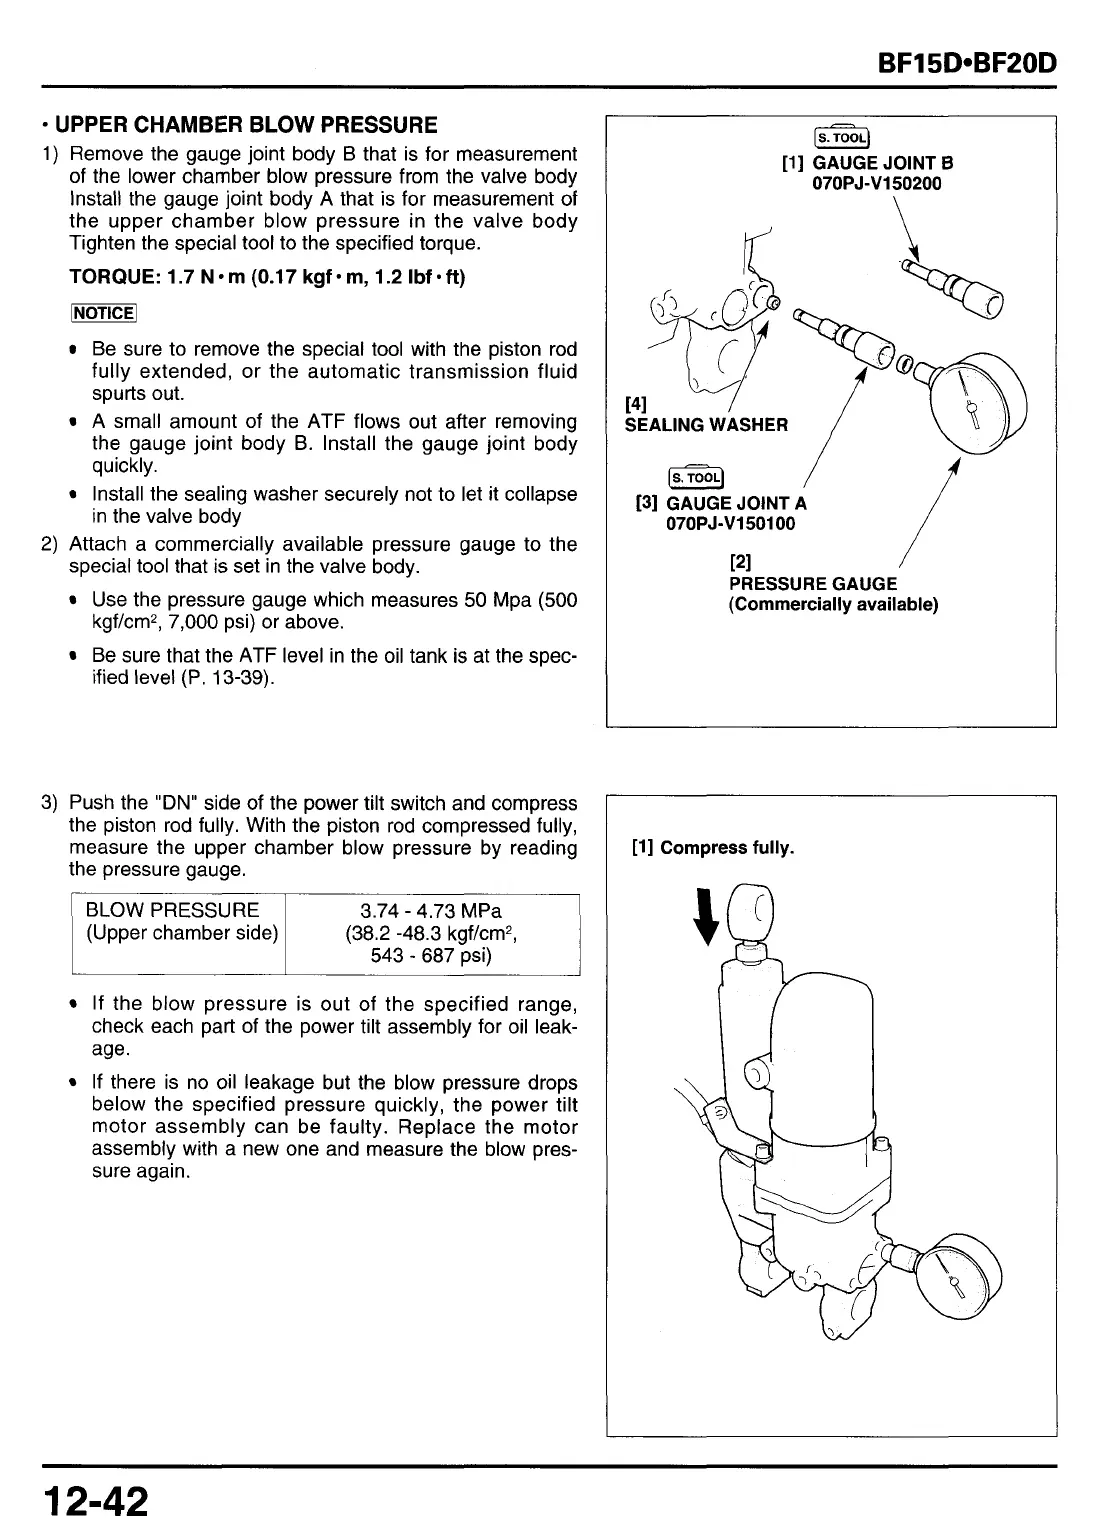
Remove the gauge joint body B that is for measurement
of the lower chamber blow pressure from the valve body
Install the gauge joint body A that is for measurement
of
the upper chamber blow pressure in the valve body
Tighten the special
tool
to
the specified torque.
TORQUE:
1.7
N
m
(0.17
kgf
m,
1.2
Ibf
oft)
Be sure
to
remove the special
tool
with the piston rod
fully extended, or the automatic transmission fluid
spurts out.
A small amount of the ATF flows out after removing
the gauge joint body B. Install the gauge joint body
quickly.
Install the sealing washer securely not
to
let it collapse
in the valve body
2) Attach a commercially available pressure gauge
to
the
special
tool
that is set in the valve body.
Use the pressure gauge which measures
50
Mpa
(500
kgf/cm2,
7,000
psi) or above.
Be sure that the ATF level in the oil tank is at the spec-
ified level (P. 13-39).
3.74
-
4.73 MPa
(38.2 -48.3 kgf/cm2,
543
-
687 psi)
If the blow pressure is out of the specified range,
check each part of the power tilt assembly for oil leak-
age.
If there is no oil leakage but the blow pressure drops
below the specified pressure quickly, the power tilt
motor assembly can be faulty. Replace the motor
assembly with a new one and measure the blow pres-
sure again.
[S.TOOLJ
[l] GAUGE JOINT
B
07OPJ-Vl50200
[S.TOOLJ
[l] GAUGE JOINT
B
07OPJ-Vl50200
SEALING WASHER
'1
Is.]
[31 GAUGE JOINT A
07OPJ-V150100
PI
PRESSURE GAUGE
(Commercially available)
111 Compress fully.
12-42



 To Next Page