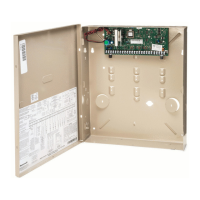
Installation and Setup Guide
4-4
FIELD
TITLE and DATA ENTRIES EXPLANATION
*36
Entry Delay 2
See *35 above for entries.
See *35 for explanation.
*37
Audible Exit Warning
0 = no; 1 = yes
Warning sound consists of slow continuous beeps until
last 10 seconds, then it changes to fast beeps. Sound
ends when exit time expires.
*38
Confirmation Of Arming Ding
Entry 1: 0 = no; 1 = yes, 1-second ding
(ding if armed from wired keypad)
Entry 2: Enter 0-15 from table below.
(ding if armed from RF device)
Entry Ding at Siren Trigger 2 Output
0 none none
1 none 250mS
2 none 1 second
3 none 4 seconds
4 250mS none
5 250mS 250mS
6 250mS 1 second
7 250mS 4 seconds
8 1 second none
9 1 second 250mS
#+10 1 second 1 second
#+11 1 second 4 seconds
#+12 4 seconds none
#+13 4 seconds 250mS
#+14 4 seconds 1 second
#+15 4 seconds 4 seconds
Entry 1 for each partition selects whether arming
from wired keypads causes siren ding. Confirmation of
arming is 1/2 second external sounder “ding.” Ding
occurs when closing reports is sent, or when exit delay
expires.
Entry 2 for each partition selects whether arming from
remote RF devices causes siren ding and/or activates
trigger 2 output; also selects siren ding/trigger
activation duration (arm = 2 dings of selected duration
with 1 second off between; disarm = 1 ding of selected
duration). Ding occurs upon reception of the wireless
arming command.
NOTE: If using an option that activates trigger 2,
trigger 2 must be dedicated to only this function; do
not assign any other functions to trigger 2.
*39
Power-Up In Previous State
0 = always power-up in a disarmed state
1 = assume the system status prior to
power down
When the system powers up armed, an alarm will
occur 1 minute after arming if a zone is faulted at that
time.
Note that if the previous state was armed AWAY or
STAY, the system will not respond to sensor changes
for 1 minute, which allows time for sensors such as
PIRs to stabilize.
Dialer Programming (
∗
∗∗
∗
40 –
∗
∗∗
∗
50)
FIELD
TITLE and DATA ENTRIES EXPLANATION
*40
PABX Access Code
Enter up to 6 digits if PABX is needed to
access an outside line. Do not fill unused
spaces.
0–9, # + 11 for ‘∗’, # + 12 for ‘#’, # + 13 for a
pause (2 seconds)
To clear entries from field, press ∗40∗. If fewer than 6
digits need to be entered, exit by pressing [∗], which
advances to the next field.
Call Waiting: If the subscriber’s phone service has
“call waiting” (and is not using PABX), enter “*70” (“#
+ 11”) plus “# + 13” (pause) as the PABX entry to
disable “call waiting” during control panel calls. If the
subscriber does not have “call waiting” and is not using
PABX, make no entry in this field.

 Loading...