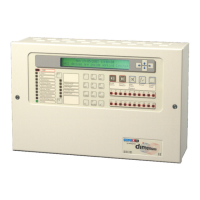
MORLEY-IAS Dimension Series
Page 40 Document No. 996-148-000-5, Revision: 5 User Manual
8 Printer Operation
8.1 Printout Samples
• The printer automatically prints fire alarm,
fault conditions and other events as they
are written to the log.
• An example is shown opposite.
• The nature of the event is printed in upper
case letters. In addition, the date and time
when the event occurred along with further
details are printed.
• For Fire Alarm events, the zone number,
device address, device type and text
descriptors are also printed.
RESOUND SOUNDERS
Tue 17/06/2003 14:55:10
SILENCE SOUNDERS
Tue 17/06/2003 14:53:05
FIRE ALARM
< zone text description >
< device text description>
Tue 17/06/2003 14:51:45 Z01 S05 OPT
FIRE ALARM
< zone text description >
< device text description>
Tue 17/06/2003 14:51:12 Z02 S99 OPT
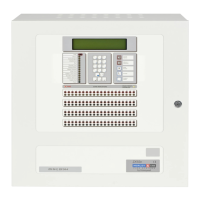
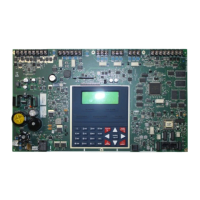
8.2 Changing the paper roll
• Firstly, remove the cover. Use the special
tool to unlock the half-turn fixings (marked
‘A’ opposite).
• Disconnect the earth lead from the back of
the cover and place the cover in a safe
place.
• Tear off the printer roll and remove the roll
from the spindle. Use the green knob to
feed the residual paper from the printer
mechanism.
• Take a new roll and place on the spindle in
the orientation shown.
0
WORD
7
PQRS
8
TUV
9
W
YZ
4
GHI
5
JKL
6
MNO
1 2
ABC
3
DEF
F1
F2
11 1 2 1
3
1
4
1
5
1
6
1
7
1
8
1
9
2
0
21 2 2 2
3
2
4
2
5
2
6
2
7
2
8
2
9
3
0
31 3 2 3
3
3
4
3
5
3
6
3
7
3
8
3
9
4
0
1 2 3
4
5
6
7
8
9
1
0
A
A
A
A
B
• Unroll the paper roll
and tear / cut off
about 20cm (8”)
leaving a clean
straight edge.
• Offer the paper up to
the entry slot in the
printer (between the
roller and the back of
the printer) – the
printer will
automatically grab the
paper and feed the
paper through the
mechanism.
• Replace the panel
cover ensuring that
the paper is free to
exit from the slot (B).
(REMEMBER to
connect the earth
lead to the back of the
cover).
Mechanism
Feed Knob
Tear Off
Feed Knob
Figure 2 – Changing the Paper Roll
Note: Refer to the Product Manual for instructions on enabling/ disabling the printer – access level 3 operation.
 Loading...