17
Mounting the switch on a workbench
IMPORTANT:
• Ensure good ventilation and 10 cm (3.9 in) of clearance around the chassis for heat dissipation.
• Avoid placing heavy objects on the switch.
This installation method is available for all HP 1910 switches.
To mount the switch on a workbench:
1. Check that the workbench is sturdy and well grounded.
2. Place the switch with bottom up, and clean the round holes in the chassis bottom with dry cloth.
3. Attach the rubber feet to the four round holes in the chassis bottom.
4. Place the switch with upside up on the workbench.
Mounting the switch on a wall
Yo u ca n mount t he H P 1910 -8G, 1910 - 8G - PoE + (65 W ) , an d 1910 -8G -Po E+ (180W ) swi tc he s on a
concrete or wood wall by using two separately orderable wall-mounting anchor kits.
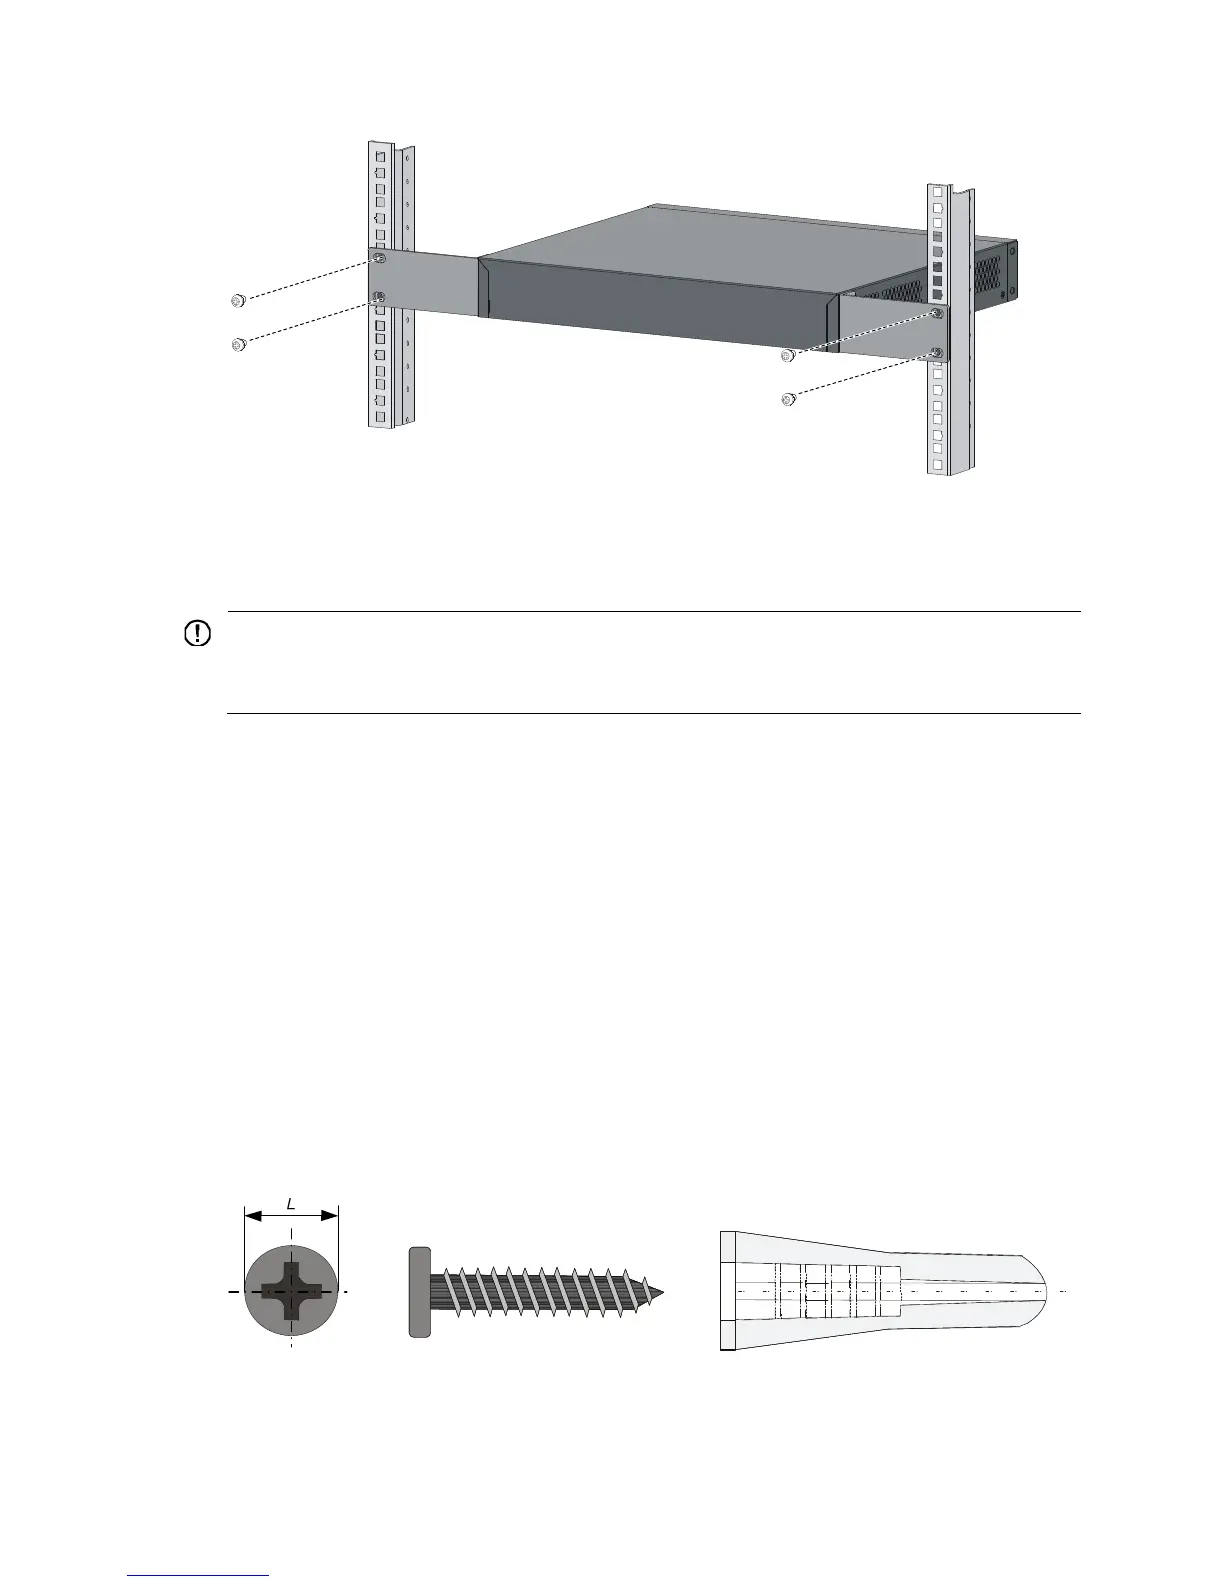
A wall-mounting anchor kit comprises a screw anchor and a screw, as shown in Figure 33. T
he outer
diameter of the screw must be less than 4 mm (0.16 in).
Figure 33 Wall-mounting anchor kit
To mount the switch on a wall:

 Loading...