19
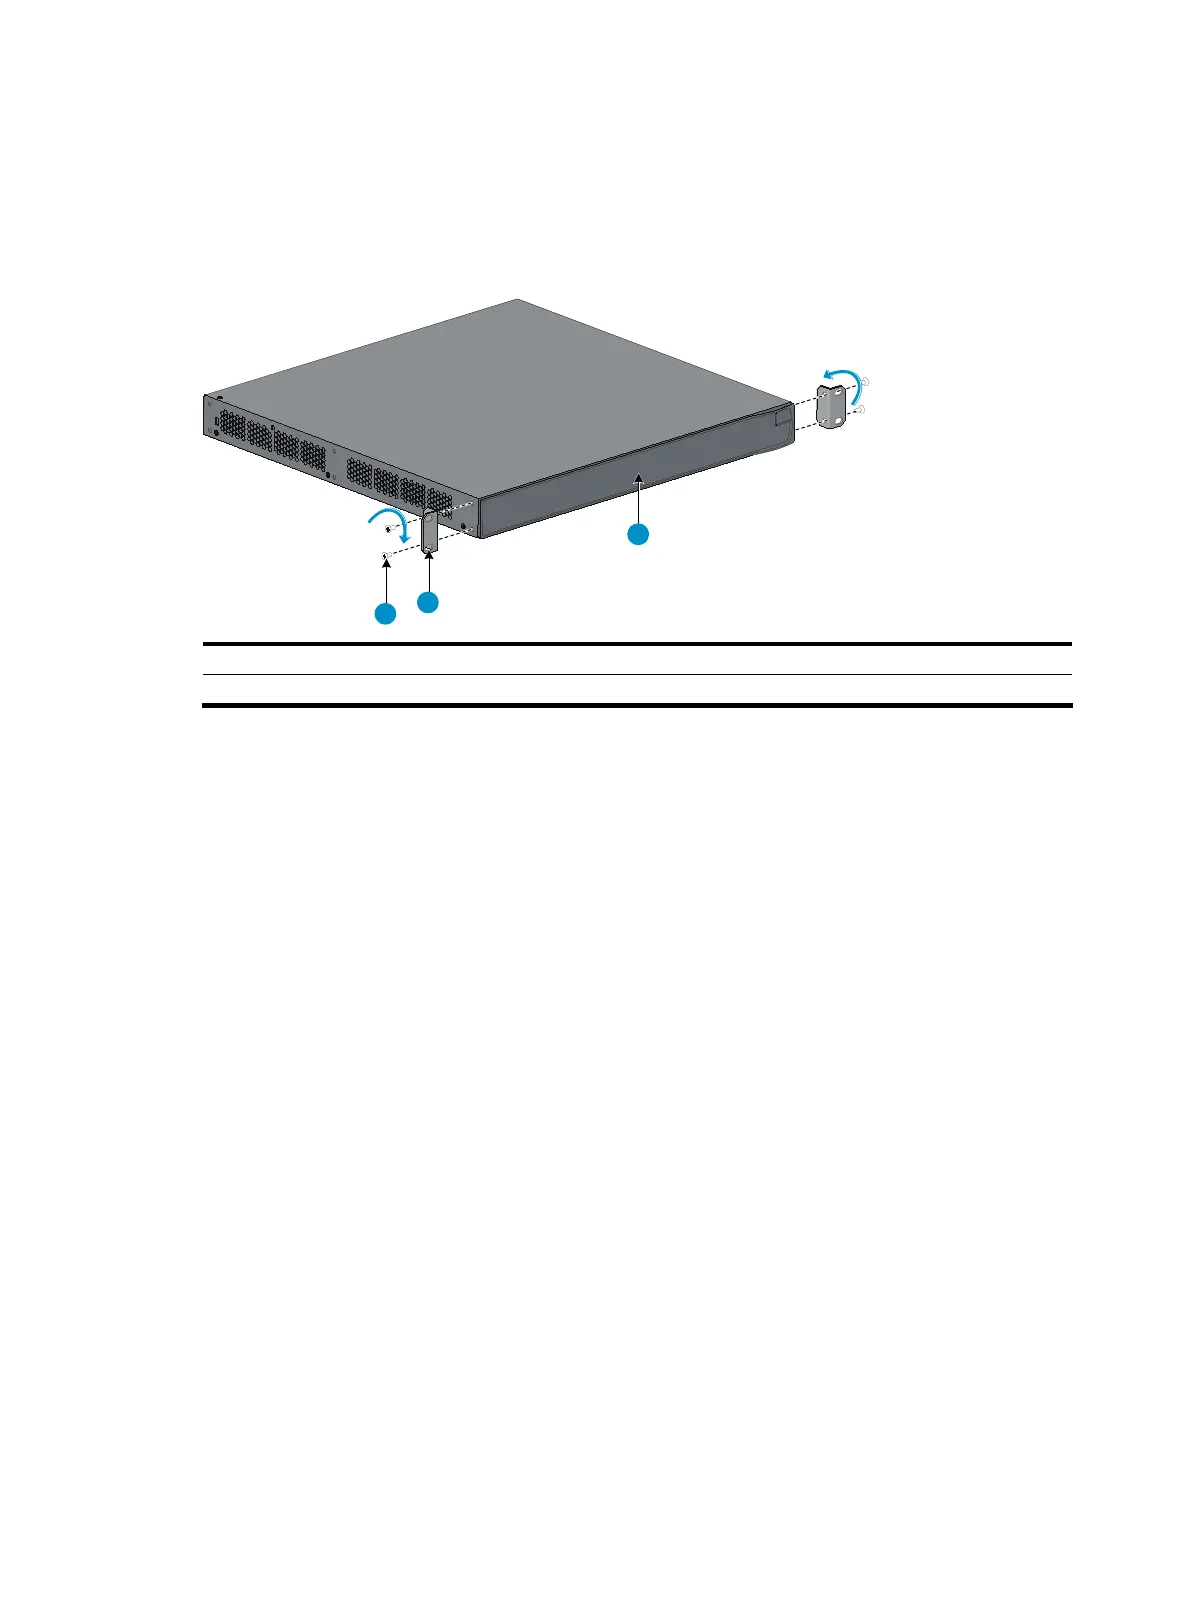
3. Unpack the front mounting brackets and the screws for fixing the brackets to the switch chassis.
4. Align the round holes in one bracket with the holes in the front mounting position of the switch
chassis, and use the screws to fix the mounting bracket to the chassis, as shown in Figure 32.
5. Repeat the previous step to attach the other mounting bracket to the chassis.
Figure 32 Attach the front mounting brackets to the chassis
3
2
1
(1) Front panel of the switch (2) Front mounting bracket
(3) Screw
6. Install cage nuts (user-supplied) in the mounting holes in the rack posts.
7. One person holds the switch chassis and aligns the oval holes in the brackets with the mounting
holes in the rack posts, and the other person fixes the mounting brackets with M6 screws
(user-supplied) to the rack, as shown in Figure 33.
 Loading...