15
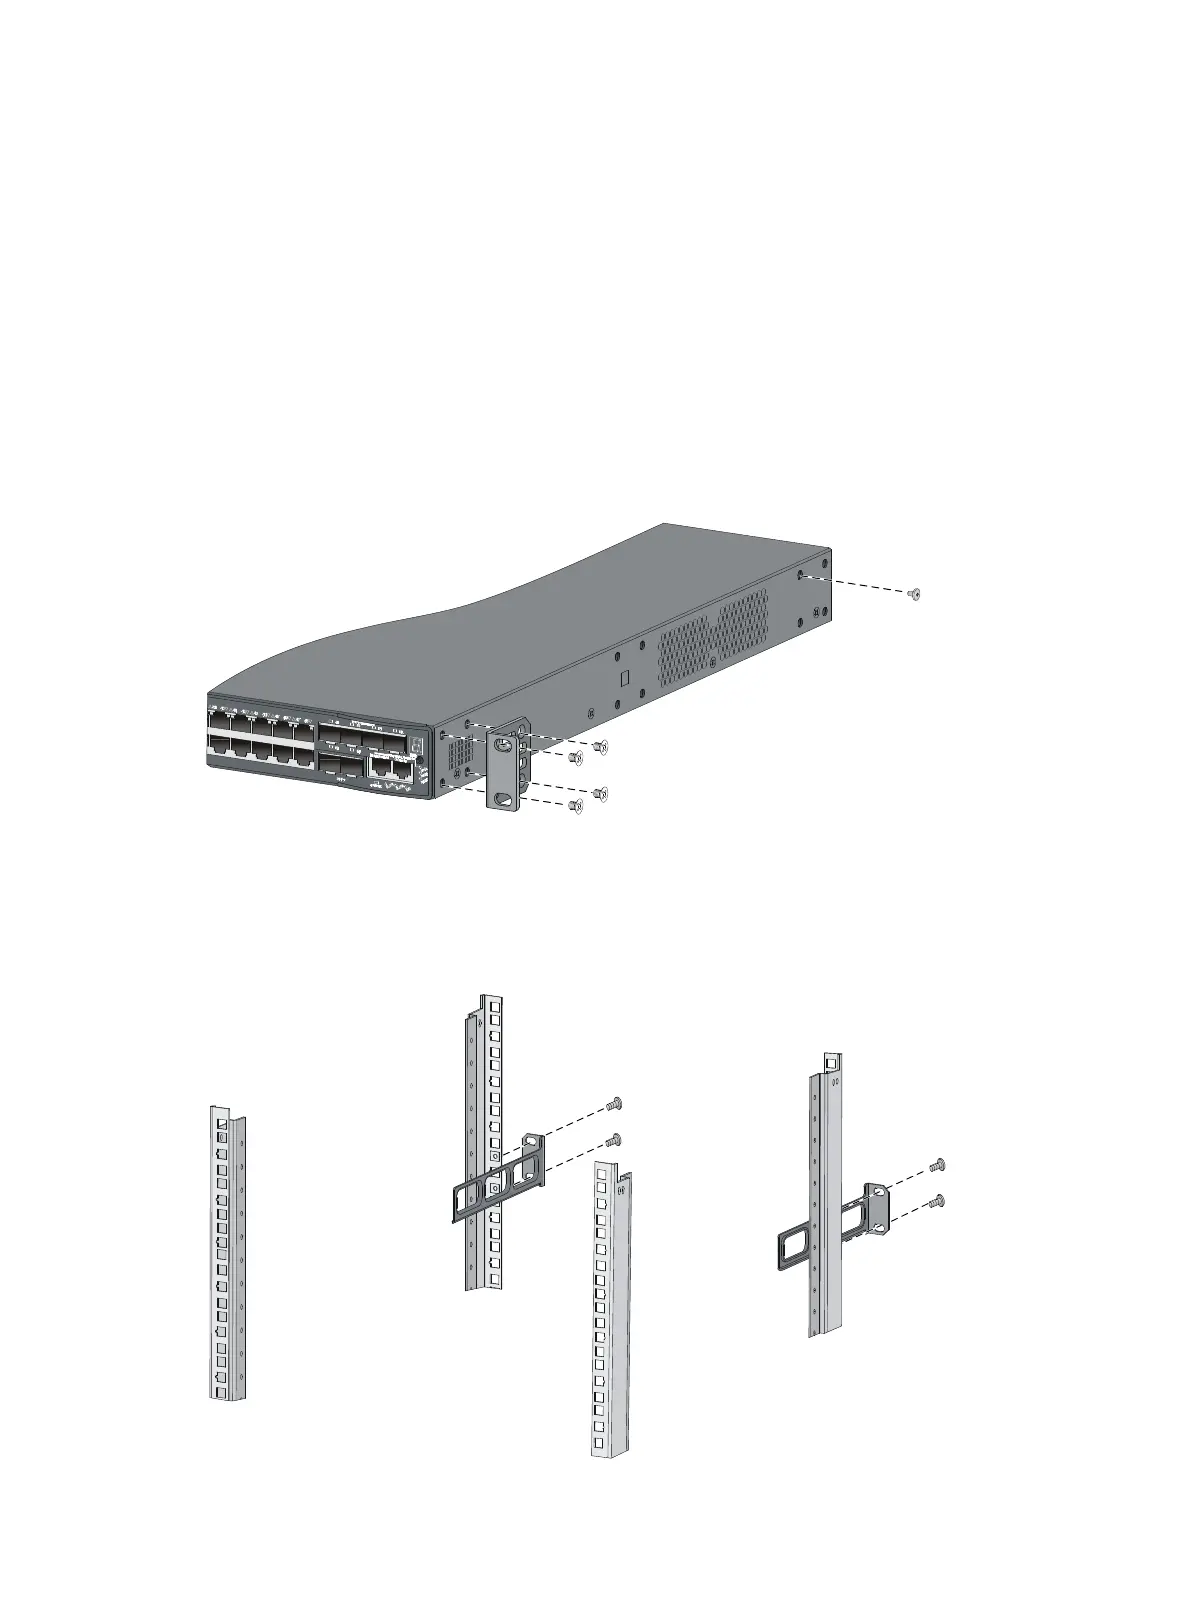
2. Attach the front mounting brackets to the chassis:
a. Unpack the front mounting brackets and the M4 screws for attaching the brackets to the switch
chassis.
b. Align the round holes in the wide flange of one front mounting bracket with the screw holes in
the port-side mounting position on one side of the chassis (see Figure 20).
c. Use M4 screws (supplied with the switch) to attach the mounting bracket to the chassis.
d. Repeat the proceeding two steps to attach the other mounting bracket to the chassis.
3. Attach the load-bearing screws to the chassis and the rear mounting brackets to the rack:
a. Unpack the rear mounting brackets and the load-bearing screws.
b. Install the load-bearing screws in one of the load bearing screw mounting positions (see Figure
20) as needed.
Figure 20 Attaching the front mounting brackets and load bearing screws to the chassis
c. Install cage nuts (user-supplied) in the mounting holes in the rear rack posts.
d. Attach the rear mounting brackets to the rear posts with M6 screws (user supplied), as shown
in Figure 21.
Figure 21 Attaching th
e rear mounting brackets to a rack

 Loading...