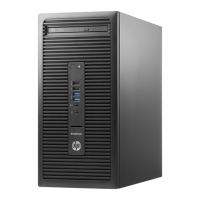
4. Remove the screws (1) securing the solid-state drive in the cage and lift the solid-state drive (2) out of
the cage.
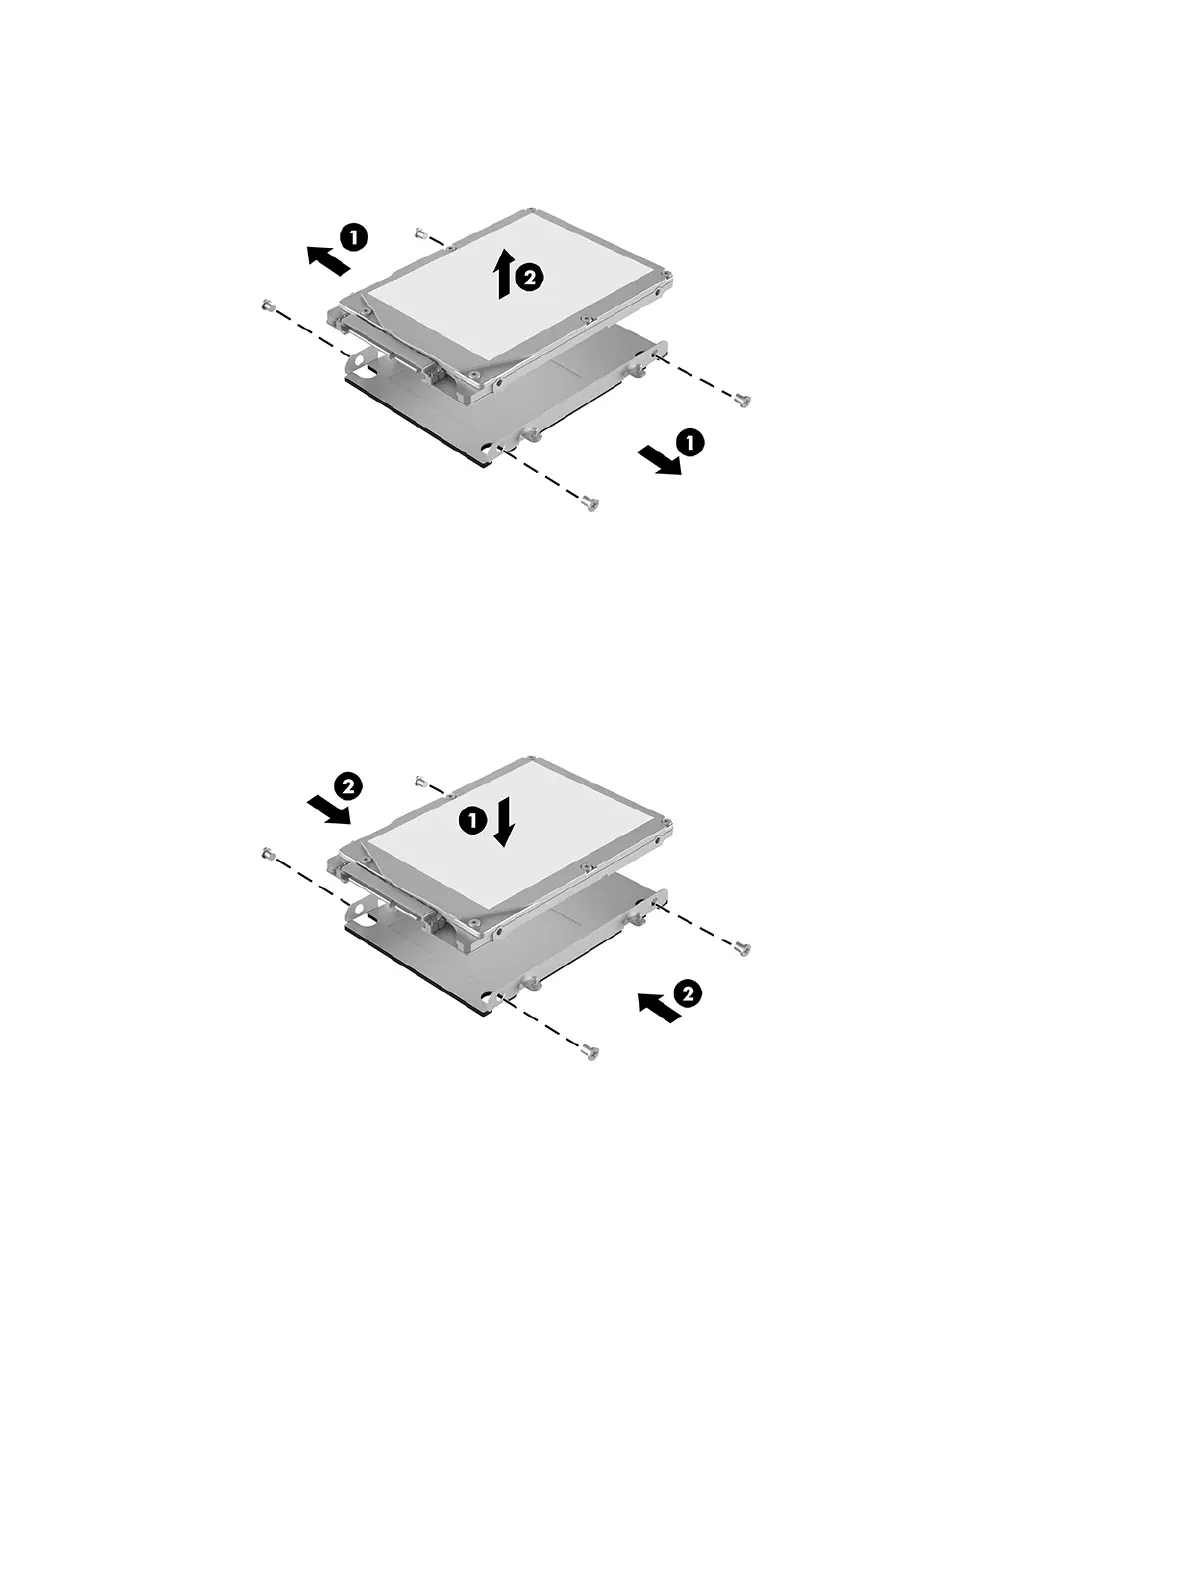
5. Position the new solid-state drive over the drive cage with the solid-state drive connectors at the end
with the thermal patch and the circuit board side facing the closed side of the drive cage.
6. Set the new solid-state drive (1) into the cage. Be sure the label side of the solid-state drive is visible.
7. Fasten the four screws (2) to secure the solid-state drive in the cage.
8. Connect the power-and-data cable (1) to the solid-state drive.
9. Set the drive cage (2) in the chassis. Be sure that the solid-state drive connectors are facing the back of
the chassis.
2.5-inch, solid-state drive (SSD) 27