2. Close all applications.
3. Update the server firmware, if it is not the latest revision.
4. If the new controller is the new boot device, install the device drivers.
5. Ensure that users are logged off and all tasks are completed on the server.
6. Power down the server.
7. Power down all peripheral devices that are attached to the server.
8. Disconnect the power cord from the power source.
9. Disconnect the power cord from the server.
10. Remove or open the access panel.
See the server user guide, for server-specific procedures.
WARNING:WARNING:
To reduce the risk of personal injury from hot surfaces, allow the drives and the internal system components to cool before touching them.
11. Remove the riser.
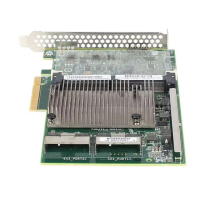
12. Select an available x8 or larger PCIe expansion slot.
13. Remove the slot cover.
Save the retaining screw, if one is present.
14. Slide the controller along the slot alignment guide, if one is present, and then press the board firmly into the expansion slot so that the contacts on the board
edge are seated properly in the slot.
15. Secure the controller in place with the retaining screw. If the slot alignment guide has a latch near the rear of the board, close the latch.
16. Connect storage devices to the controller.
For cabling information, see the server user guide.
17. Reinstall the riser.
18. Connect the power cord to the server.
19. Connect the power cord to the power source.
20. Power up all peripheral devices.
21. Power up the server.
More informationMore information
Updating software and firmwareUpdating software and firmware
Array and controller configurationArray and controller configuration
Connecting internal storageConnecting internal storage
Installing in an unconfigured serverInstalling in an unconfigured server
ProcedureProcedure
1. Update the server firmware.
2. Select an available x8 or larger PCIe expansion slot.
3. Remove the slot cover.
Save the retaining screw, if one is present. See the server user guide, for server-specific procedures.
4. Slide the controller along the slot alignment guide, if one is present, and then press the board firmly into the expansion slot so that the contacts on the board
edge are seated properly in the slot.
5. Secure the controller in place with the retaining screw. If the slot alignment guide has a latch near the rear of the board, close the latch.
6. Install physical drives, as needed.
7. Connect drive backplane to the controller.
For cabling information, see the server user guide.
8. Power up the server.
If this controller is the only one installed in the server, and it is the boot device, you must configure a logical drive or select the physical drives for JBOD mode
using the configuration utility in UEFI System Utilities.
9. Proceed to install the OD on the controller driver.
 Loading...