EasyManuals Logo

HP ZBOOK STUDIO 16 G10 User Manual

HP ZBOOK STUDIO 16 G10
113 pages
To Next Page IconTo Next Page
To Previous Page IconTo Previous Page
Page #55 background imageLoading...
Page #55 background image
3. Remove the battery (see Battery on page 46).
If you are replacing a memory module, remove the existing memory module:
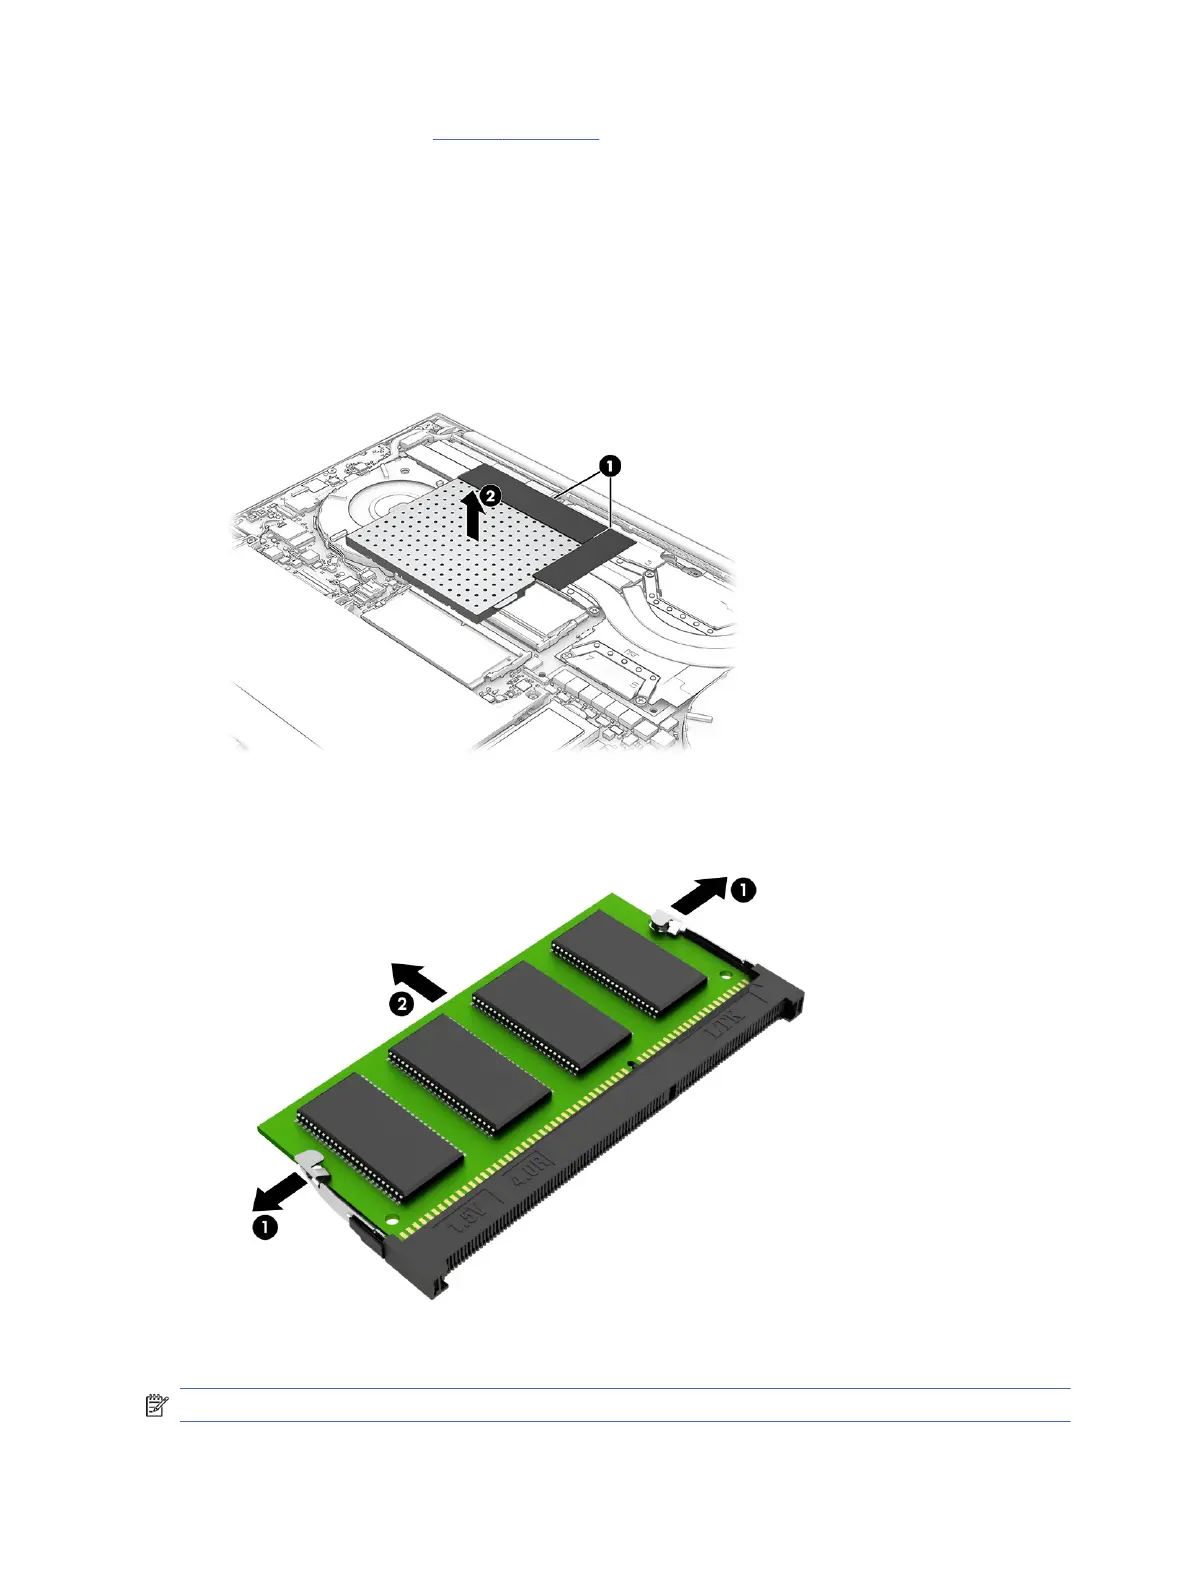
1. Release the tape (1) that secures the memory module shield to the heat sink.
2. Lift and remove the memory module shield (2) from the system board.
The memory module shield is included in the Shield Kit, spare part number N10942-001.
When installing the memory module shield, be sure that the edges of the shield fit into all the clips
that are built into the system board.
3. Spread the two retention clips outward (1) until the memory module tilts up at a 45° angle, and then
remove the module (2). Use the same procedure to remove all memory modules.
To install a memory module, reverse the removal procedure.
NOTE: Memory modules are designed with a notch to prevent incorrect insertion.
48
Chapter 5 Removal and replacement procedures for authorized service provider parts

Table of Contents

Questions and Answers:

Question and Answer IconNeed help?

Do you have a question about the HP ZBOOK STUDIO 16 G10 and is the answer not in the manual?

HP ZBOOK STUDIO 16 G10 Specifications

General IconGeneral
Operating SystemWindows 11 Pro
WirelessWi-Fi 6E, Bluetooth 5.3
Webcam5MP IR Camera
AudioBang & Olufsen, dual speakers
KeyboardBacklit, spill-resistant
ProcessorIntel Core i7 or i9 (13th Gen)
GraphicsNVIDIA RTX 2000 Ada Generation Laptop GPU
Display16-inch, 2560 x 1600, IPS
RAMUp to 64GB DDR5
StorageUp to 2TB PCIe NVMe SSD
Weight1.73 kg
Battery86 Wh Li-ion polymer
Ports2 x Thunderbolt 4, 1 x HDMI 2.1, 1 x headphone/microphone combo
SecurityFingerprint sensor, TPM 2.0

Related product manuals