EasyManuals Logo

HP ZBOOK STUDIO 16 G10 User Manual

HP ZBOOK STUDIO 16 G10
113 pages
To Next Page IconTo Next Page
To Previous Page IconTo Previous Page
Page #58 background imageLoading...
Page #58 background image
To install the heat sink, reverse the removal procedure.
Display assembly
To remove and disassemble the display assembly, use these procedures and illustrations.
Before removing the display assembly, follow these steps:
1. Prepare the computer for disassembly (see Preparation for disassembly on page 40).
2. Remove the bottom cover (see Bottom cover on page 40).
3. Disconnect the battery cable from the system board (see Battery on page 46).
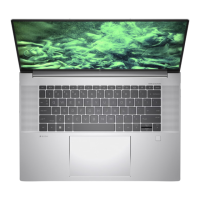
4. Remove the heat sink (see Heat sink on page 49).
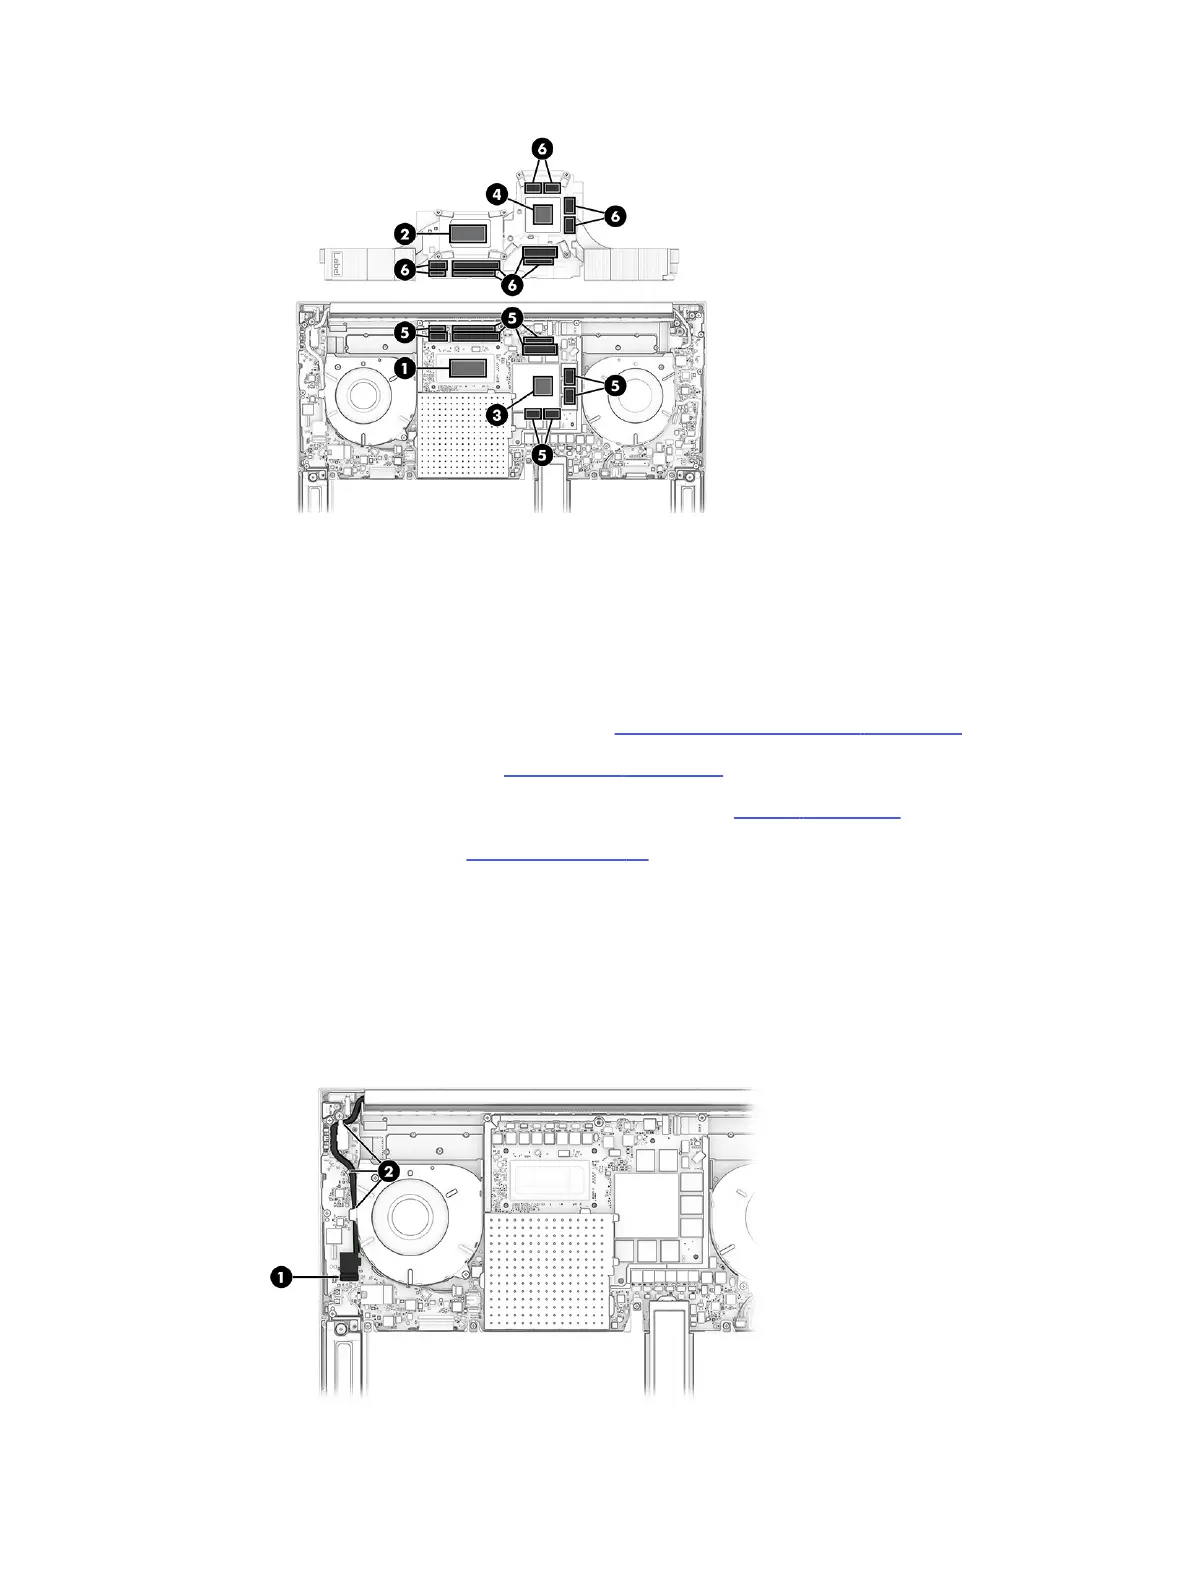
Remove the display assembly:
1. Release the zero insertion force (ZIF) connector (1) the webcam cable is connected to, and then
disconnect the webcam cable from the system board.
2. Release the webcam cable from the retention clips (2) that are built into the right fan and I/O
bracket.
Display assembly
51

Table of Contents

Questions and Answers:

Question and Answer IconNeed help?

Do you have a question about the HP ZBOOK STUDIO 16 G10 and is the answer not in the manual?

HP ZBOOK STUDIO 16 G10 Specifications

General IconGeneral
Operating SystemWindows 11 Pro
WirelessWi-Fi 6E, Bluetooth 5.3
Webcam5MP IR Camera
AudioBang & Olufsen, dual speakers
KeyboardBacklit, spill-resistant
ProcessorIntel Core i7 or i9 (13th Gen)
GraphicsNVIDIA RTX 2000 Ada Generation Laptop GPU
Display16-inch, 2560 x 1600, IPS
RAMUp to 64GB DDR5
StorageUp to 2TB PCIe NVMe SSD
Weight1.73 kg
Battery86 Wh Li-ion polymer
Ports2 x Thunderbolt 4, 1 x HDMI 2.1, 1 x headphone/microphone combo
SecurityFingerprint sensor, TPM 2.0

Related product manuals