EasyManua.ls Logo

Huawei Quidway S2000-EI Series User Manual

Huawei Quidway S2000-EI Series
70 pages
To Next Page IconTo Next Page
To Previous Page IconTo Previous Page
Page #6 background imageLoading...
Page #6 background image
II. GUI conventions
Convention Description
< >
Button names are inside angle brackets. For example, click the <OK>
button.
[ ]
Window names, menu items, data table and field names are inside
square brackets. For example, pop up the [New User] window.
/
Multi-level menus are separated by forward slashes. For example,
[File/Create/Folder].
III. Keyboard operation
Format Description
<Key>
Press the key with the key name inside angle brackets. For example,
<Enter>, <Tab>, <Backspace>, or <A>.
<Key1+Key2>
Press the keys concurrently. For example, <Ctrl+Alt+A> means the three
keys should be pressed concurrently.
<Key1, Key2>
Press the keys in turn. For example, <Alt, A> means the two keys should
be pressed in turn.
IV. Mouse operation
Action Description
Click Press the left button or right button quickly (left button by default).
Double Click Press the left button twice continuously and quickly.
Drag Press and hold the left button and drag it to a certain position.
V. Symbols
Eye-catching symbols are also used in the manual to highlight the points worthy of
special attention during the operation. They are defined as follows:
Caution, Warning, Danger: Means reader be extremely careful during the
operation.
Note, Comment, Tip, Knowhow, Thought: Means a complementary description.

Table of Contents

Question and Answer IconNeed help?

Do you have a question about the Huawei Quidway S2000-EI Series and is the answer not in the manual?

Huawei Quidway S2000-EI Series Specifications

General IconGeneral
SeriesQuidway S2000-EI Series
CategorySwitch
Switch TypeManaged
MAC Address Table8K
VLANs4K
Operating Temperature0°C to 45°C
Operating Humidity10% to 90% (non-condensing)
Storage Humidity5% to 95% (non-condensing)
Ports24/48
Uplink Ports1000Base-X ports
Power SupplyAC 100-240V, 50/60Hz
Dimensions (W x D x H)442 mm x 220 mm x 43.6 mm
Dimensions442 x 300 x 44 mm
Weight3.5 kg
Storage Temperature-40°C to +70°C
Jumbo Frame9216 bytes

Summary

Chapter 1 Product Overview

1.1 S2008-El Ethernet Switch

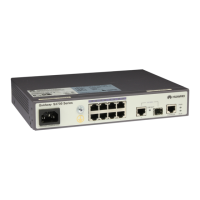
Details on the S2008-El Ethernet Switch, including its appearance and views.

1.2 S2016-El Ethernet Switch

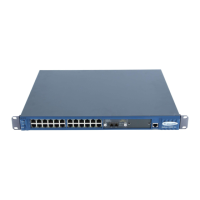
Details on the S2016-El Ethernet Switch, including its appearance and views.

1.3 S2403H-El Ethernet Switch

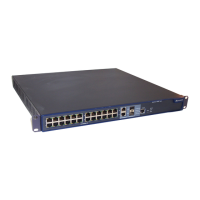
Details on the S2403H-El Ethernet Switch, including its appearance and views.

1.4 S2000-El Series Specifications

Technical specifications for the S2000-El series Ethernet Switches.

Chapter 2 Installation Preparation

2.1 Precautions

Important safety and handling precautions before installing the switch.

2.2 Requirements on Environment

Environmental conditions and requirements for proper switch installation and operation.

2.3 Installation Tools

List of essential tools required for the installation process.

Chapter 3 Installation

3.1 Installation of the S2008-El

Steps for mounting and installing the S2008-El Ethernet Switch.

3.2 Connection to the Power Supply of the S2008-El

Procedure for connecting the external power supply to the S2008-El.

3.3 Installation of the S2016-EI/S2403H-EI

Steps for mounting the S2016-EI and S2403H-EI switches.

3.4 Connection of Power Cord and Ground Wire (S2016-EI/S2403H-EI)

Connecting power cords and ground wires for S2016-EI/S2403H-EI.

3.5 Connection of Console Cable

Instructions for connecting the console cable for management.

3.6 Installation/Removal of Optional Interface Modules

Procedures for installing and removing optional interface modules.

3.7 Installation Verification

Final checks to ensure the switch installation is correct.

Chapter 4 Powering on Switch for the First Time

4.1 Establish configuration environment

Setting up the PC and console connection for initial configuration.

4.2 Connecting the Console Cable

Physical connection steps for the console cable.

4.3 Setting Terminal Parameters

Configuring terminal emulation software parameters for connection.

4.4 Boot Switch

Procedure for powering on the switch for the first time.

Chapter 5 BootROM and Host Software Loading

5.1 Introduction to Loading Approaches

Overview of methods for loading BootROM and host software.

5.2 Local Software Loading

Steps for loading software via the console port (XModem, TFTP, FTP).

5.3 Remote Software Loading

Methods for loading software remotely using FTP or TFTP.

5.4 Dealing with Load Failure

Troubleshooting common issues during software loading.

5.5 Dealing with Missing of Password

Procedure for handling lost BootROM or user passwords.

Chapter 6 Maintenance and Troubleshooting

6.1 Power System Failure

Diagnosing and resolving power system failures.

6.2 Configuration System Failure

Troubleshooting issues with terminal display or configuration.

Chapter 7 Optional Interface Modules

7.1 1-Port 100Base-FX Modules

Details on 1-port 100Base-FX fiber optic modules.

7.2 1-Port 100Base-T PoE Interface Module (S2016-EI)

Details on the 1-port 100Base-T PoE interface module.

Appendix A Lightning Protection of the Switch

A.2 Installation of Lightning Arrester for Network Port

Installing surge protection for network cable connections.

Related product manuals