5.4 Service Mode Setup and Features
NOTE: Service Mode should only be used by authorized users or
Hunter Engineering Company authorized service personnel.
Some options in Service Mode may not be available.
Options in Service Mode are dependent on the specific
authorization key installed.
Enter “Service Mode” by pressing and holding K2 and K3 and pressing the Reset
softkey twice quickly from any screen. This will immediately return the user to the main
screen and “Service Mode” will then be displayed at the top of the screen.
“Service Mode” enables the selection of advanced customized settings and hardware
specific setup.
Set Date and Time
Selects the correct date and time for both display and printouts.
Prompted Inflation Station
Enables or disables the program to automatically prompt the user to set tire pressure.
Prompted Centering Checks
Enables or disables the program to automatically prompt the user to perform a
centering check on each wheel.
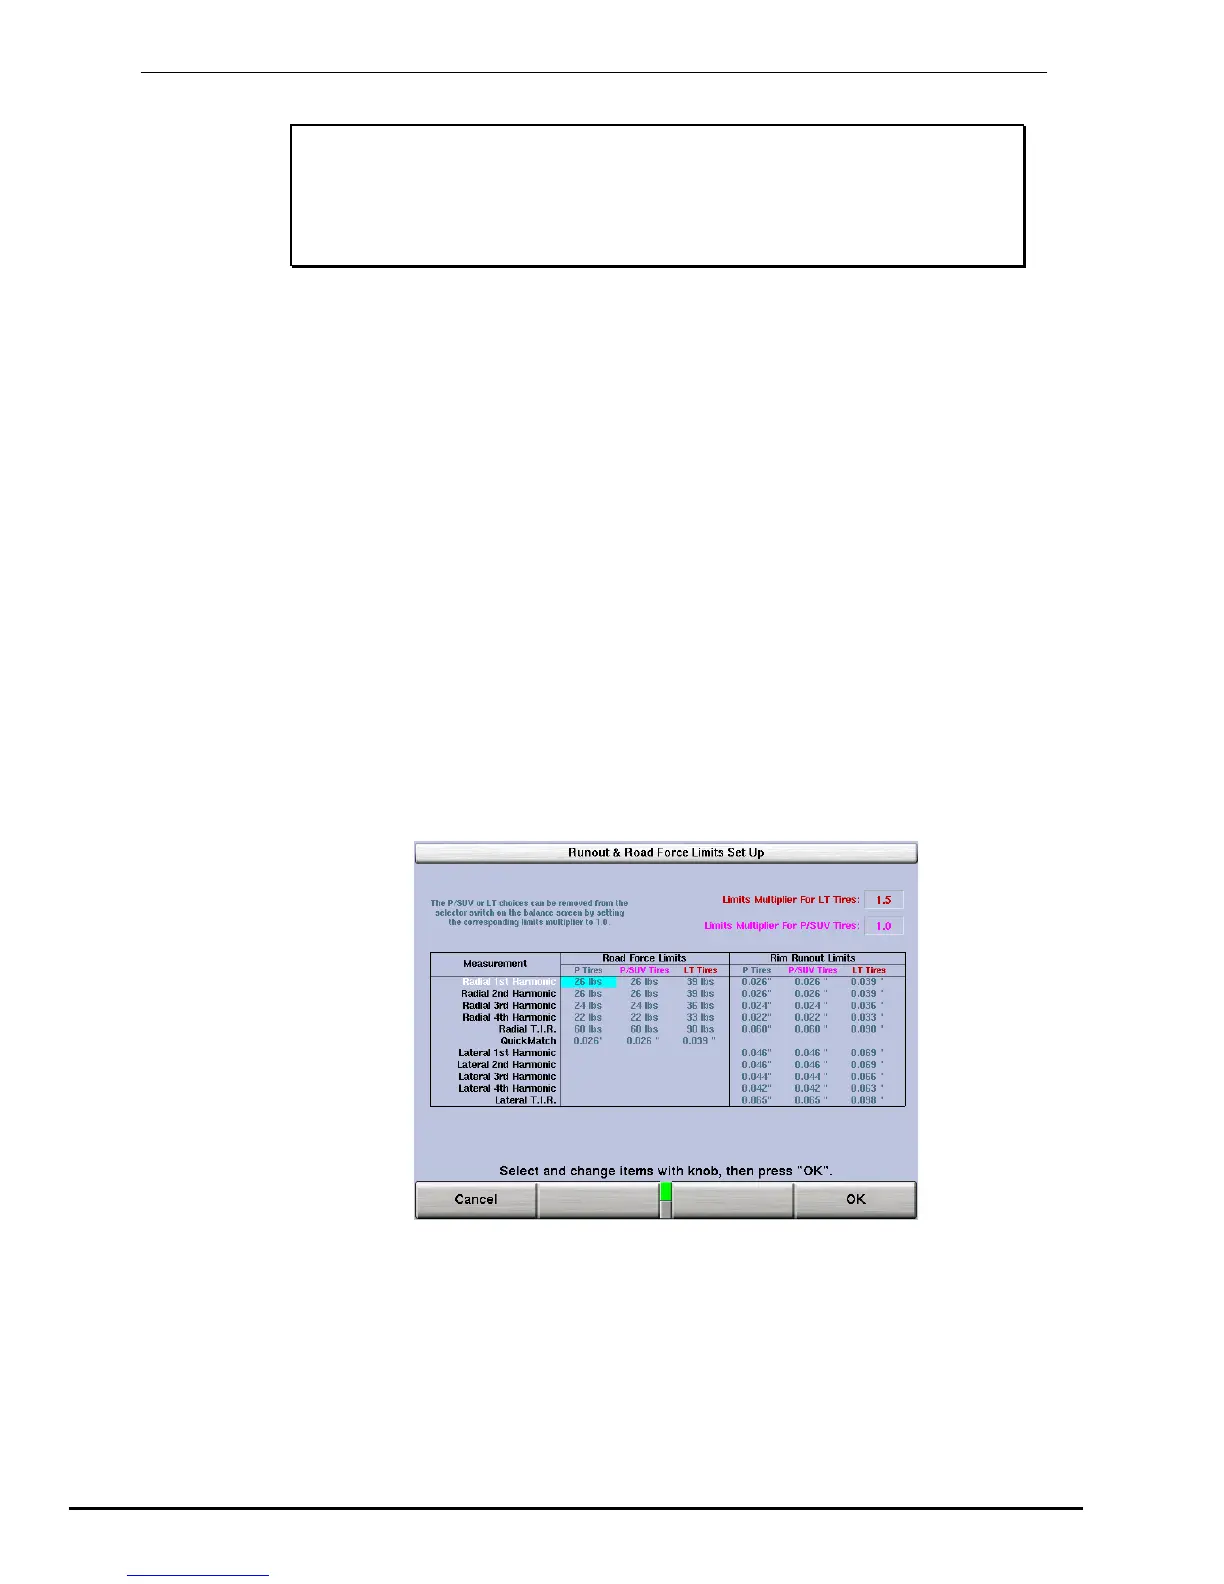
Runout & Road Force® Limits
Selects the amount of road force and runout needed to exceed limits.
“P” Limits
The control knob changes the “P” (passenger) tire limits. Push the control knob in to
select the measurement limit you desire to change. For more restrictive passenger
tire limits, rotate the control knob counterclockwise. For less restrictive passenger tire
limits, rotate the control knob clockwise. The light truck and sport utility vehicle limits
are based on the limits set for the passenger tires. As the passenger tire limits
change, the corresponding “LT” and “P/SUV” limits will also change.
114
Equipment Information GSP9720JLR Wheel Balancer Operation Instructions