English - 66
Connect the mower to Autocheck EXP and select
Programming. The service program will then ask
for the mower's serial number. Select the correct
serial number in the log book. Autocheck EXP now
automatically transfers the operating information
saved in step 1.
If the current robotic lawnmower for any reason
is not in the log book in Autocheck EXP, the serial
number must be entered manually. For security rea-
sons, the serial number can only be entered once,
and it is therefore very important to enter the correct
serial number. The serial number is printed on the
rating plate on the inside of the display cover.
If the main circuit board is replaced when trou-
bleshooting and you are not sure if the new main
circuit board will be kept in the relevant robotic
lawnmower, it is possible to temporarily program
the main circuit board in a so-called Service Mode.
Refer to 4.3.4 Programming on page 49.
For security reasons the serial number
can only be entered once. You should
therefore ensure that the correct serial
number is entered.
IMPORTANT INFORMATION
10. Test that the mower works.
When the main switch is set to position 1
after replacing a main circuit board, a new
start-up sequence commences, which
includes entering a new PIN code.
5.9 Replacing the HMI board
1. Dismantle the body, see 5.2.1 Dismantling
the body on page 59.
2. Dismantle the chassis, see
5.2.2 Dismantling the chassis on page 59.
3. Dismantle the display cover, see 5.2.3
Dismantling the display cover on page 60.
4. Disconnect all connections from the
connectors on the HMI circuit board.
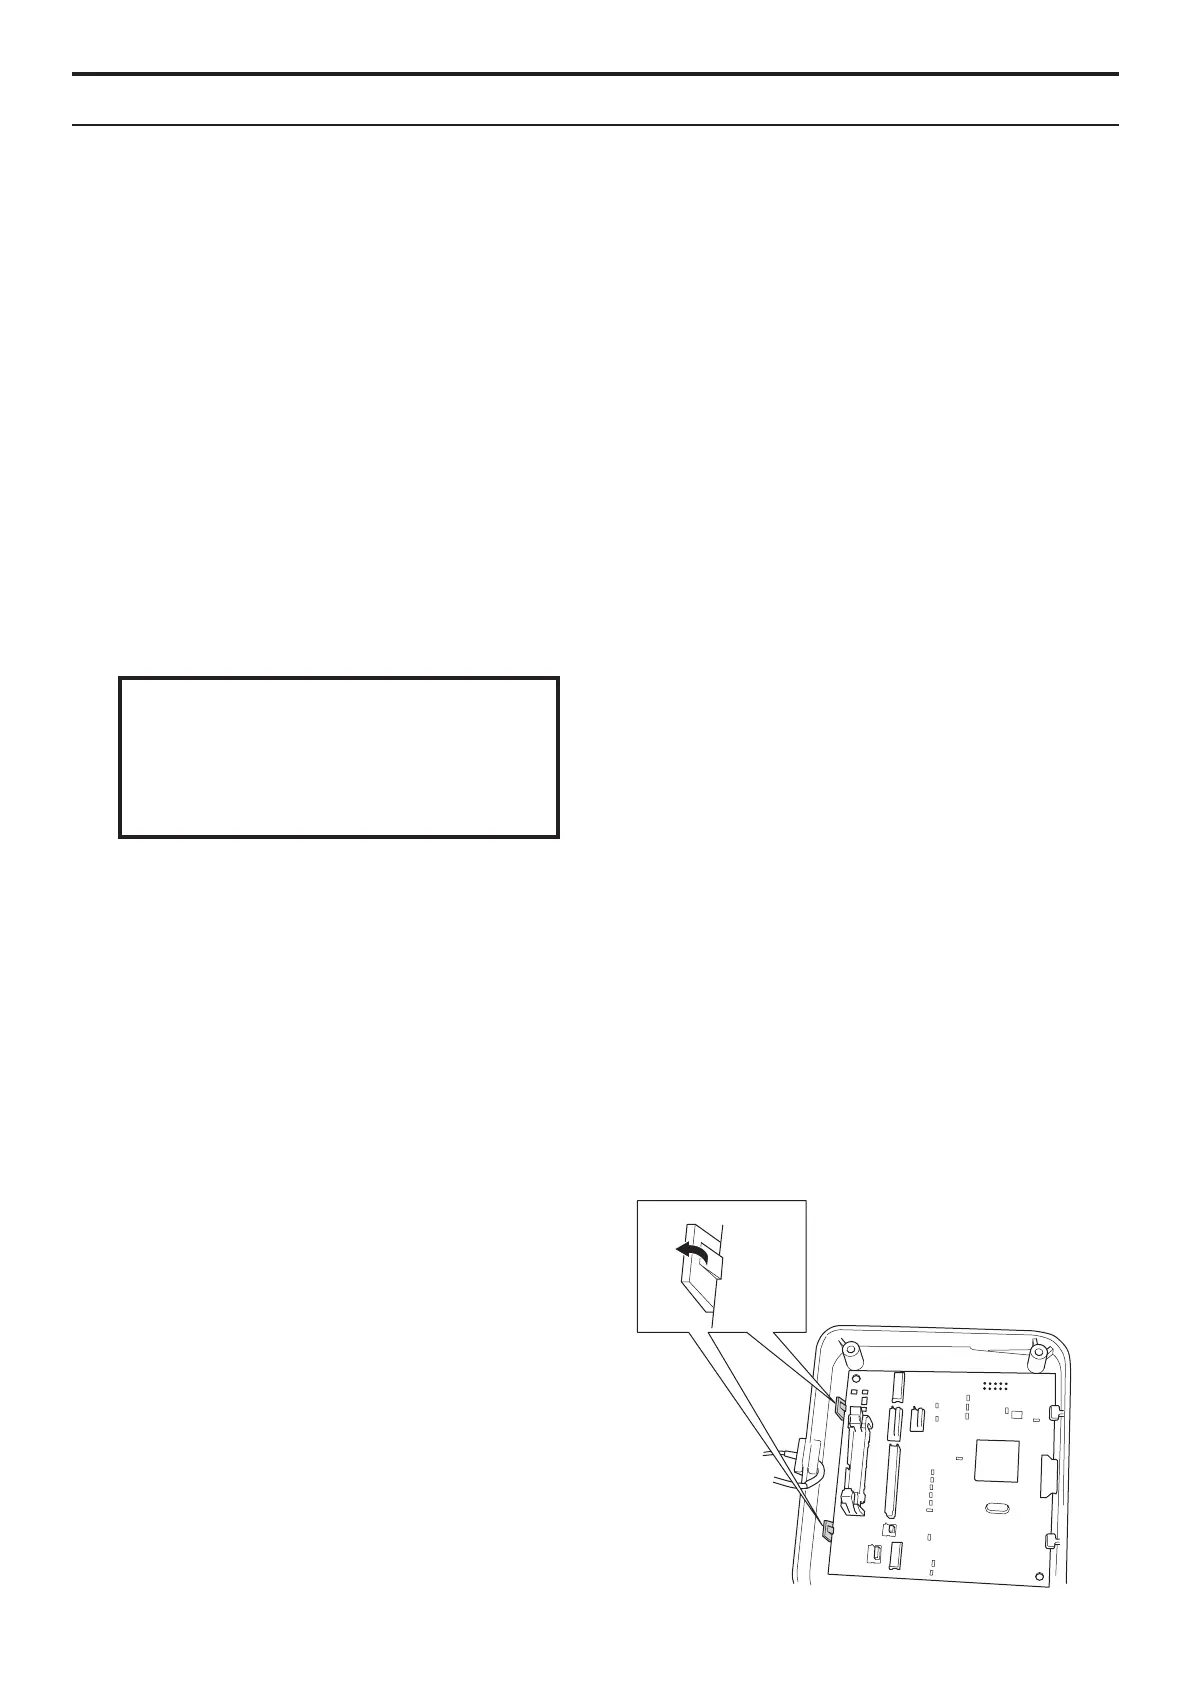
5. The HMI circuit board is secured to the
display cover by means of 2 snap-on
fasteners. Carefully bend away the snap-
on fasteners and lift the edge of the
HMI circuit board on which the snap-on
fasteners are located.
6. Remove the HMI board.
7. Fit a new HMI circuit board. Carefully bend
away the snap-on fasteners to make it
easier to t the HMI circuit board.
5. REPAIR INSTRUCTIONS

 Loading...


