Pg 21 S22A/S23A 2001b 2100 v1.0
NO
TE: Before entering "AUTO MODE" and working with a "QUEUE", follow the same procedures outlined on the
previous page for "AUTOMATIC OPERATION" with regards to setting up for an initial trim cut.
WORKING WITH A QUEUE
The purpose of a QUEUE is to allow the operator to run several jobs (max of 5) in series if they are of the same
material and shape.
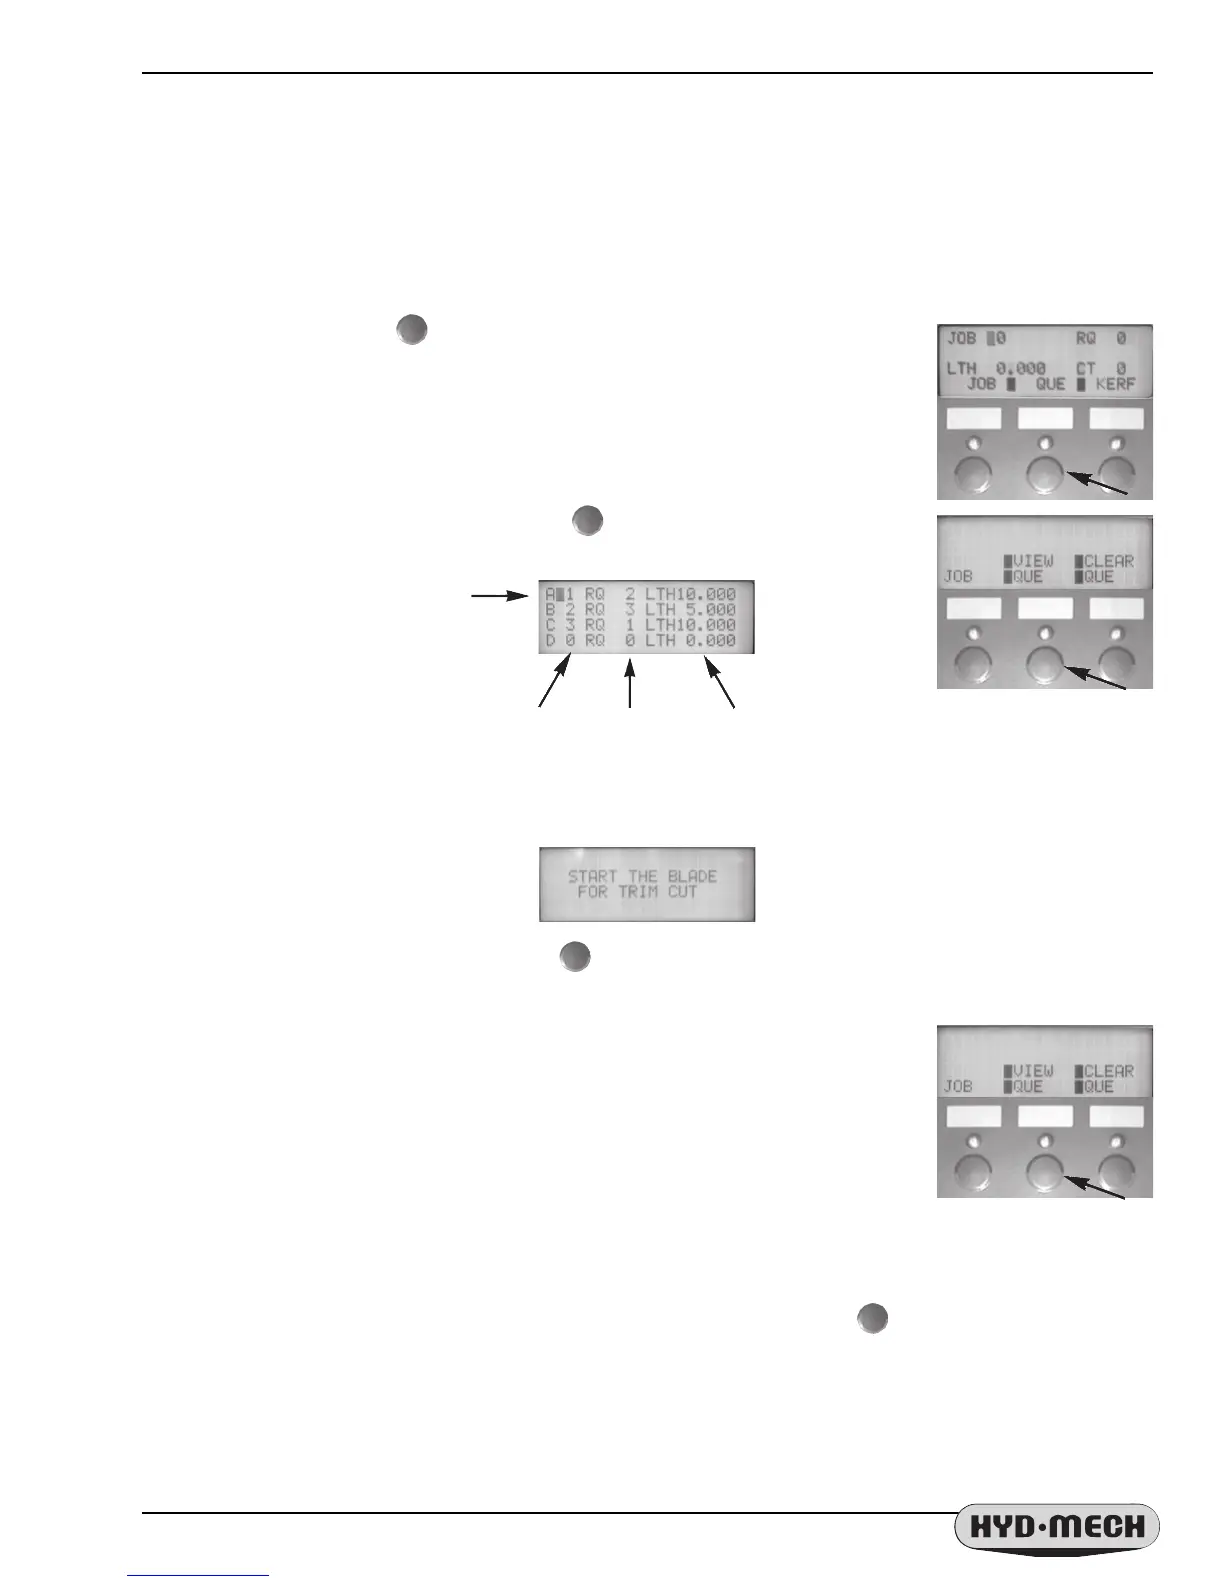
In AUTO mode, press the key below the word “QUE” on the display and the
display window will appear as shown.
If you choose to VIEW the QUEUE, press the key below the words “VIEW QUE”
on the display. The display window will show the jobs in the current QUEUE. Four jobs at
a time are shown.
Use the CURSOR buttons to view all the jobs. To run the QUEUE as it is displayed (jobs may be edited in this
mode), press the CYCLE START button on the control panel. The screen will now prompt you to start the blade for a
trim cut.
If you choose to Edit the QUEUE, press the key below the words “CLEAR QUE” on the display. This will
clear any jobs that are in the QUEUE and the display window will show an empty Queue. Jobs may be entered and
edited in this mode.
To fill the QUEUE, follow these two steps.
1) Key in a job number and press ENTER. If that job number has previously been
programmed, it's values will be displayed. The cursor will move to the next position in
the QUEUE. Up to five jobs may be in the QUEUE at any time. The job values can be
edited in this mode.
2) When the desired jobs have been entered, you may press the CYCLE START
button on the control panel to execute the jobs in the QUEUE. (Follow the same procedures to initiate a cycle as
in "AUTOMATIC OPERATION")
The QUEUE may be exited to the previous screen at any time by pressing the key under JOB .
At completion of the "QUEUE", the machine will shut down if “0” has been entered in the “POWER DWN TIMER”
parameter or continue running for the specified time up to a maximum of 180 minutes.
NOTE: For angled cuts, see "Kerf Correction" on the following page.
First Job
Length
To Cut
Programmed
Job Number
Quantity
To Cut


 To Next Page