Pg 33 S23A 2001
BLADE BRUSH ADJUSTMENT
The machine leaves the factory with the blade brush adjusted for maximum life of the
brush. This setting places the ends of the blade brush wires so as to contact the blade at
the bottom of the blade gullets. The plastic drive wheel that is driven by the drive wheel
face should be held against the blade face with the minimum force that is necessary. As
the blade brush wears it is necessary to periodically adjust it closer to the blade or if a
new brush is installed, further away from the blade.
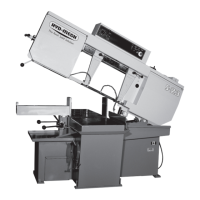
As shown, there are two springs on socket head screws holding the brush assembly
against the blade. There is also an adjusting socket set screw with a hex nut on it.
Loosen the hex nut with a 9/16" wrench and turn the set screw counter clockwise with a
3/16" allen key. This will move the brush closer to the blade. Adjust the set screw so that
the brush cleans to the bottom of the blade gullets and tighten the hex nut.
BLADE GUIDE ADJUSTMENT
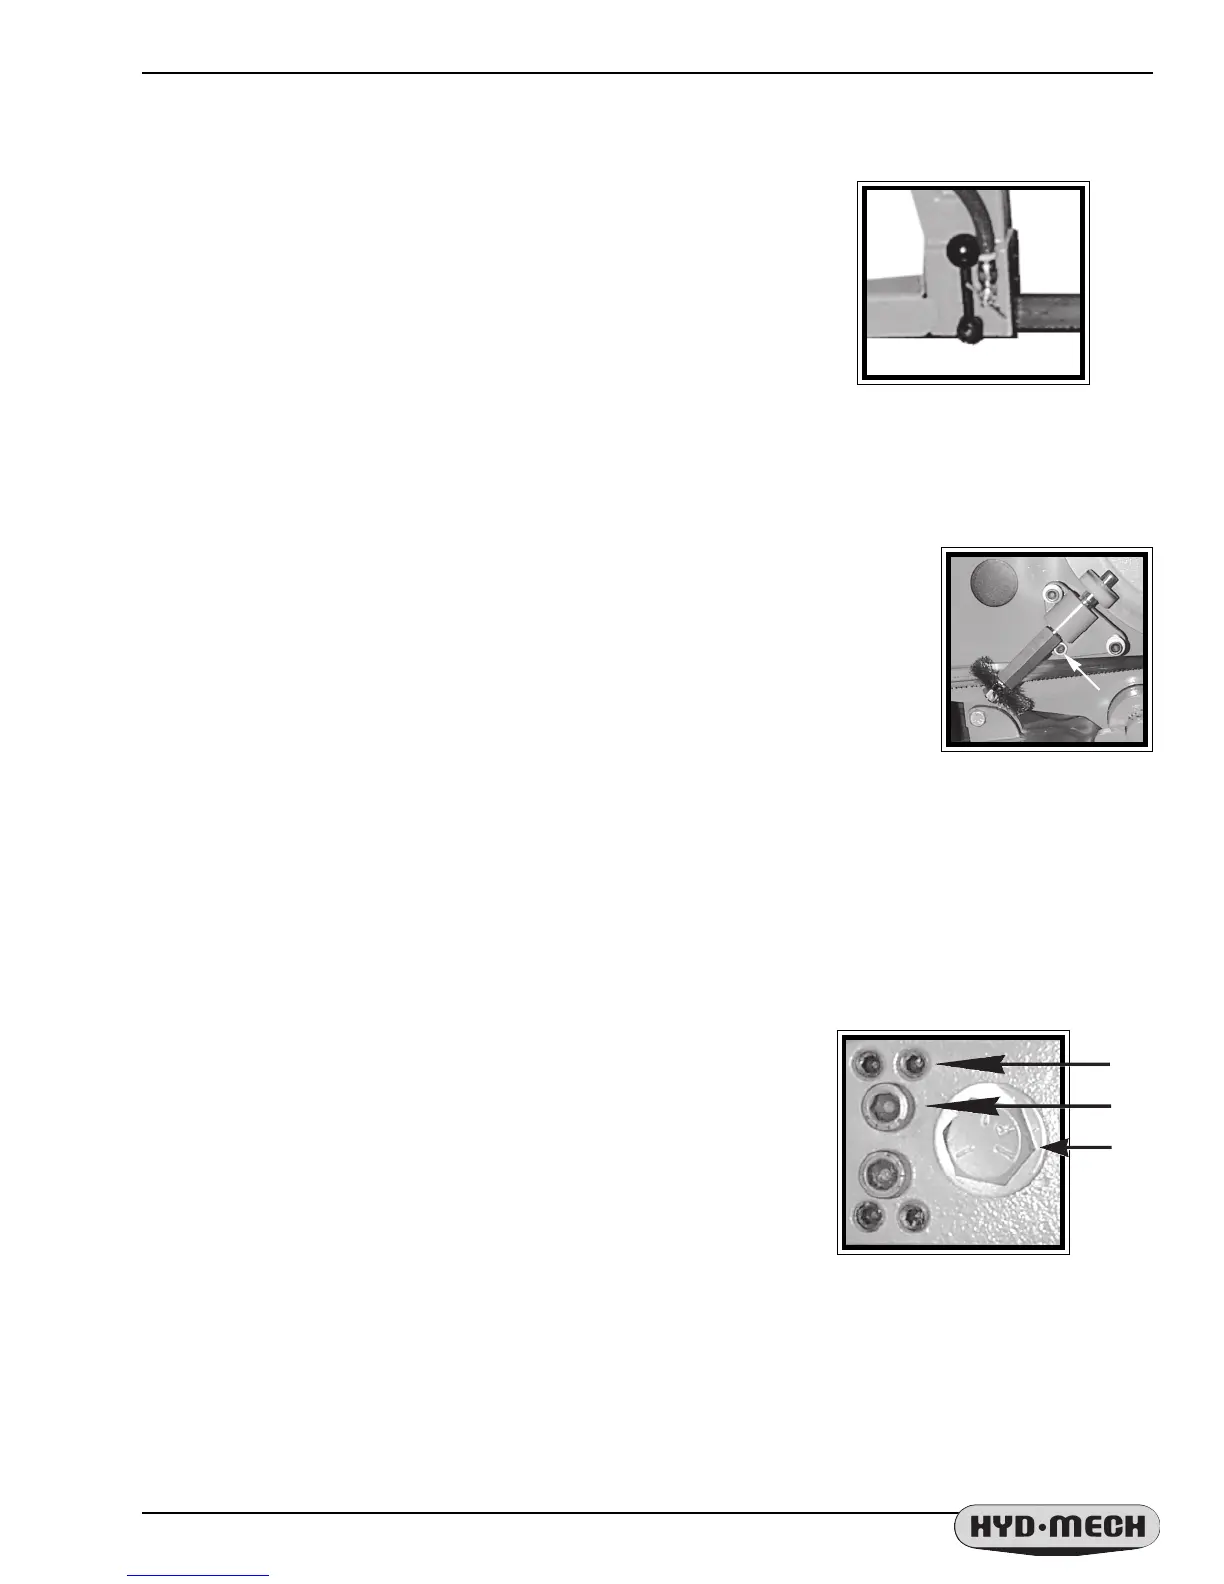
At the bottom of the guide arms are the carbide blade guide
assemblies, the photo shows the carbide locking handle. These
assemblies will need to be adjusted occasionally as the carbide pads
become worn. To adjust properly, follow this simple procedure. Loosen
the hex nut on the locking handle with a 9/16 wrench and turn the
handle clockwise until it rests against the coolant tap on the idler guide
arm or the roll pin on the drive guide arm. Turn the set screw clock wise
with a 3/16 allen key until tight and then loosen 1/8 of a turn and tighten
the hex nut. This should put just enough pressure on the blade to permit
you to push the blade down approximately 1/8".
Idler guide arm carbide locking
handle in the locked position.
ANGLE BRAKE ADJUSTMENT
The clamping force on the swivel brake can be adjusted to ensure that the Head is held securely and does not
move during cutting. The brake handle should be adjusted so that it does not "bottom out" or hit it's movement limit,
yet holds the head securely.
ANGLE BRAKE ADJUSTMENT PROCEDURE
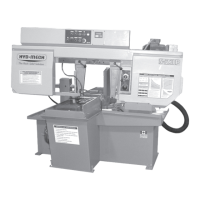
STEP 1 Loosen locking cap screws "B" with a 1/4 allen key.
STEP 2 Tighten all 4 set screws "A" until snug with a 5/32" allen key.
STEP 3 Back out the "A" screws 1/4 of a turn.
STEP 4 Tighten the locking cap screws "B".
STEP 5 Swing the head to 45
o
and back to ensure that the head
moves freely and does not bind on the pivot surfaces. Continue to step 6
if necessary.
STEP 6 Adjust the clamping force bolt "C" with a 3/4" wrench. If not
tightened enough, the locking handle will "bottom out" and not hold the
head firmly.
DRIVE BELT REPLACEMENT
The drive belt on the S-23A is a long life grooved belt. It should last for many hours of operation and should
rarely require replacement. See the BLADE DRIVE ASSEMBLY on Pg 6.2.
Blade brush adjusting
screw & hex nut.
A
C
Angle Brake
Adjustment Screws.
B


 To Next Page