APPENDIX C – BEVEL CUTTING
HPR130 Manual Gas Instruction Manual c-7
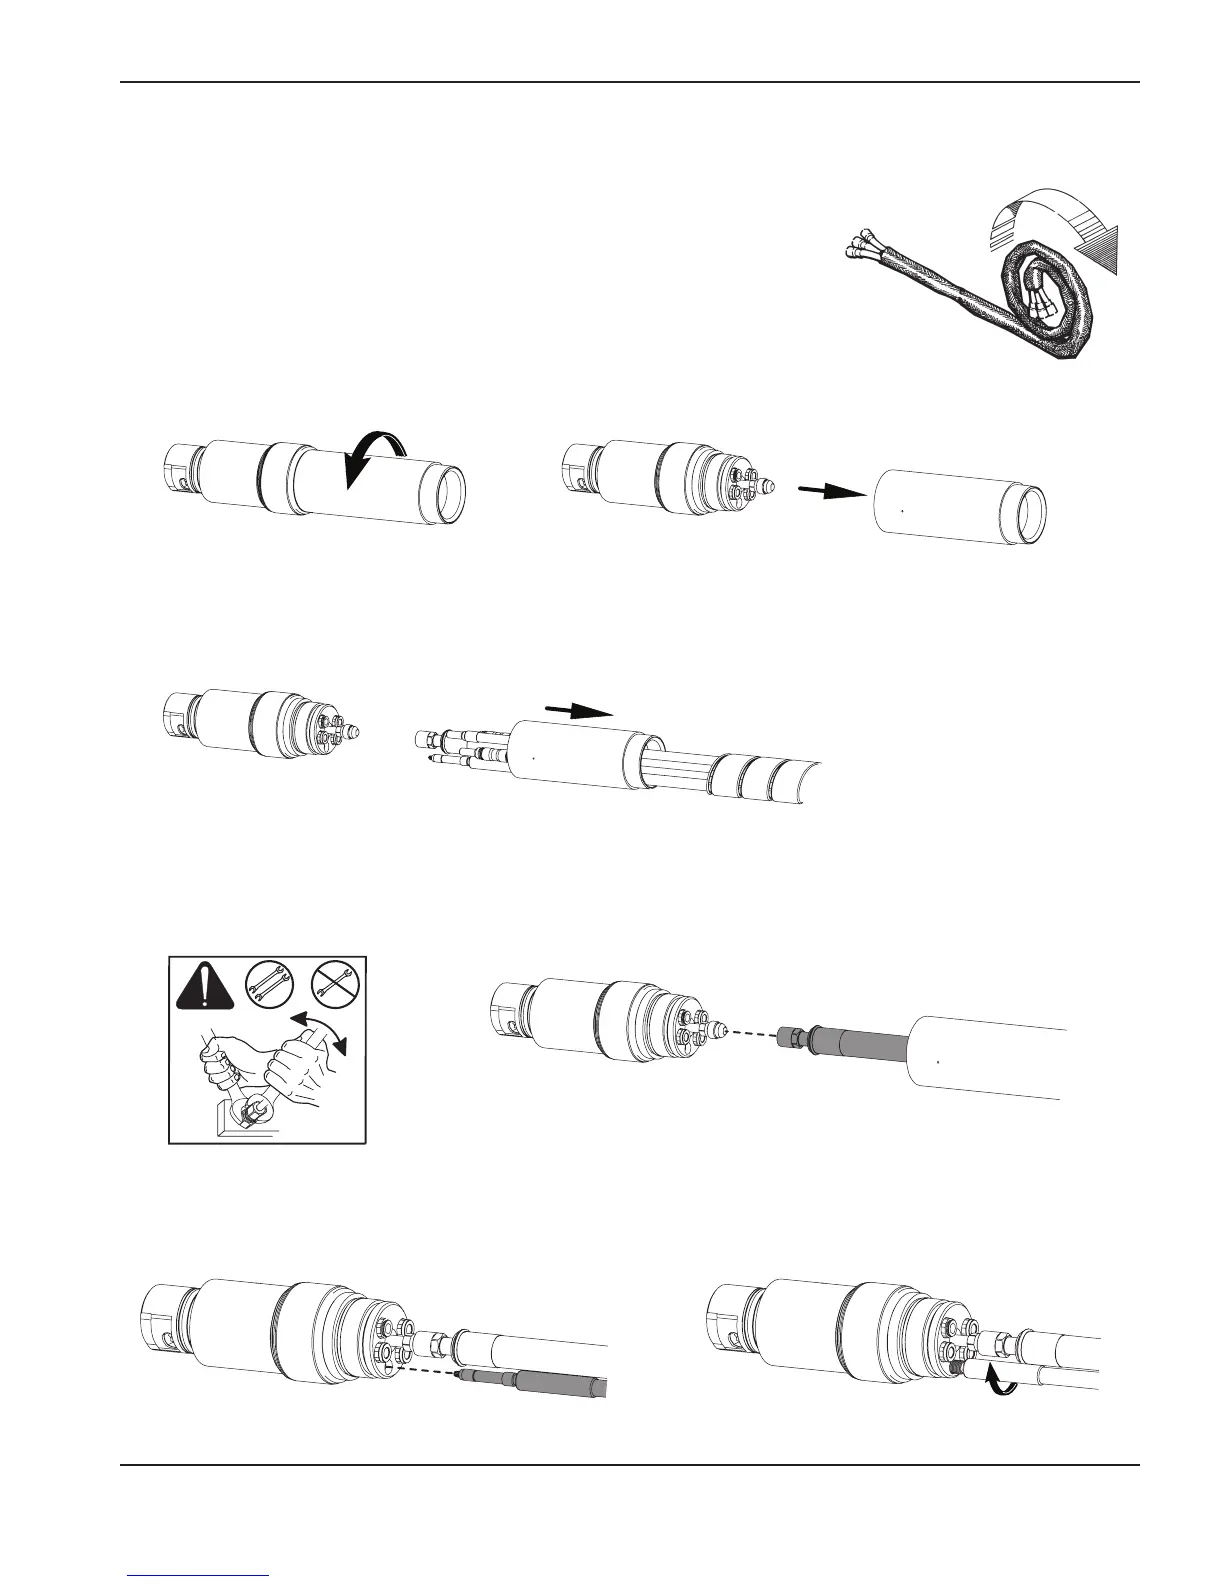
Torch connections
Connect the torch lead assembly to the quick-disconnect assembly
1. Uncoil the first 2 meters (6.5 feet) of lead assembly on a flat surface.
2. Hold the torch assembly and remove the mounting sleeve from the torch quick-disconnect assembly.
3. Slide the mounting sleeve over the leads and align the torch quick-disconnect fittings with the hoses in the lead
assembly. The connections are color coded. The hoses must not be twisted and are taped together to help prevent
twisting. Do not remove tape from leads.
4. Connect the coolant inlet hose (green).
5. Connect the pilot arc lead (yellow).

 Loading...


