MAINTENANCE
5-46 HPR400XD Manual Gas Instruction Manual
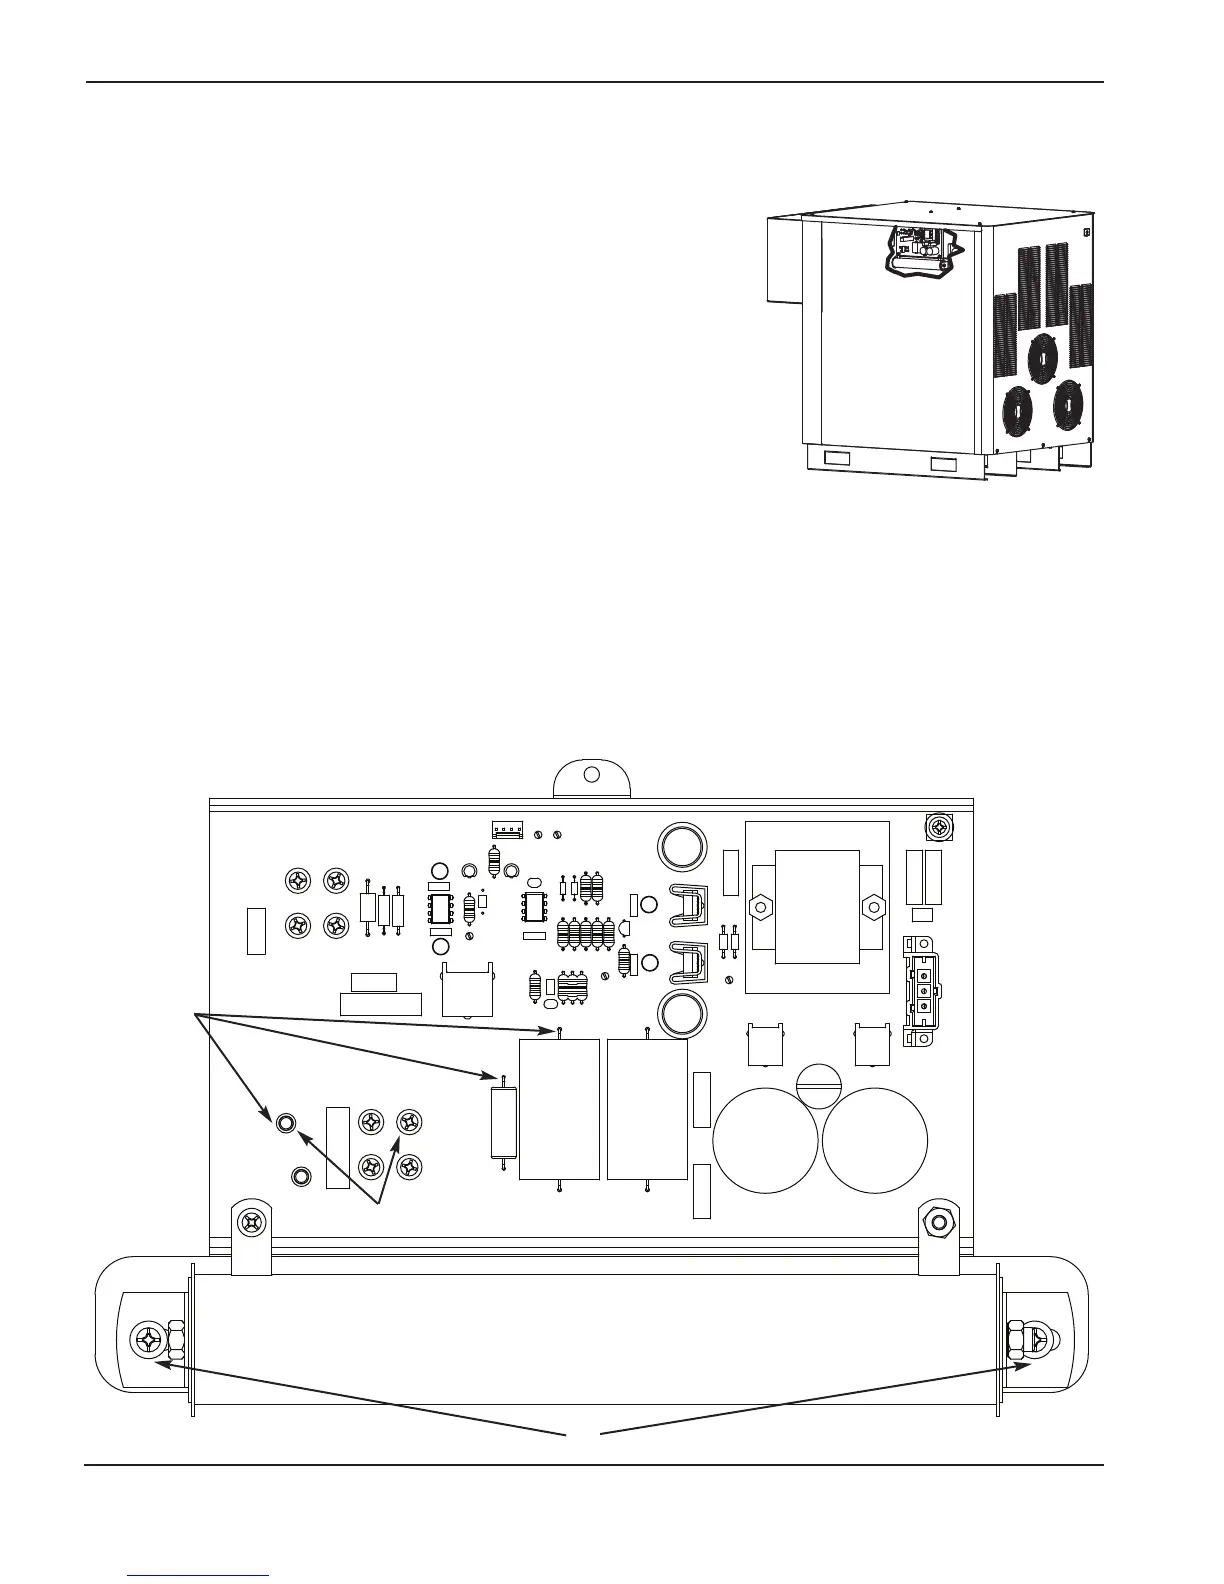
D2 should always be illuminated.
D1 illuminates as soon as the torch fires and will extinguish as soon as the arc
transfers to the workpiece. If arc transfer is immediate, the LED will not
illuminate.
If there is no arc at the torch or if the arc will not transfer:
1. Turn OFF all power to the system.
2. Remove wires from H8 (WORK) and H9 (NOZZLE) studs on the board.
3. Verify a resistance of about (≈) 5.5 kΩ between H8 and D50 (–). If the
resistance value is not correct, replace the board.
Note: Resistance value may slowly increase to the correct value due to the
capacitance in the circuit.
4. Verify a resistance of about (≈) 15 kΩ between snubber and H8.
• The work lead should not have any cuts or breaks. Verify a resistance of 1Ω or less. The work lead connection
to the cutting table should be clean and have good contact to the table.
• Verify that LED-D2 is illuminated. If it is not illuminated, the board may need to be replaced or the board may
not be receiving power.
• Fire the torch in the air and verify that D1 is illuminated. If it is not illuminated, but a pilot arc is established, the
board may need to be replaced.
• Verify a resistance of about (≈) 1 Ω across the R1 resistor.
 Loading...