© 2023 HyQuest Solutions 37
Configuration
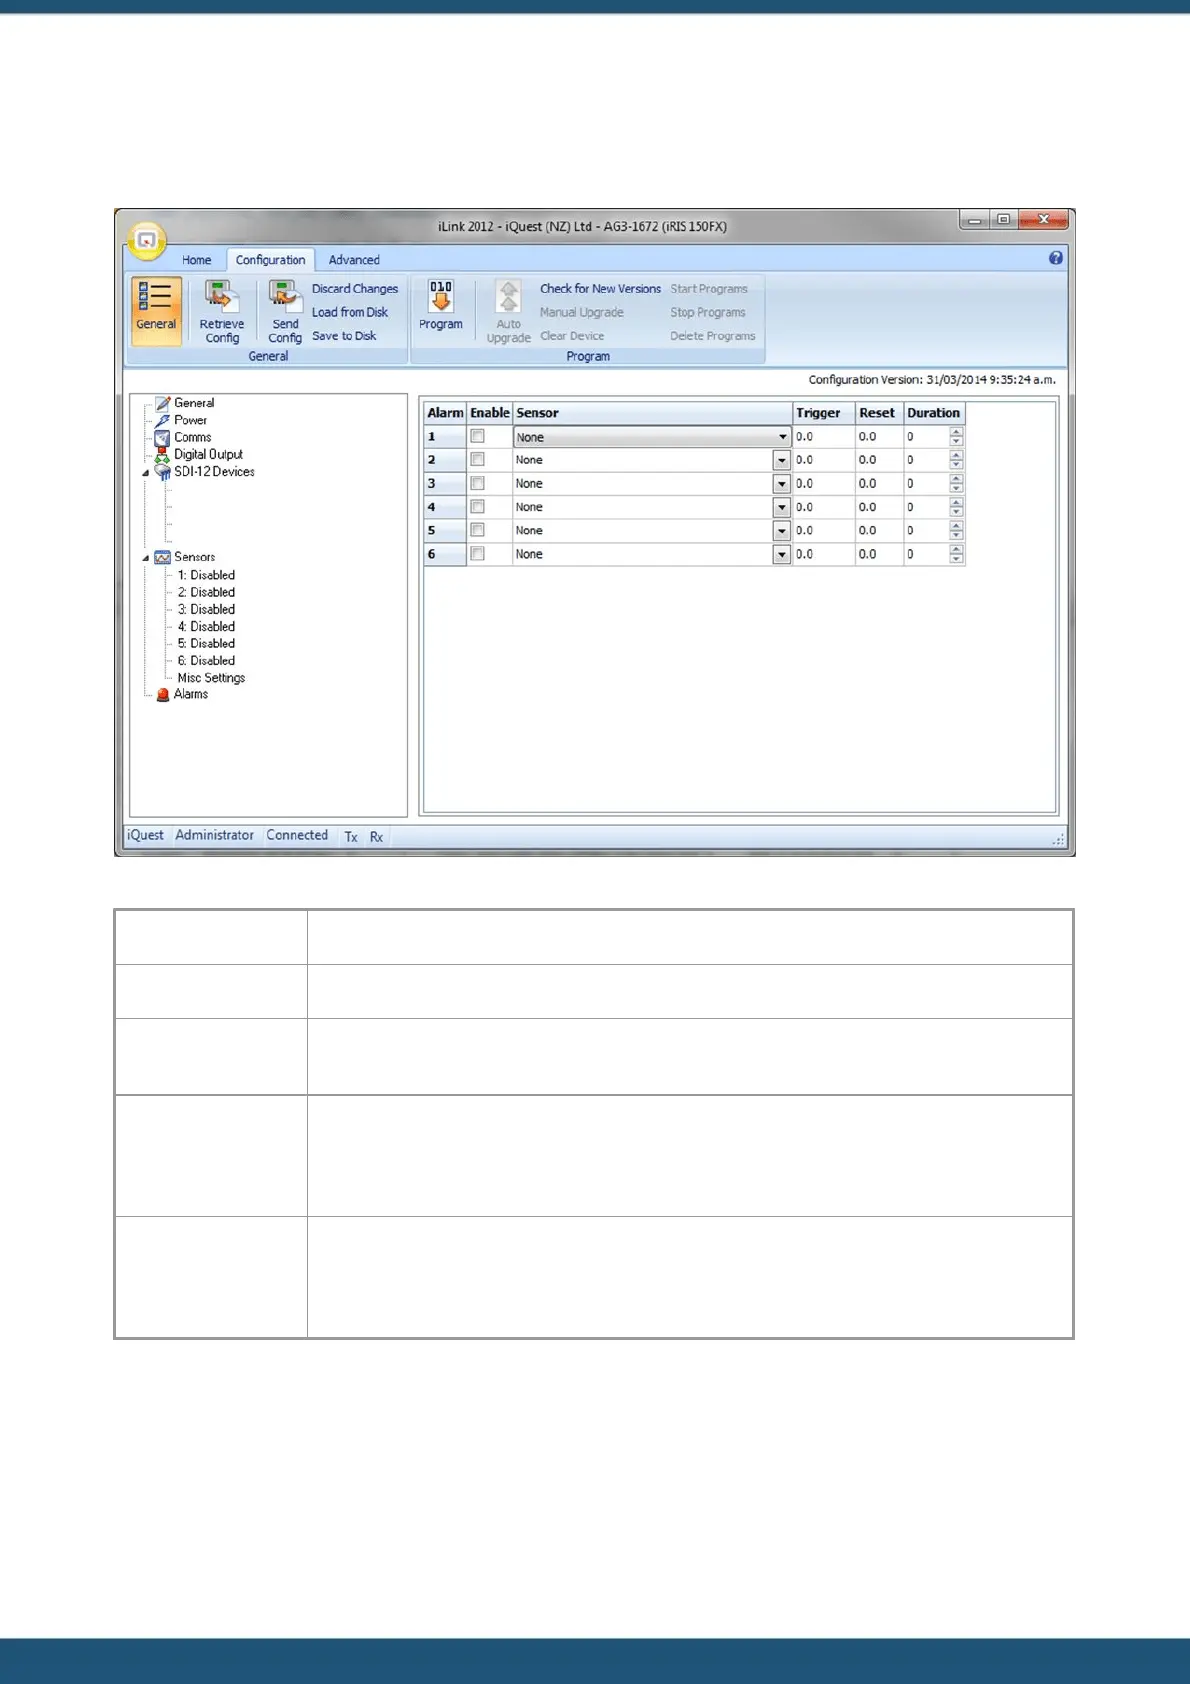
3.2.7 Alarms
Use the Alarms menu to decide which of the six alarms you want to configure.
Tick the box in the ENABLE column to enable an alarm.
Choose the sensor which you want to activate the alarm for from the list.
In this column, enter a value in engineering units that you want to use as the trigger point for
the alarm. When the scaled value exceeds the limit the alarm will become active.
Enter a value in engineering units that you want to use as the reset point for the alarm. When
the scaled value falls below this limit the alarm will be deactivated. If the reset level is set to a
value greater than the trigger level then the alarm is reverse acting. This mode is normally
used for low voltage or low water level type alarms.
Enter a time in seconds to delay alarm activation. This can be used to implement hysteresis for
analogue data sources. If the data source is one of the internal counters, then this time is used
to totalise individual sample values. If the total over the given alarm duration is above the
trigger level then an alarm is generated. Typically this feature is used for rainfall alarms.
3.3 Terminal Menus
The Terminal menu can be accessed by clicking on the Terminal button under the Advanced Tab in iLink 2012. You can see
three menu options – Totals, SDI-12 Terminal and Initialise. To make a menu selection, type a number followed by
[ENTER].
 Loading...