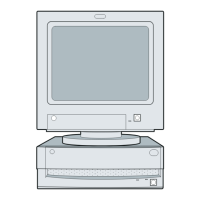
(continued)
017 (continued)
3. Select Settings, then select Control Panel.
4. Select the Sound icon.
5. In the Sound window, select chimes from the Names field. (To test
other adapter card software, select an action from a menu in that
software.)
IS THE PREVIEW BUTTON (OR ACTION IN OTHER SOFTWARE)
SELECTABLE ON THE SCREEN (SHOWN IN BLACK AND NOT GRAY)?
Yes No
018
– Power-off the system unit.
– Check the Mwave card or sound adapter card for proper installation.
– Check the Mwave card, sound adapter card, or adapter card jumper
positions.
– Replace the Mwave card, sound adapter card, or adapter card.
019
– Select the Preview button from the Sound window.
DO YOU HEAR ANY SOUND FROM THE SYSTEM?
Yes No
020
– Make sure the speaker power cable is plugged into the speaker
power connector in back of the system unit.
– Check for 12 V dc at the speaker power connector. If no voltage,
check speaker power internal cable continuity with power off and
replace if necessary. If voltage not present at the system board
connector, see “System Board Layout—Type A-1” on page 5-2 and
“System Board Layout—Type A-2” on page 5-5, replace system the
board.
– Make sure the volume control on the sound adapter card (if any) is
not turned low.
– Make sure the speaker sound cable is plugged into the sound
adapter card Audio Output jack.
– Check the Mwave card or sound adapter card jumper positions.
Refer to “CD-ROM Drive Jumper Settings” on page 5-23.
– Check continuity of any cable attached to the adapter card and
replace if necessary.
– Make sure the speakers are not damaged. If damaged, replace the
speakers.
(Step 020 continues)
2-56

 Loading...